Setup a Sequin sync
Before you can use Sequin with Windmill, you’ll need to create a sync. Sequin will guide you through authenticating, selecting the data you want to sync, and connecting to your database. Read our getting started guide for step-by-step instructions.Create a Windmill Resource
Windmill provides integrations with many different apps and services with Resources. Each Resource has a Resource Type (PostgreSQL, MySQL, BigQuery, Snowflake) that defines the schema that the resource of this type needs to implement. Sequin uses a Postgres Proxy to interface with your Sequin-synced tables. The Proxy lets Sequin capture inserts, updates, and deletes you make in your database and commit them to the API. To add Sequin’s Postgres Proxy as a Windmill Resource, you can treat it as a regular Postgres Resource and enter the connection details in the Resource configuration: Step 1: Go to your Windmill dashboard and find “Resources” on the left sidebar. Click on the “Add Resource” button Step 2: Select PostgreSQL type. Step 3: Fill out the form with the information. Give it a name and paste the values for host, database name, database username, and database password from the Connection instructions tab of your Sequin dashboard.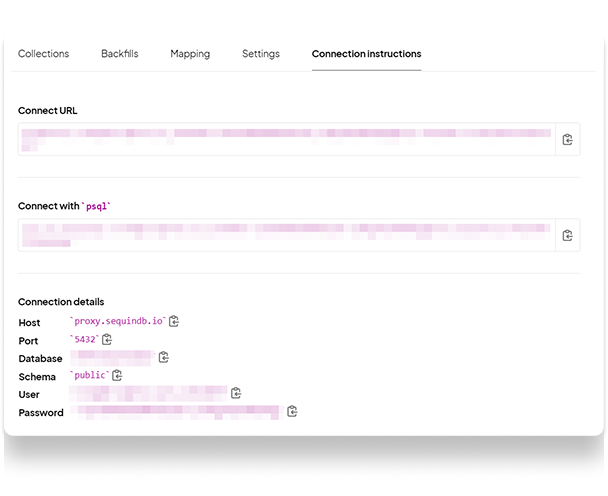
Using the Postgres Resource in Windmill
Now, Sequin is syncing your API data to Postgres. You’ve also connected Windmill to Postgres via Sequin’s Proxy. To query this data in your Windmill app, go back to your Windmill dashboard and find “Home”: Step 1: From the Home page, click on the “+Script” button. Step 2: Name the Script, give it a summary, and select your “PostgreSQL” as language. Step 3: In the list of Resources, select the Postgres connection to Sequin. Step 4: Compose your query. The schema for your Sequin-synced tables is available if you click “Explore schema” button right under the database name. Step 5: Click the “Test” button on the top right to make sure your query runs as expected. Here’s an example Airtable query that returns all the product names in the Products Inventory table, which are of the type “Bag”.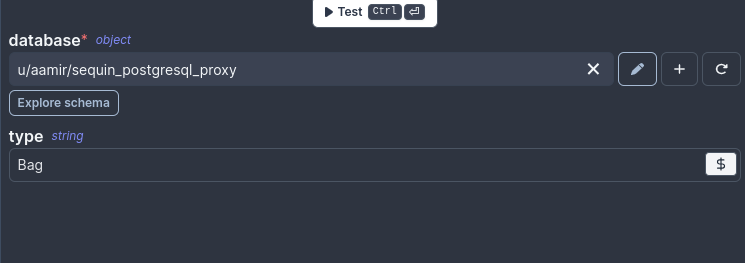
Writing back to the API
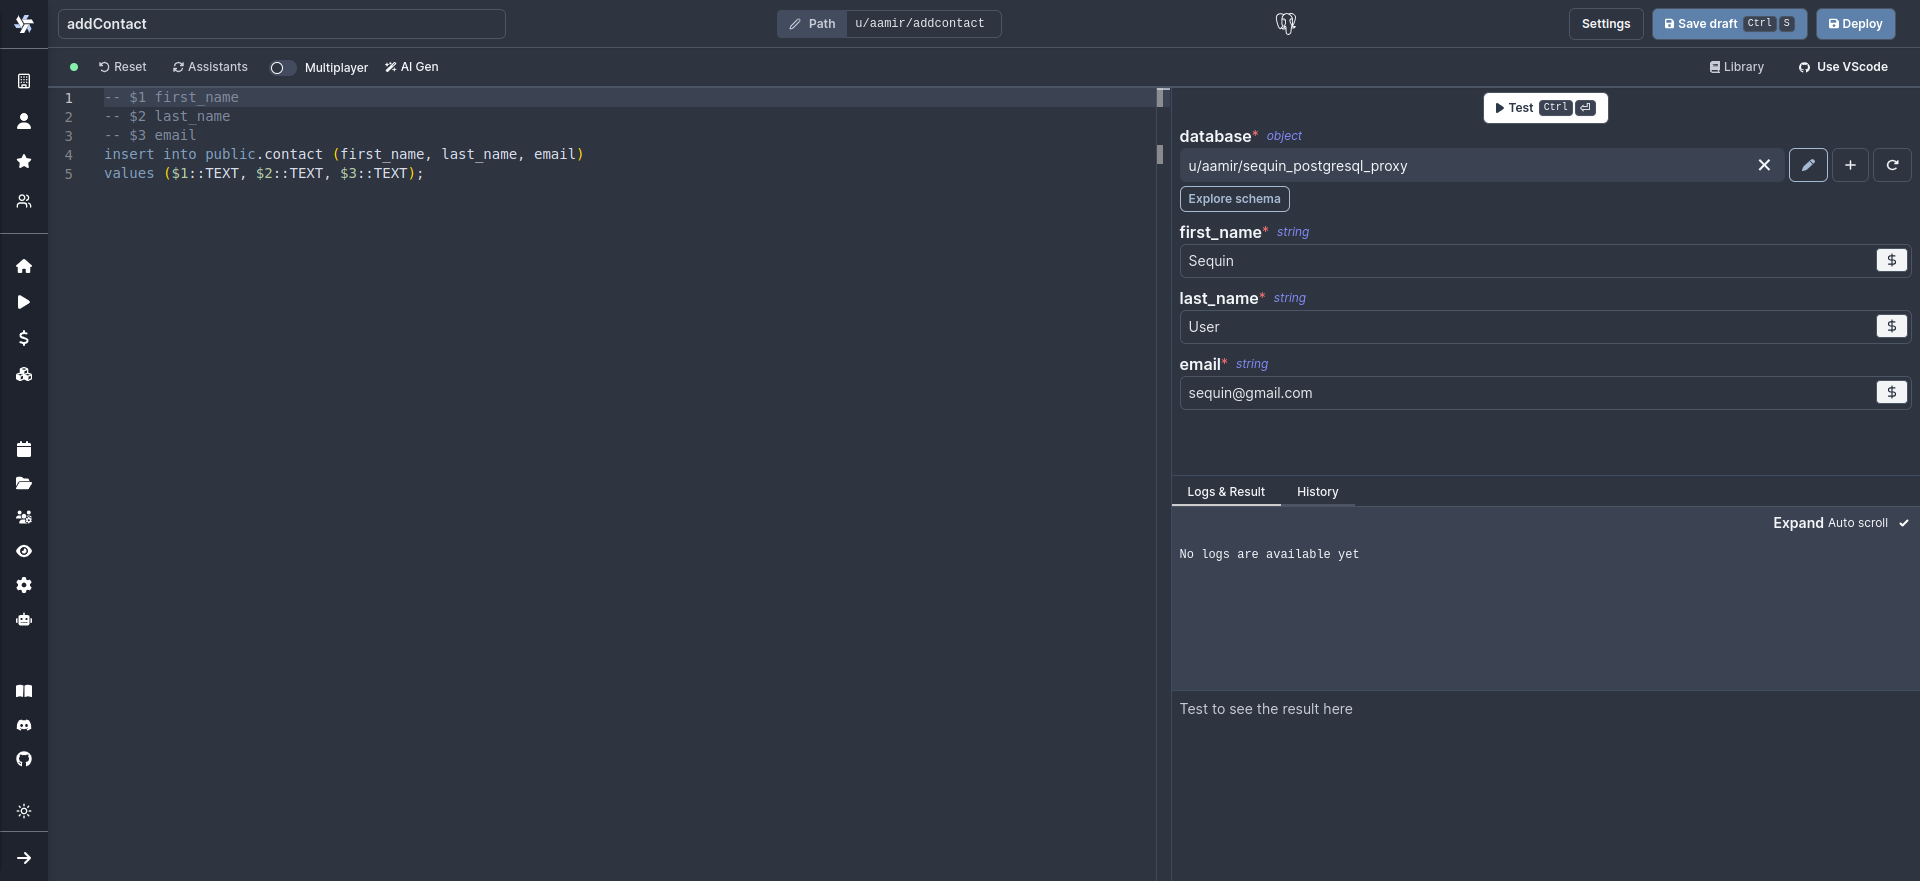
With Sequin, you can also make mutations via your database as well. Inserts, updates, and deletes you make to Sequin-synced tables are first applied to the API. If they pass validation, they’re committed to your database. To write your first mutation query, navigate to “Home” on the left sidebar and click the “+Script” button. In the list of Resources, select the Postgres connection to Sequin. You can compose aninsert query by populating values with various input fields in your application. For example, if you have a form with inputs named first_name, last_name, and email, the corresponding insert query would look like this:
Errors
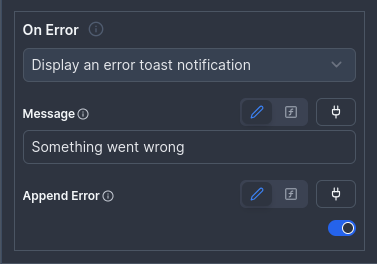
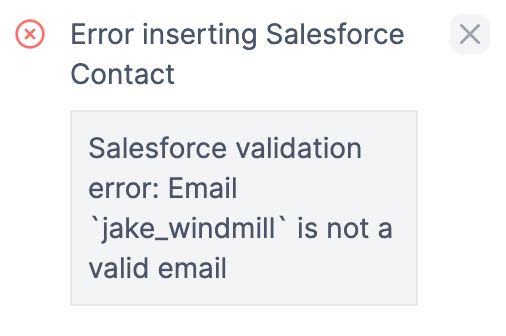
When Sequin’s Proxy encounters an error trying to apply your mutation in the upstream API, the Proxy returns a standard Postgres error. You can configure your app to display this as an alert notification. Let’s say you make a mutation to a Salesforce Contact with an invalid email. Salesforce will return a validation error. You can configure your Windmill app to display this as a helpful error message. As an example, Windmill has a Submit button with an onFailure property. You can display an error message to the user if the script throws an error: