Create a Heroku Postgres database
First, you’ll provision a Heroku Postgres database. You can do this through the Heroku CLI or the Heroku dashboard. Here are the steps:To use a Heroku Postgres instance with Sequin, you’ll need a “production-class” plan (i.e. Standard, Premium, Private, and Shield). At lower tiers, you can’t manage the credentials for your database, which is required for Sequin to work.
Heroku CLI
Step 1: Create a new Heroku app by running the heroku create CLI command:Heroku Dashboard
Step 1: Login to Heroku and create new Heroku app. Step 2: Navigate to the Resources tab of your new app and search for “Postgres”. Then select Heroku Postgres and select the plan you want to use: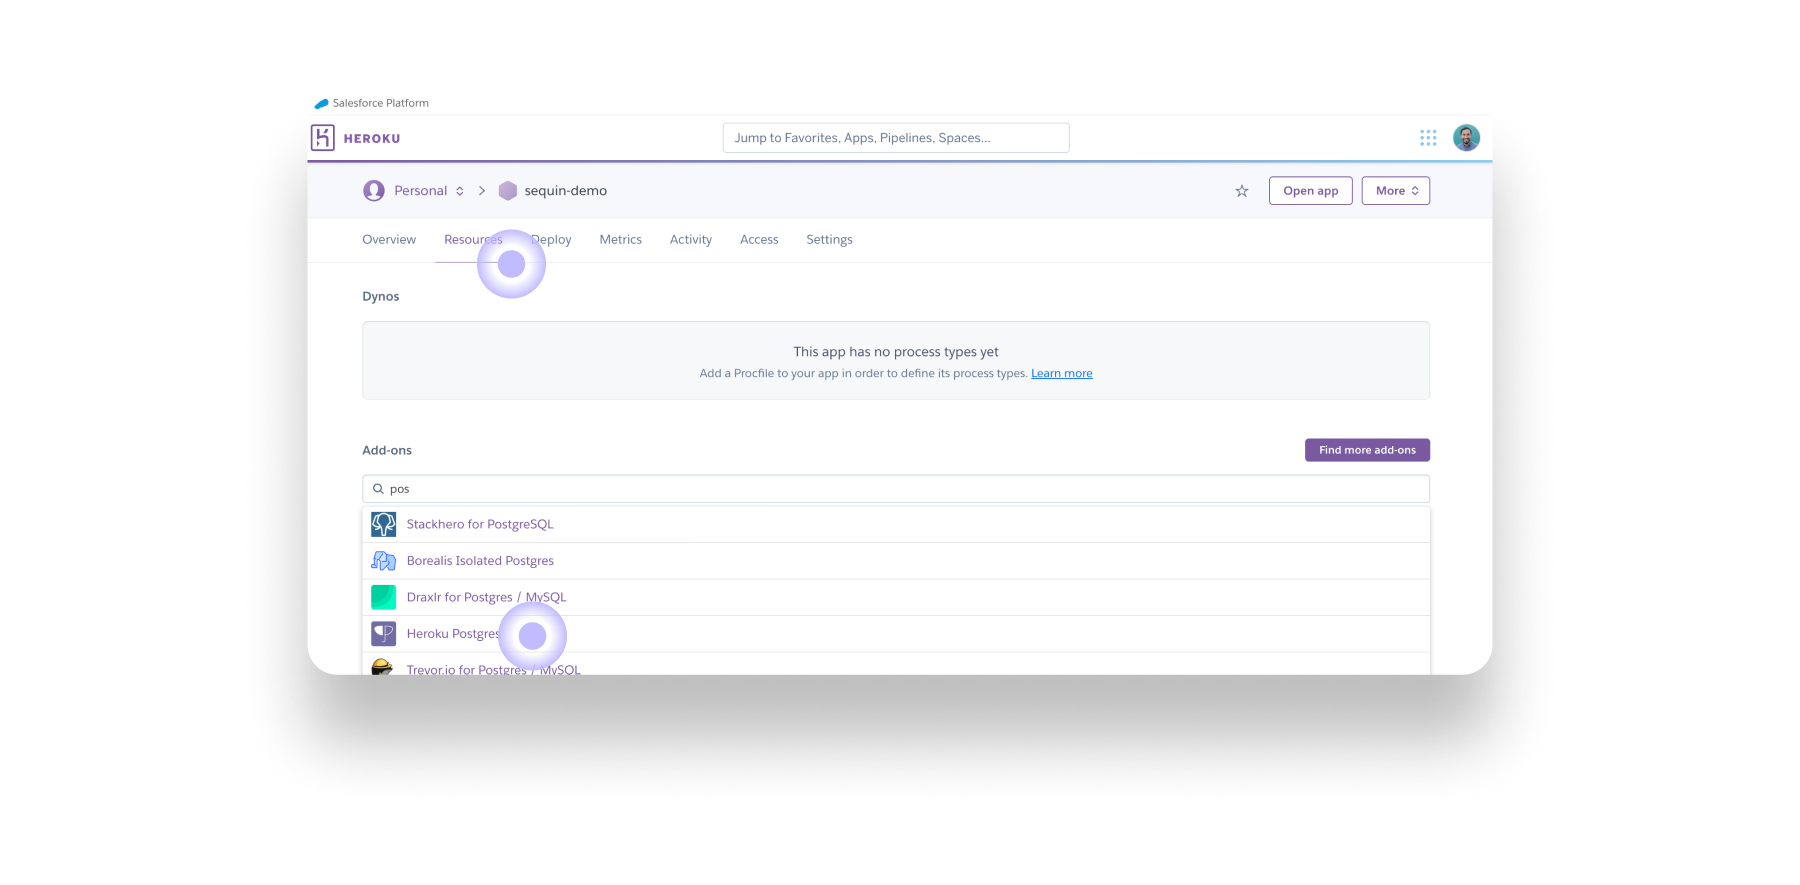
Create a Sequin database user
With your Heroku Postgres instance provisioned, you’ll now create a database user for Sequin. As with provisioning the database, you can create a new user via the Heroku CLI or the Heroku dashboard.Heroku CLI
Step 1: Create a new database user by running the pg:credentials:create CLI command:You’ll replace
postgresql-addon-name with the name of your Heroku Postgres add on. You can find this name by running the pg:info command.sequin_user was created by running the pg:credentials CLI command:
sequin_user was created, you’ll need to grant the proper permissions to the user using the pg:psql CLI command and standard postgres permission grants:
password, host, database, and port) for the sequin_user by running the pg:credentials:url CLI command:
Heroku Dashboard
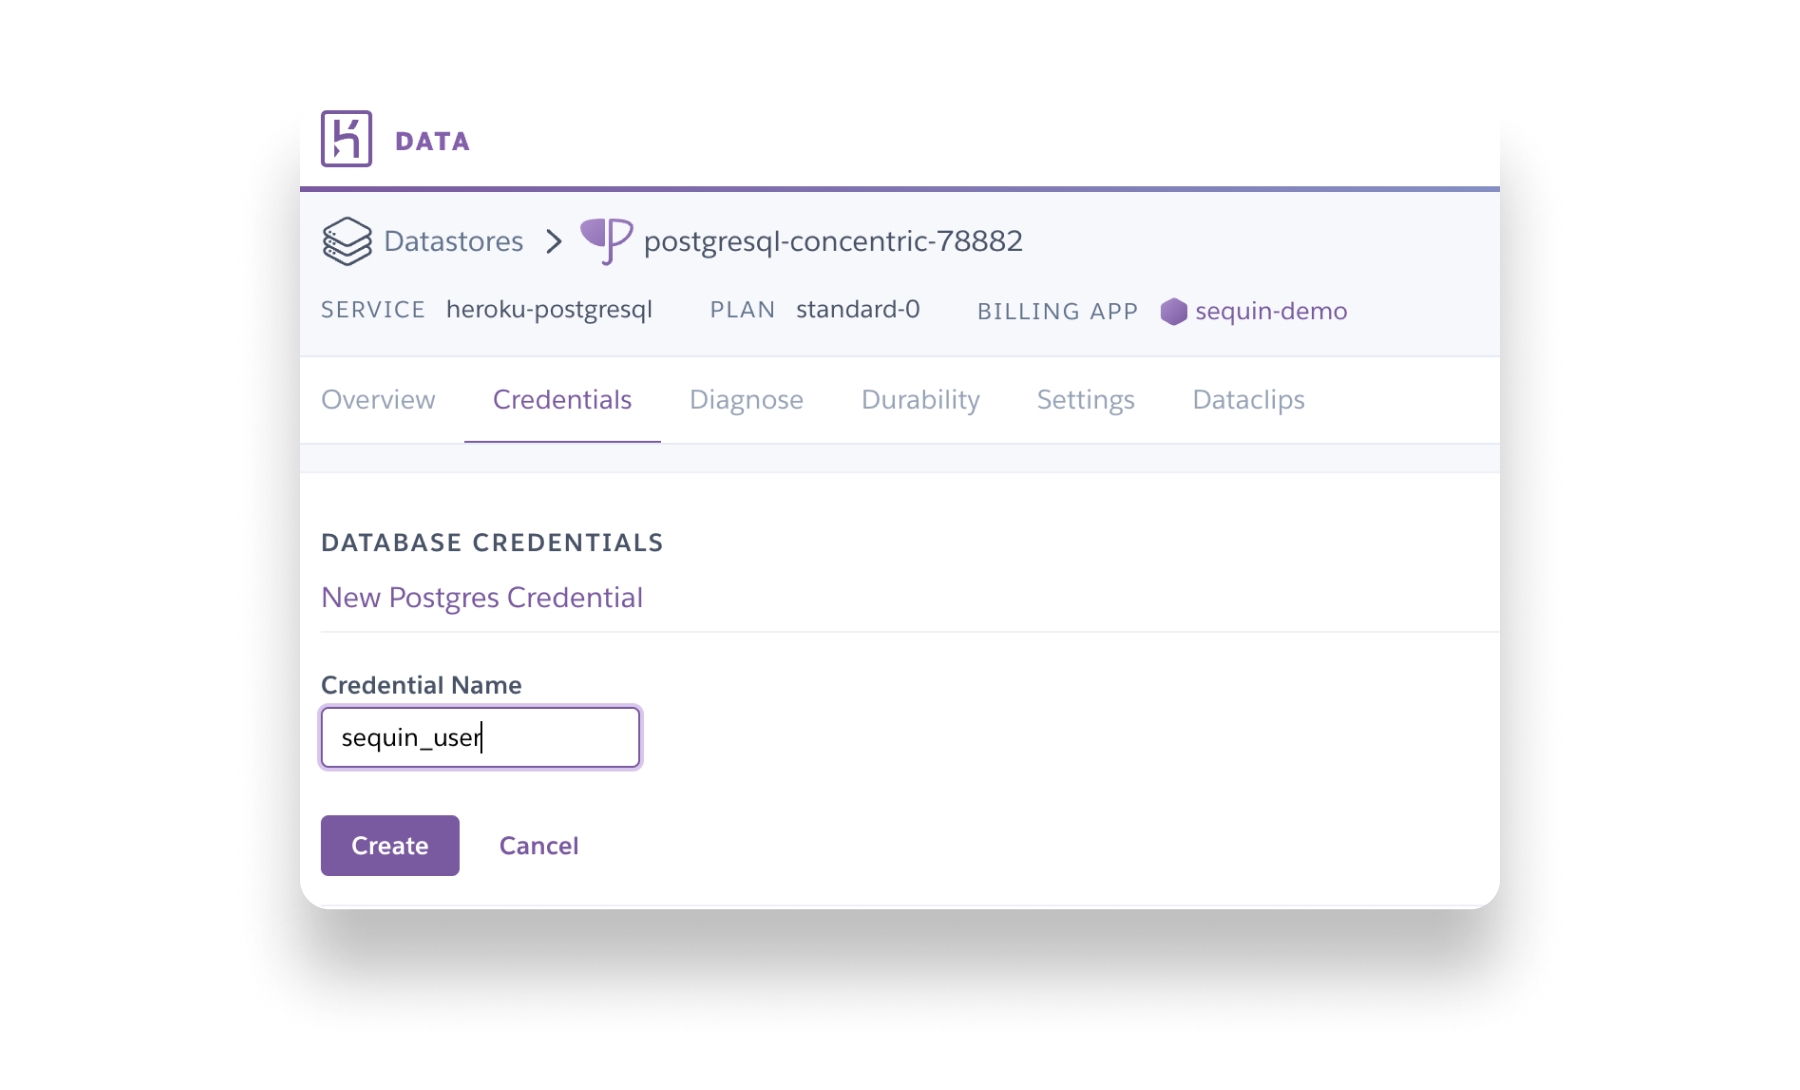
Step 1: Navigate to the Resources tab and select your Heroku Postgres database. Step 2: Select the Credentials tab and click the Create Credential button. Step 3: Entersequin_user for the Credential Name and click Create. It may take a couple minutes for Heroku to create the user:
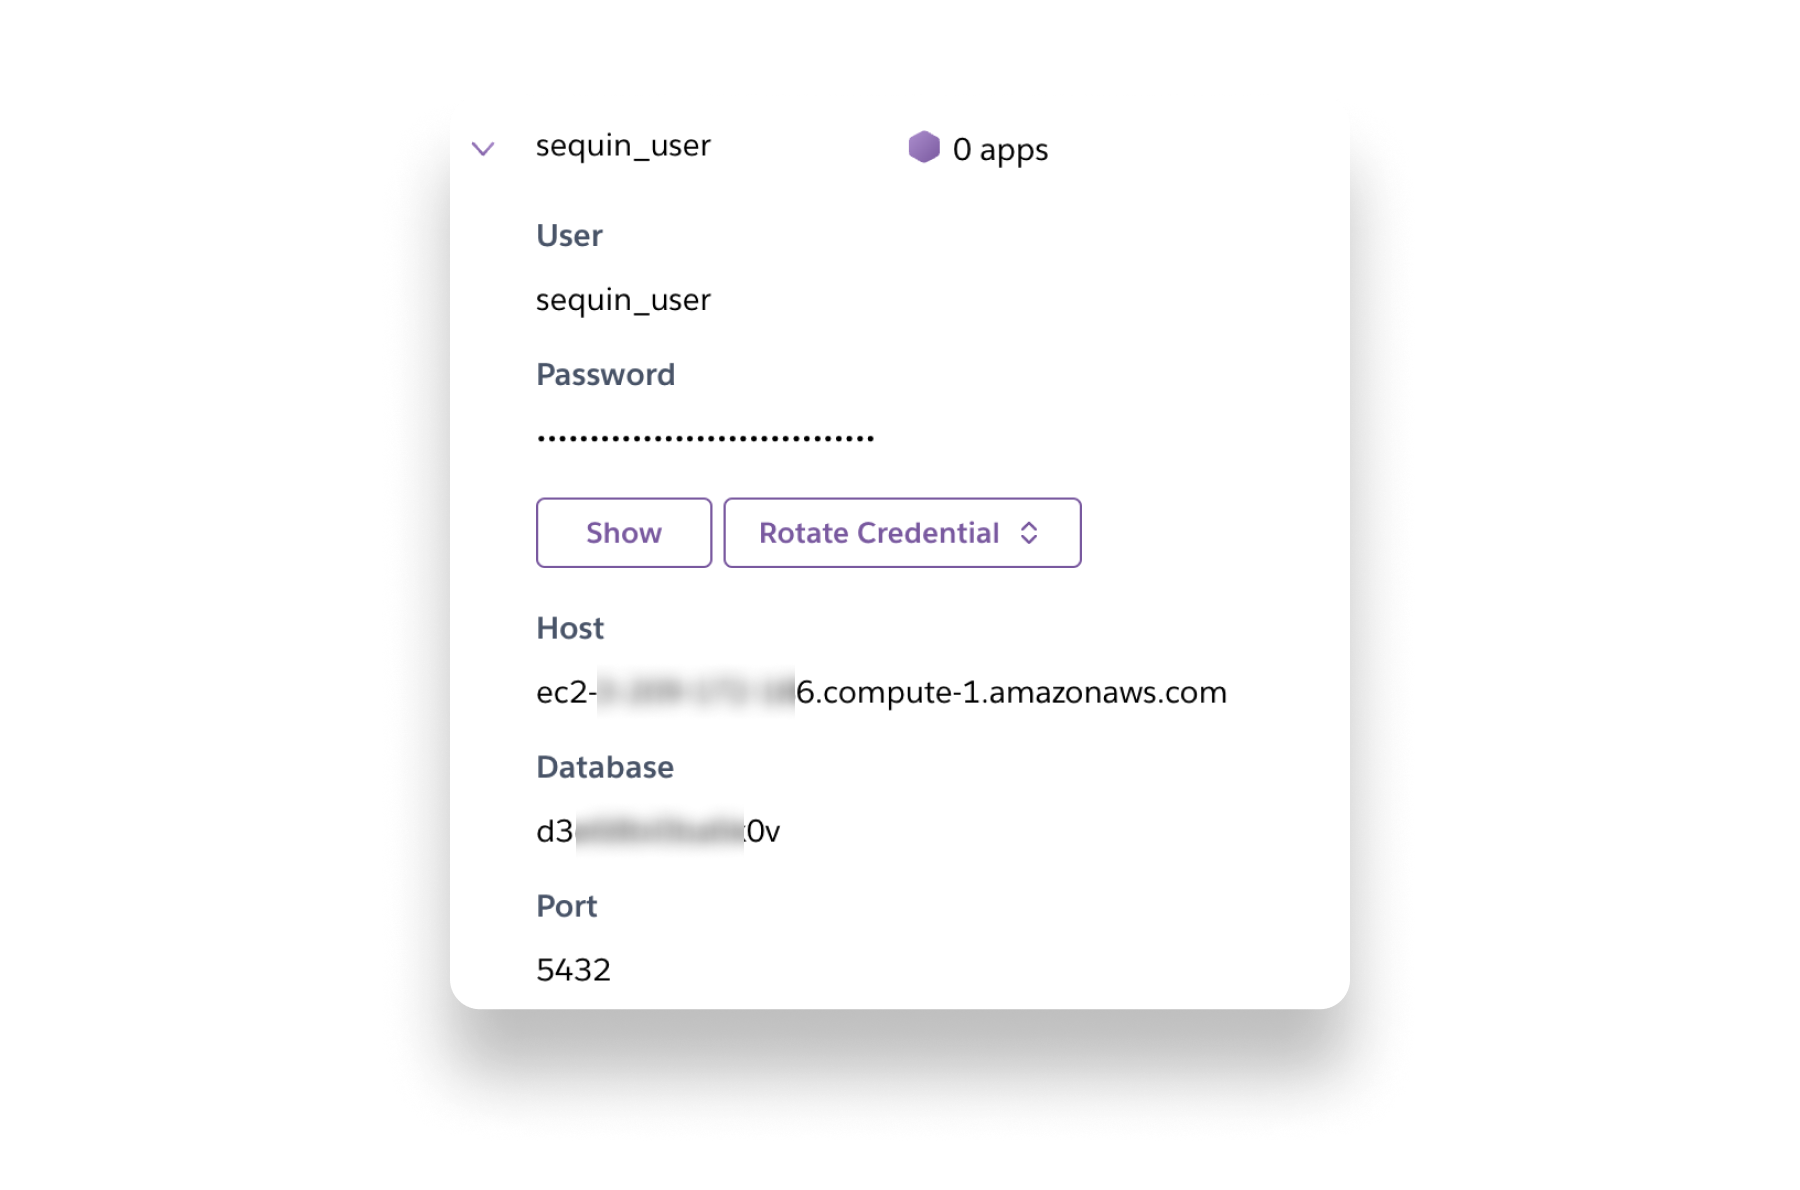
sequin_user is created, you’ll see it appear on the credentials page. Now, grant the sequin_user the proper permissions using the Heroku CLI (as described in Step 3 of the Heroku CLI instructions above) or by connecting to the database using another Postgres client (e.g. Postico) and running the following SQL:
user, password, host, database, and port values for the sequin_user credential. You’ll need these to connect Sequin to your Heroku Postgres database:
Connect Sequin to Heroku Postgres
With yoursequin_user created, you can now connect Sequin to your Heroku Postgres database.
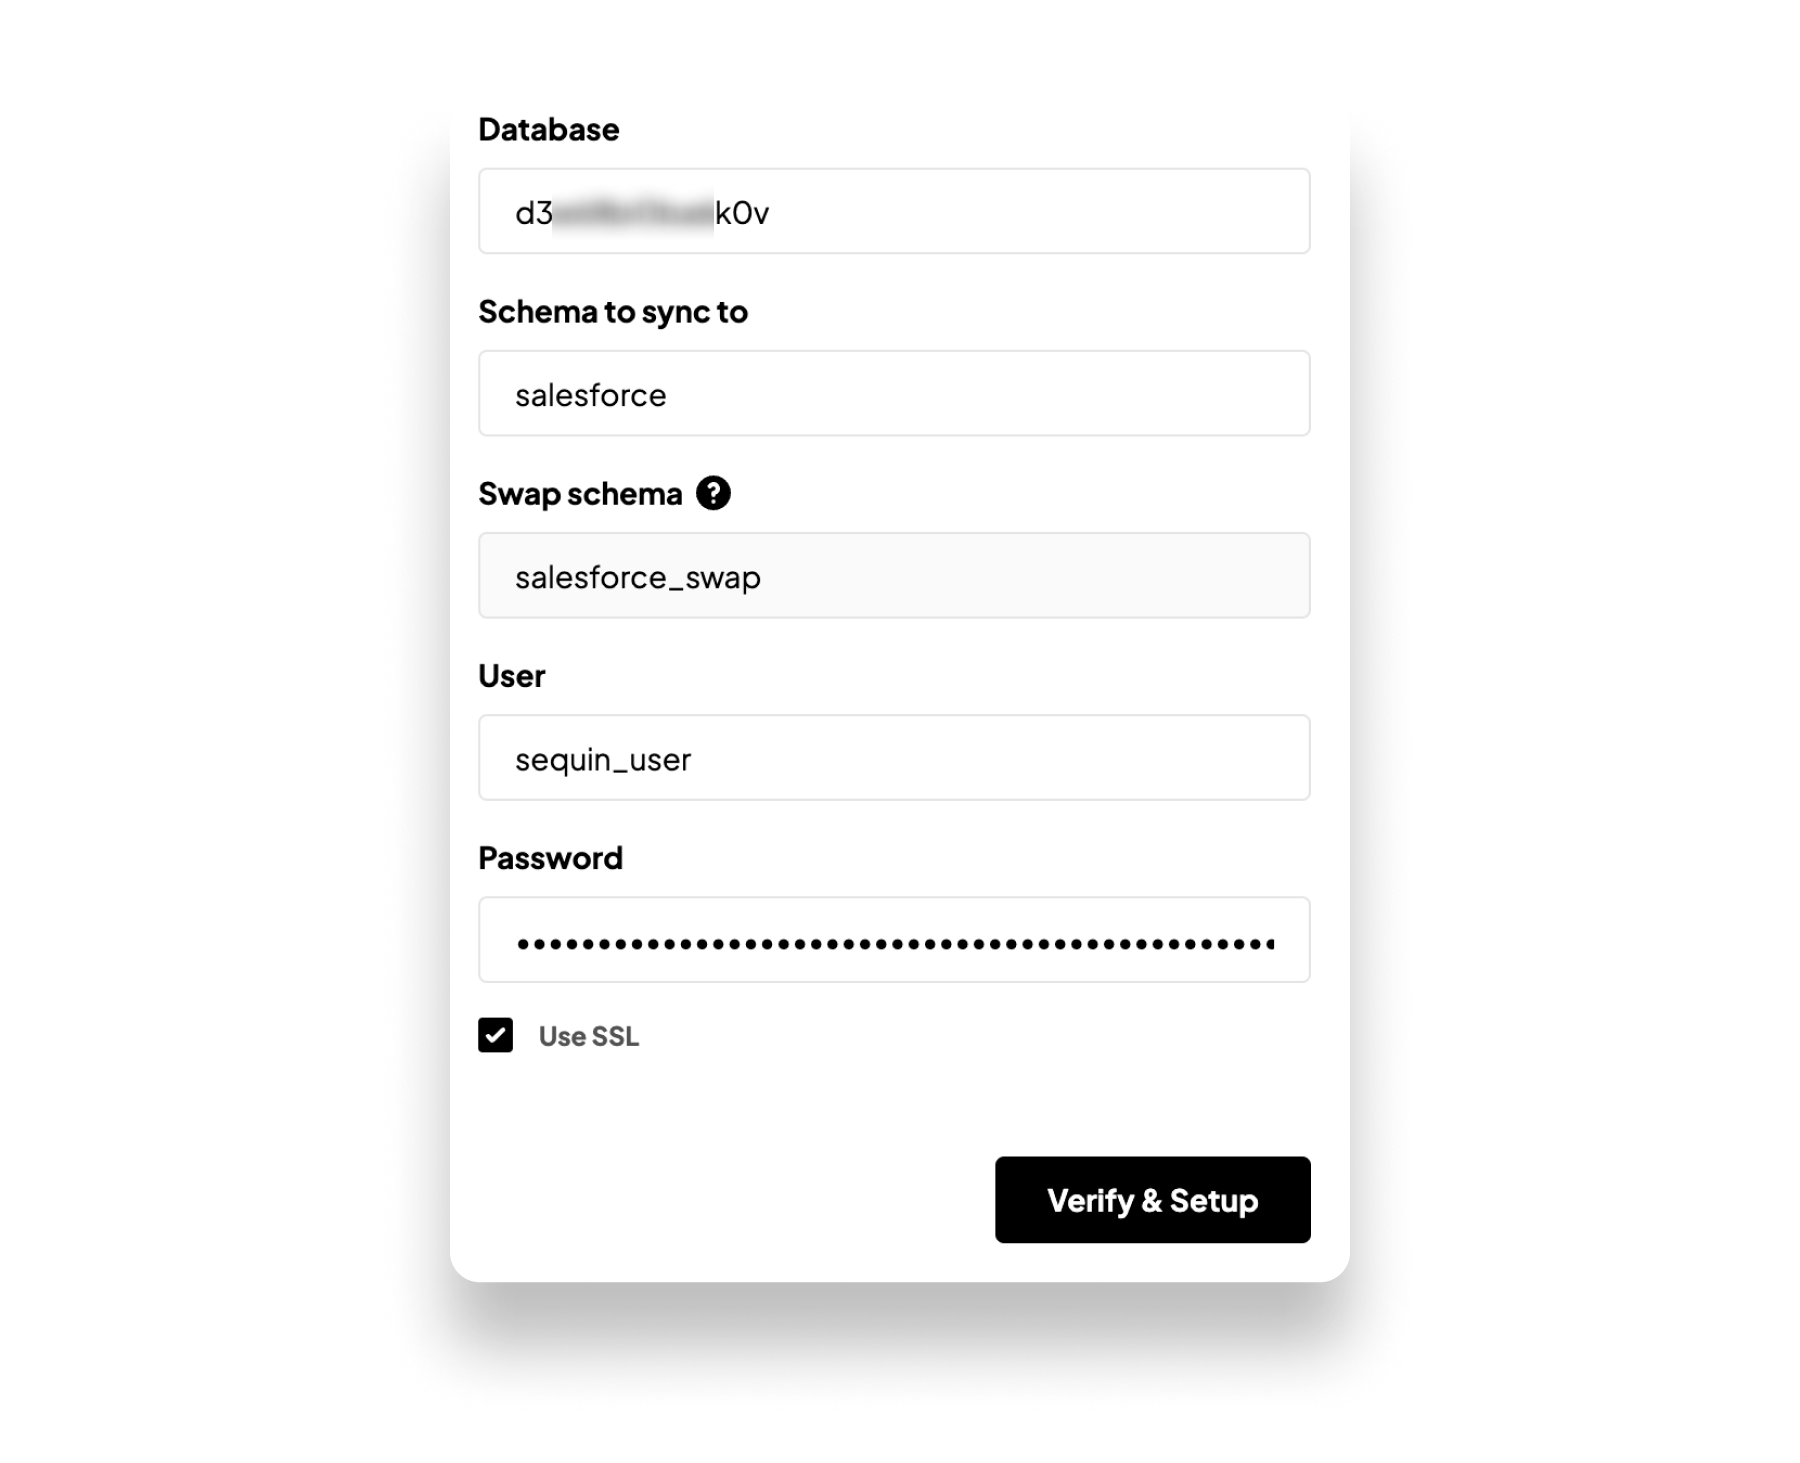
Step 1: Begin to create a new sync in the Sequin console (if you need more instruction, check out one of our step-by-step guides). After connecting your source and selecting the data you want to include in your sync, you’ll be prompted to connect your destination. Click Launch or Connect and choose Connect to start a new connection to your Heroku database.
Step 2: On the screen that appears, enter the host and port that you noted down for your Heroku Postgres database and click the Continue button.
Step 3: On the next page, click the Setup manually instead option. Since you’ve already created the Heroku user in the steps above, skip the instructions and scroll down to enter the database, user, and password that you noted for thesequin_user credential you created. Make sure you’ve checked Use SSL, then click the Verify & Setup button: