Overview
This guide will show you how to:
- Create your first stream
- Create a sync to an API provider in the stream
- Create a consumer and read data from the stream
- Write data back to the API provider
Then, you’ll see how to do all this programmatically using Sequin’s Management API.
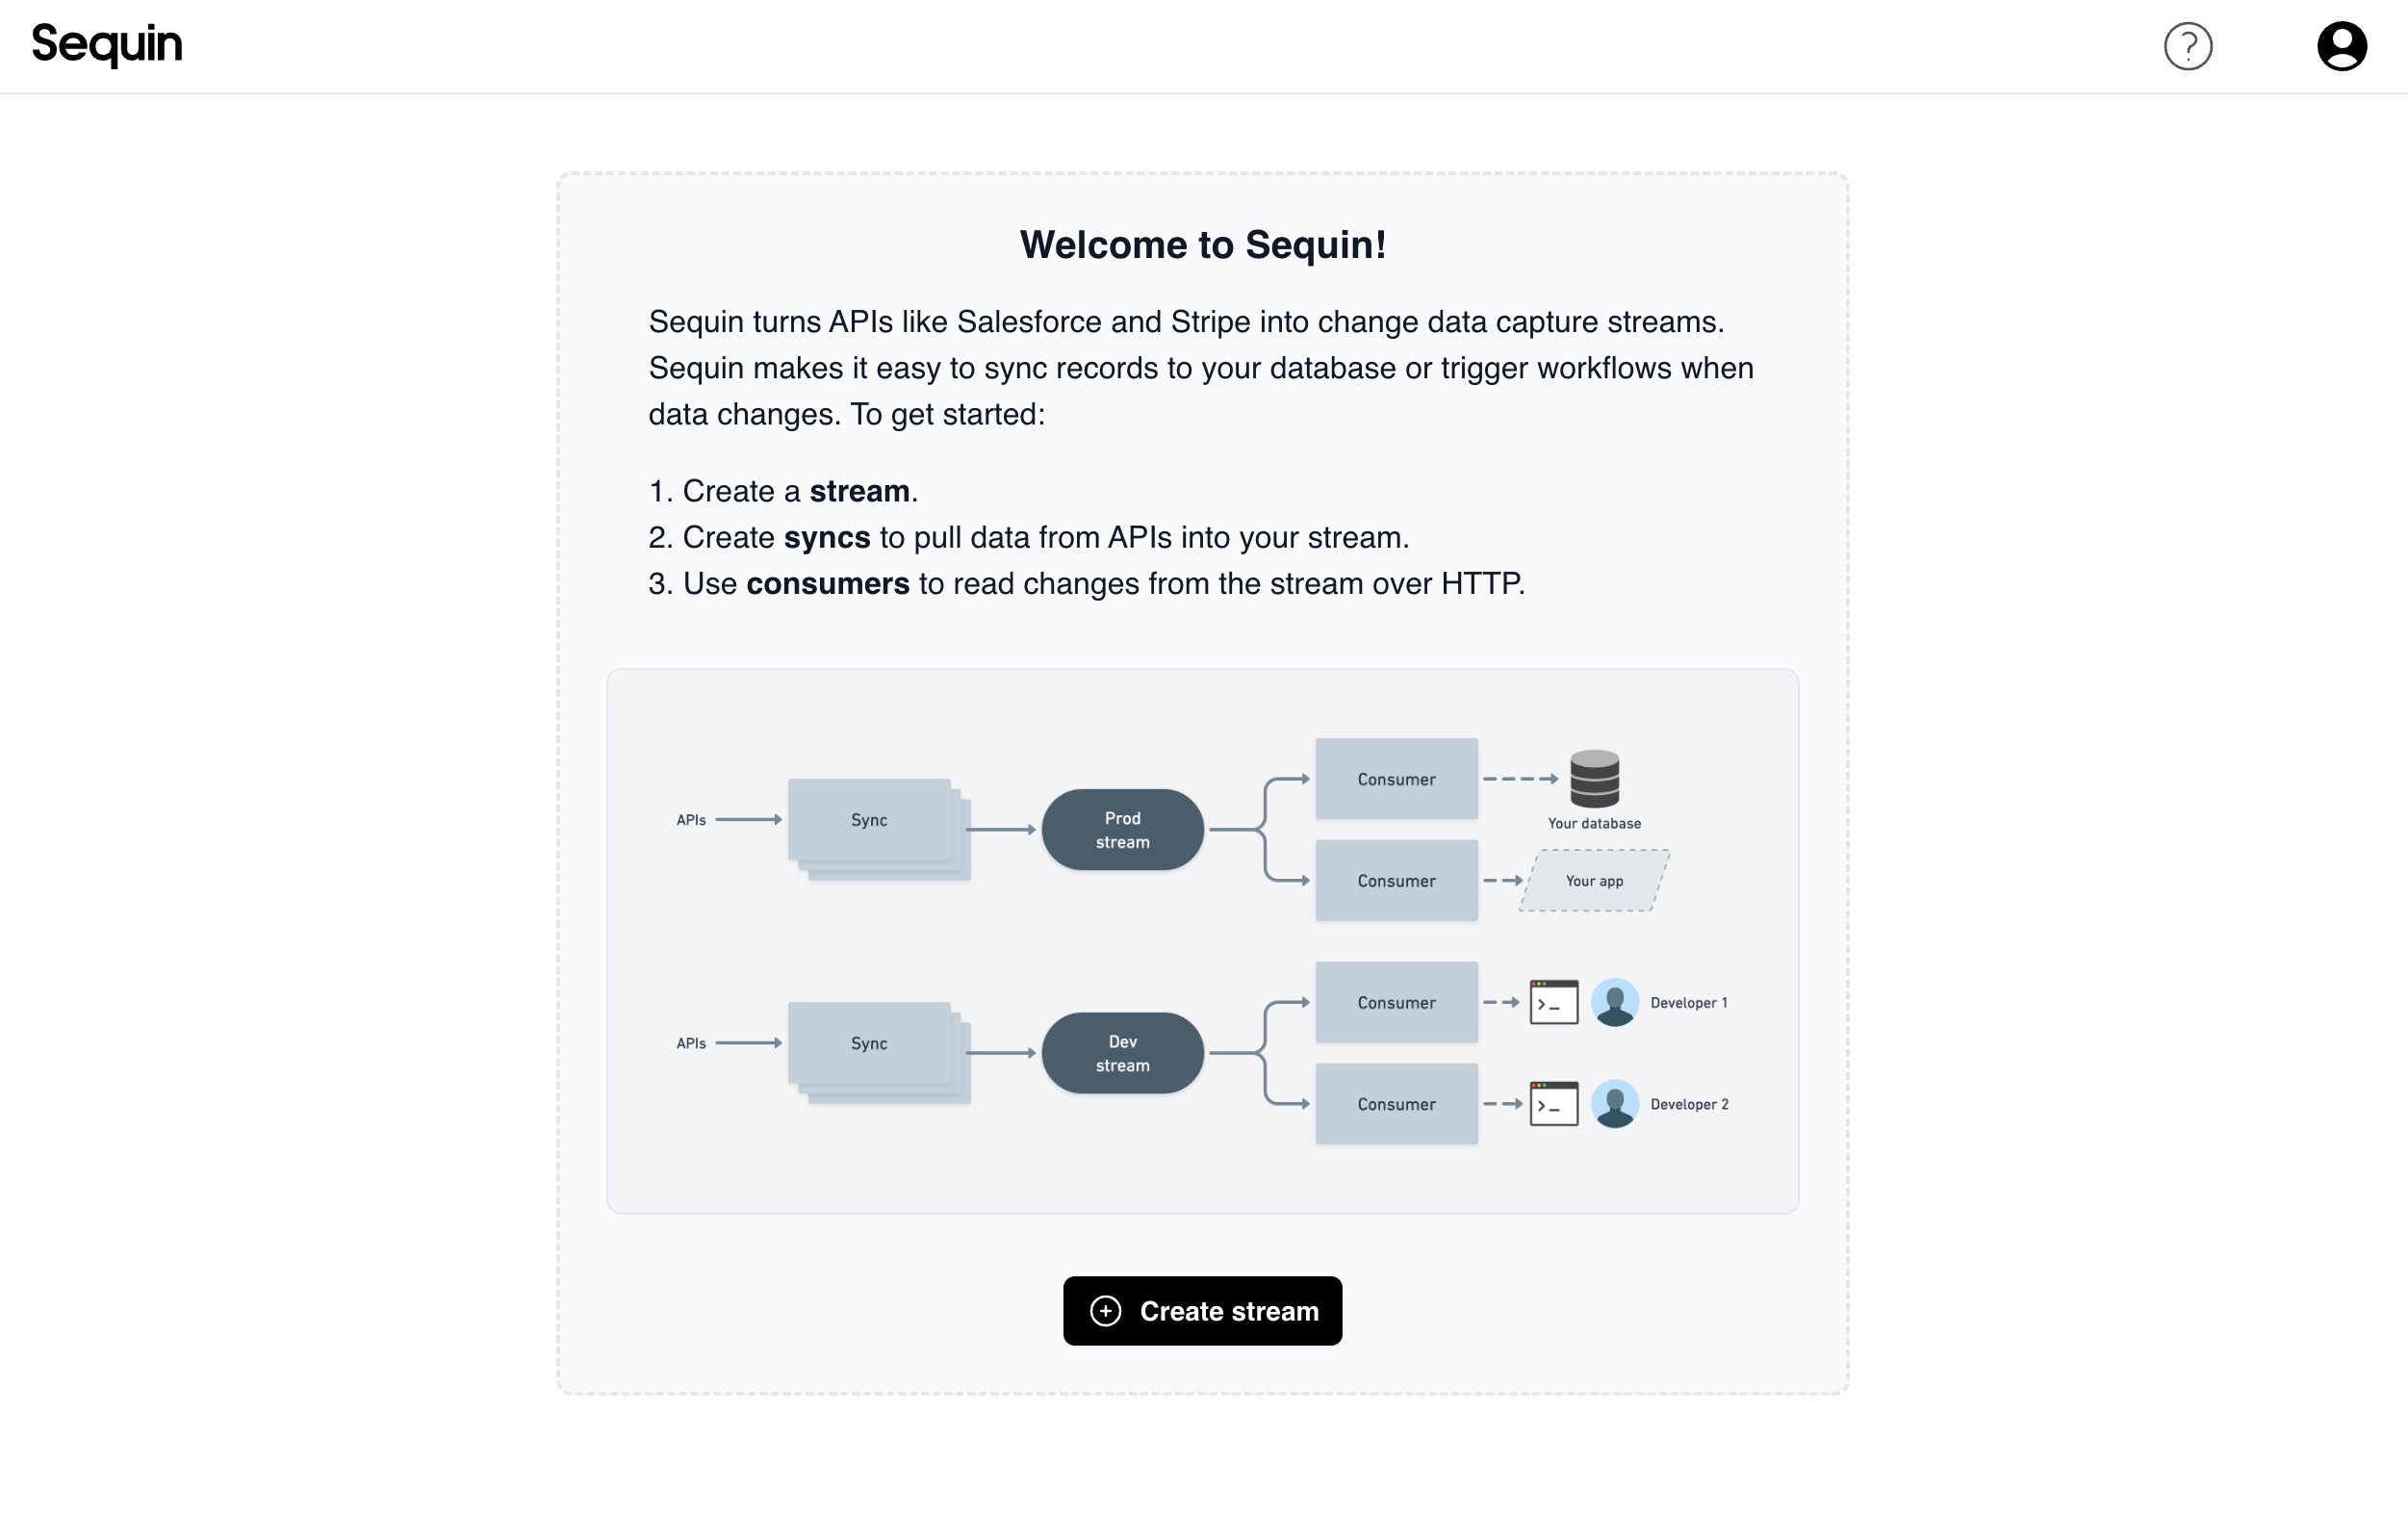
Create a stream
Streams are at the center of Sequin. The data from your syncs is stored in a stream. Your consumers read from a stream, keeping track of which messages you have processed and which still need to be delivered.
To get started, you’ll need a Sequin account. If you don’t have one, you can sign up for free. Once you’re logged in, you’ll be prompted to create your first stream:
Click “Create stream” and enter a name. I chose dev as this stream is just for development, not yet production.
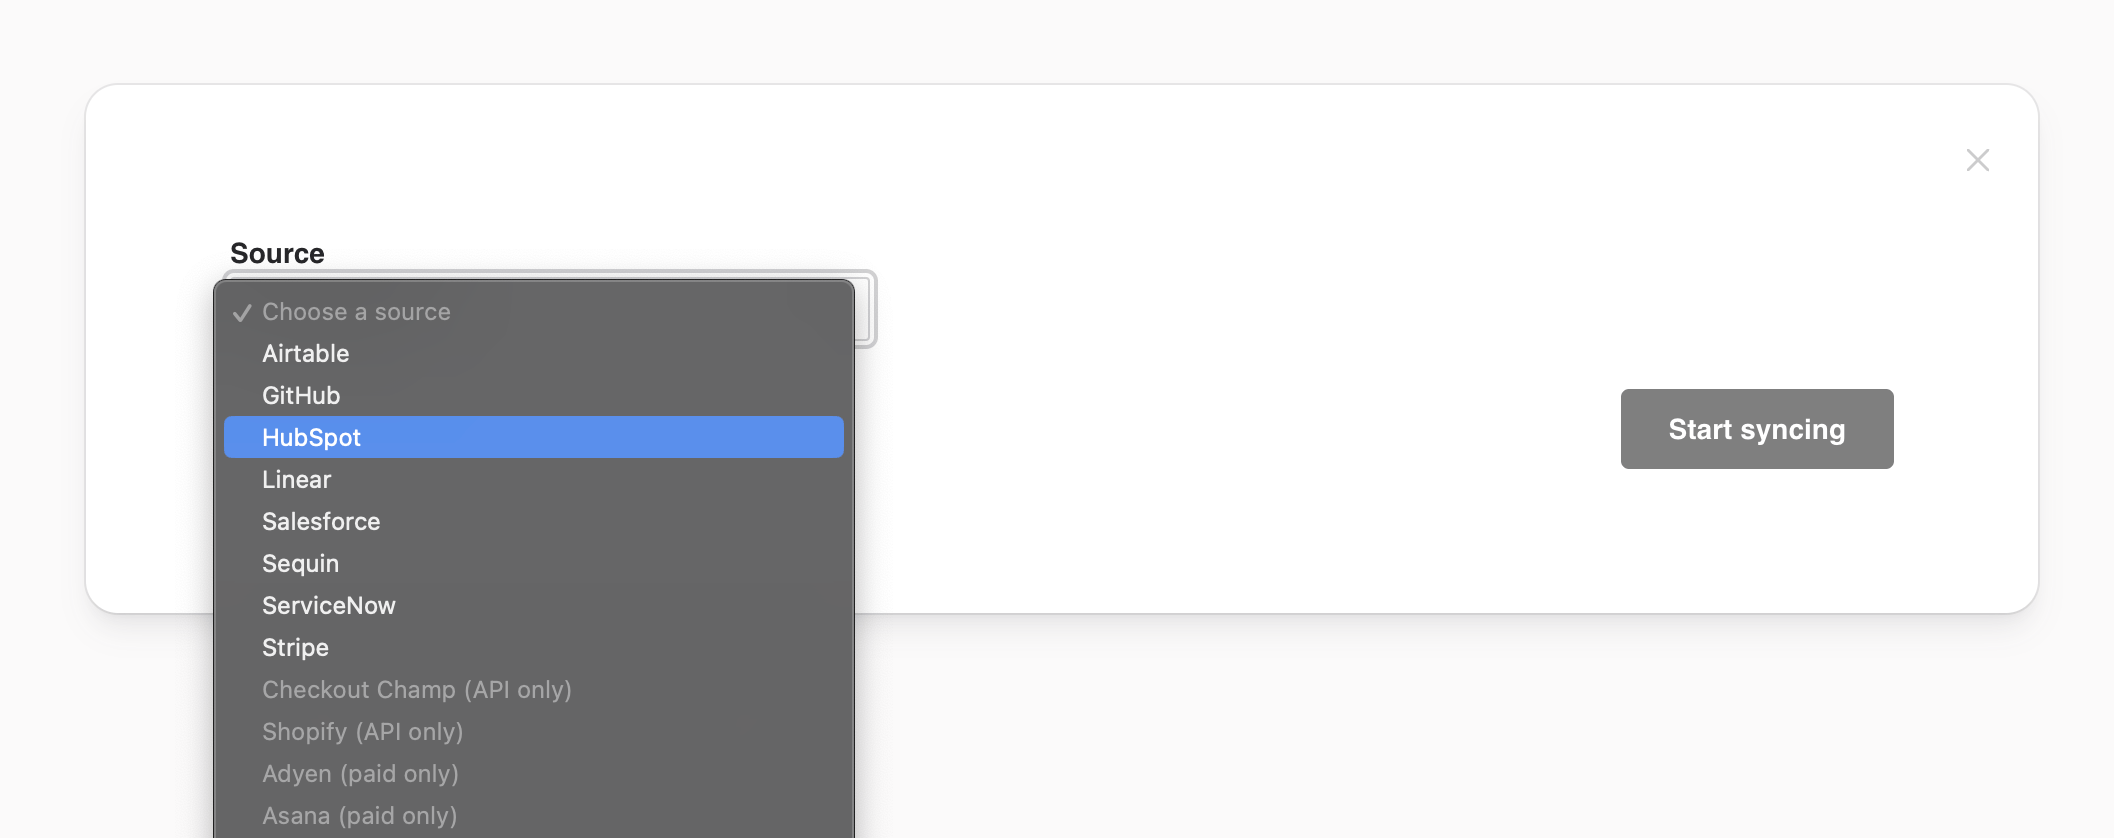
Create a sync
That’s it! Our first stream is created. Now let’s add a sync.
In Sequin, an instance of a connection to an API is called a sync. Sequin uses a credential (e.g. an access token) to access the API.
Here are some examples of things you can sync:
- A Salesforce account
- A HubSpot sandbox
- A Shopify store
- A Stripe account
You can connect to your API account or to your customers’ API accounts. This guide will focus first on connecting to an account you own, but later we’ll show you how to programmatically connect to your customers’ accounts.
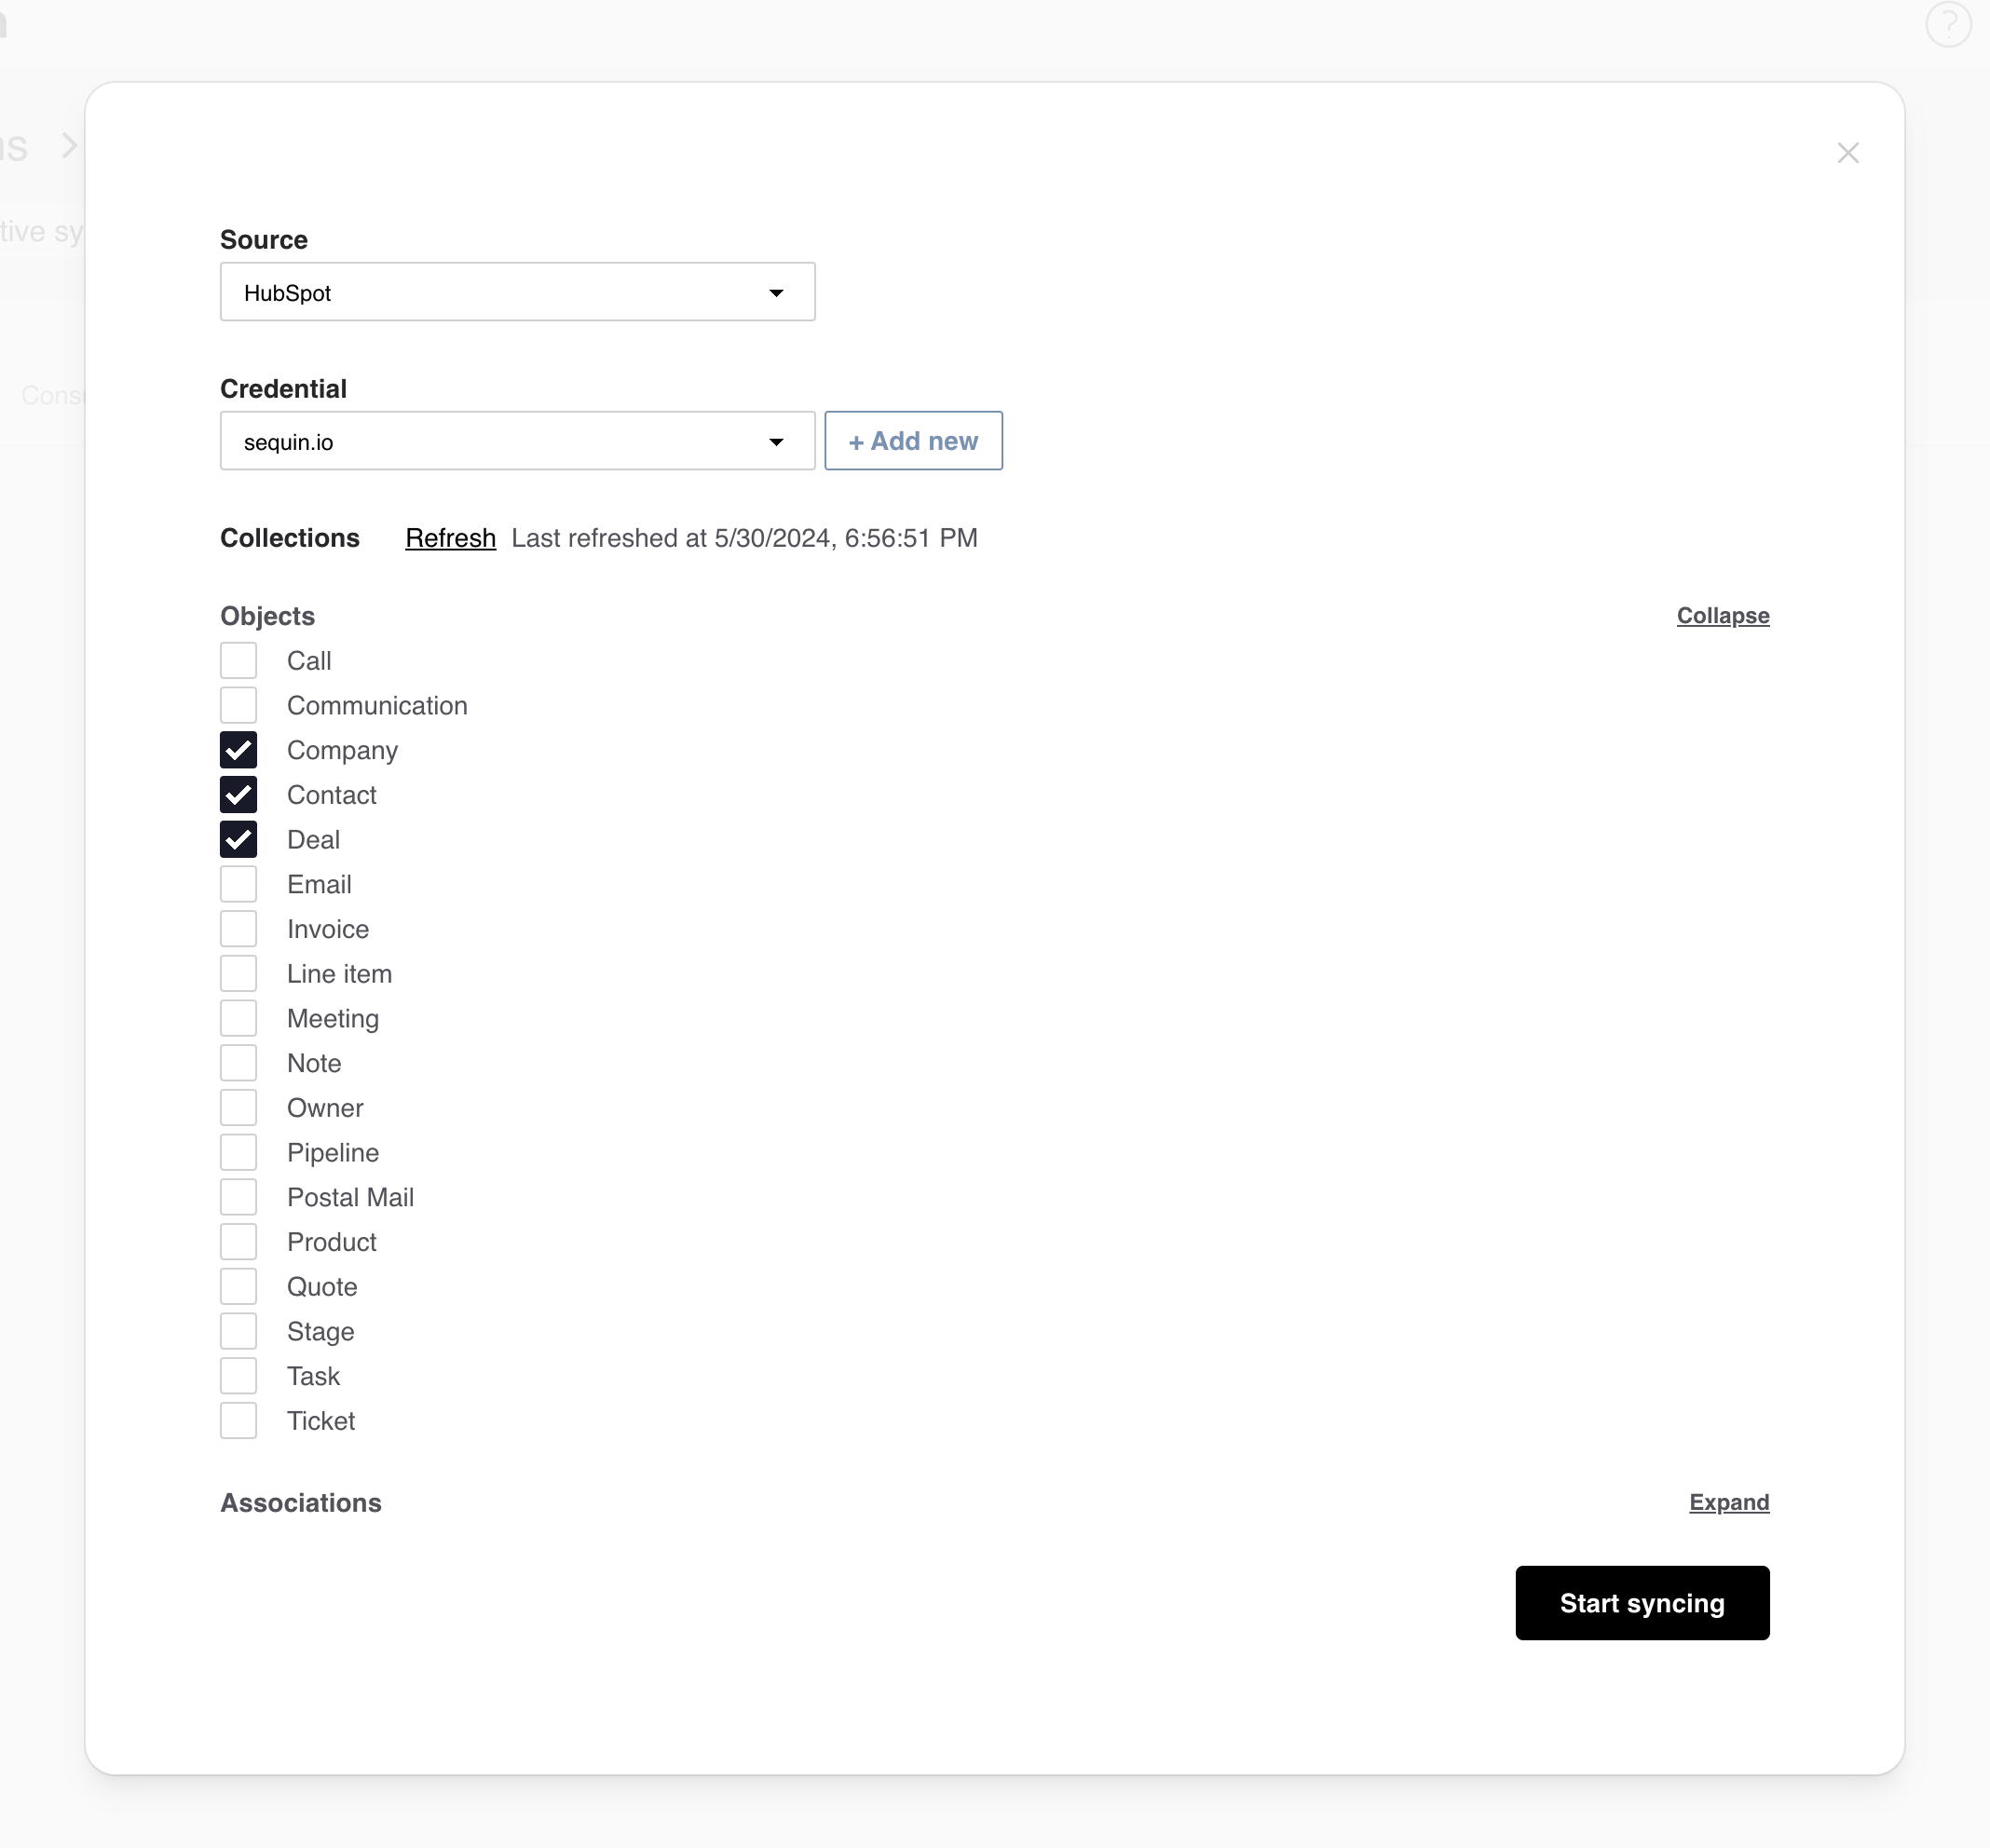
Create a credential
In the “Credential” section, click + Add New then Connect Sequin to HubSpot. Follow the prompts in HubSpot to authorize Sequin.
Select collections to sync
Under “Collections,” select the data you want to sync. A collection is a type of API object, like a Salesforce Contact or a Shopify Order.
Start your sync
Click Start syncing.
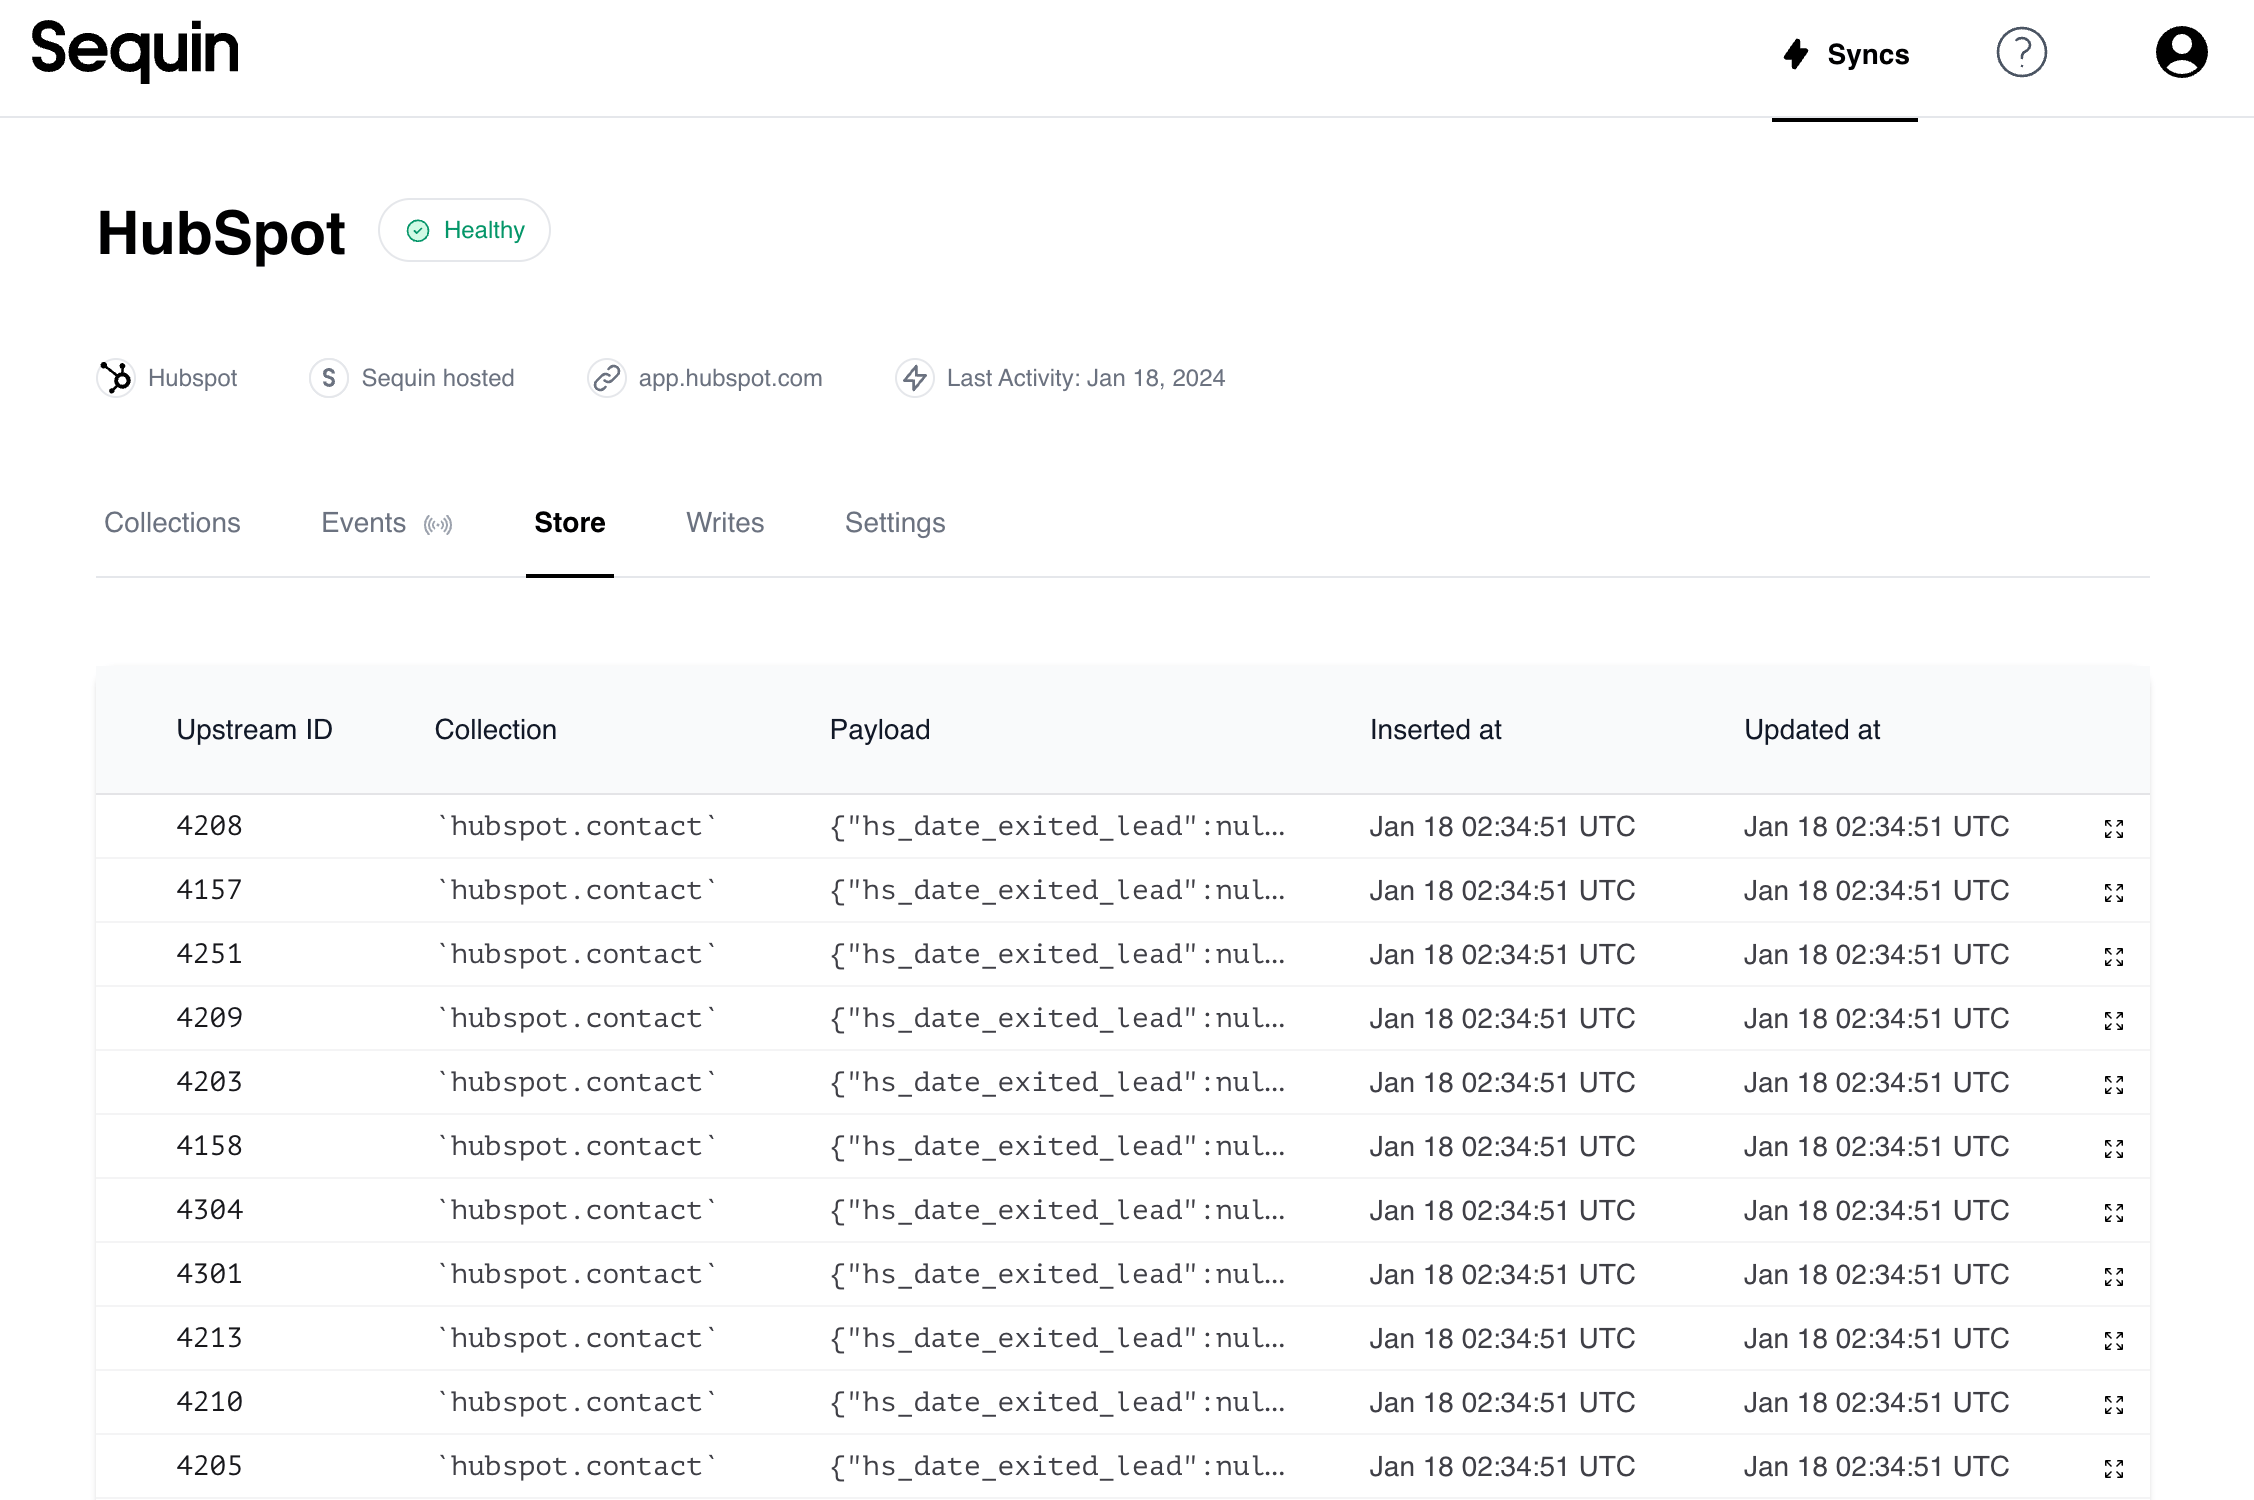
Introspect
After starting your sync, introspect the shape of objects flowing from the API. Click the “Records” tab to see the list of records Sequin has extracted so far:
You can click on any record to see an expanded view. You can make changes to records in the API and see the corresponding records update in real-time!
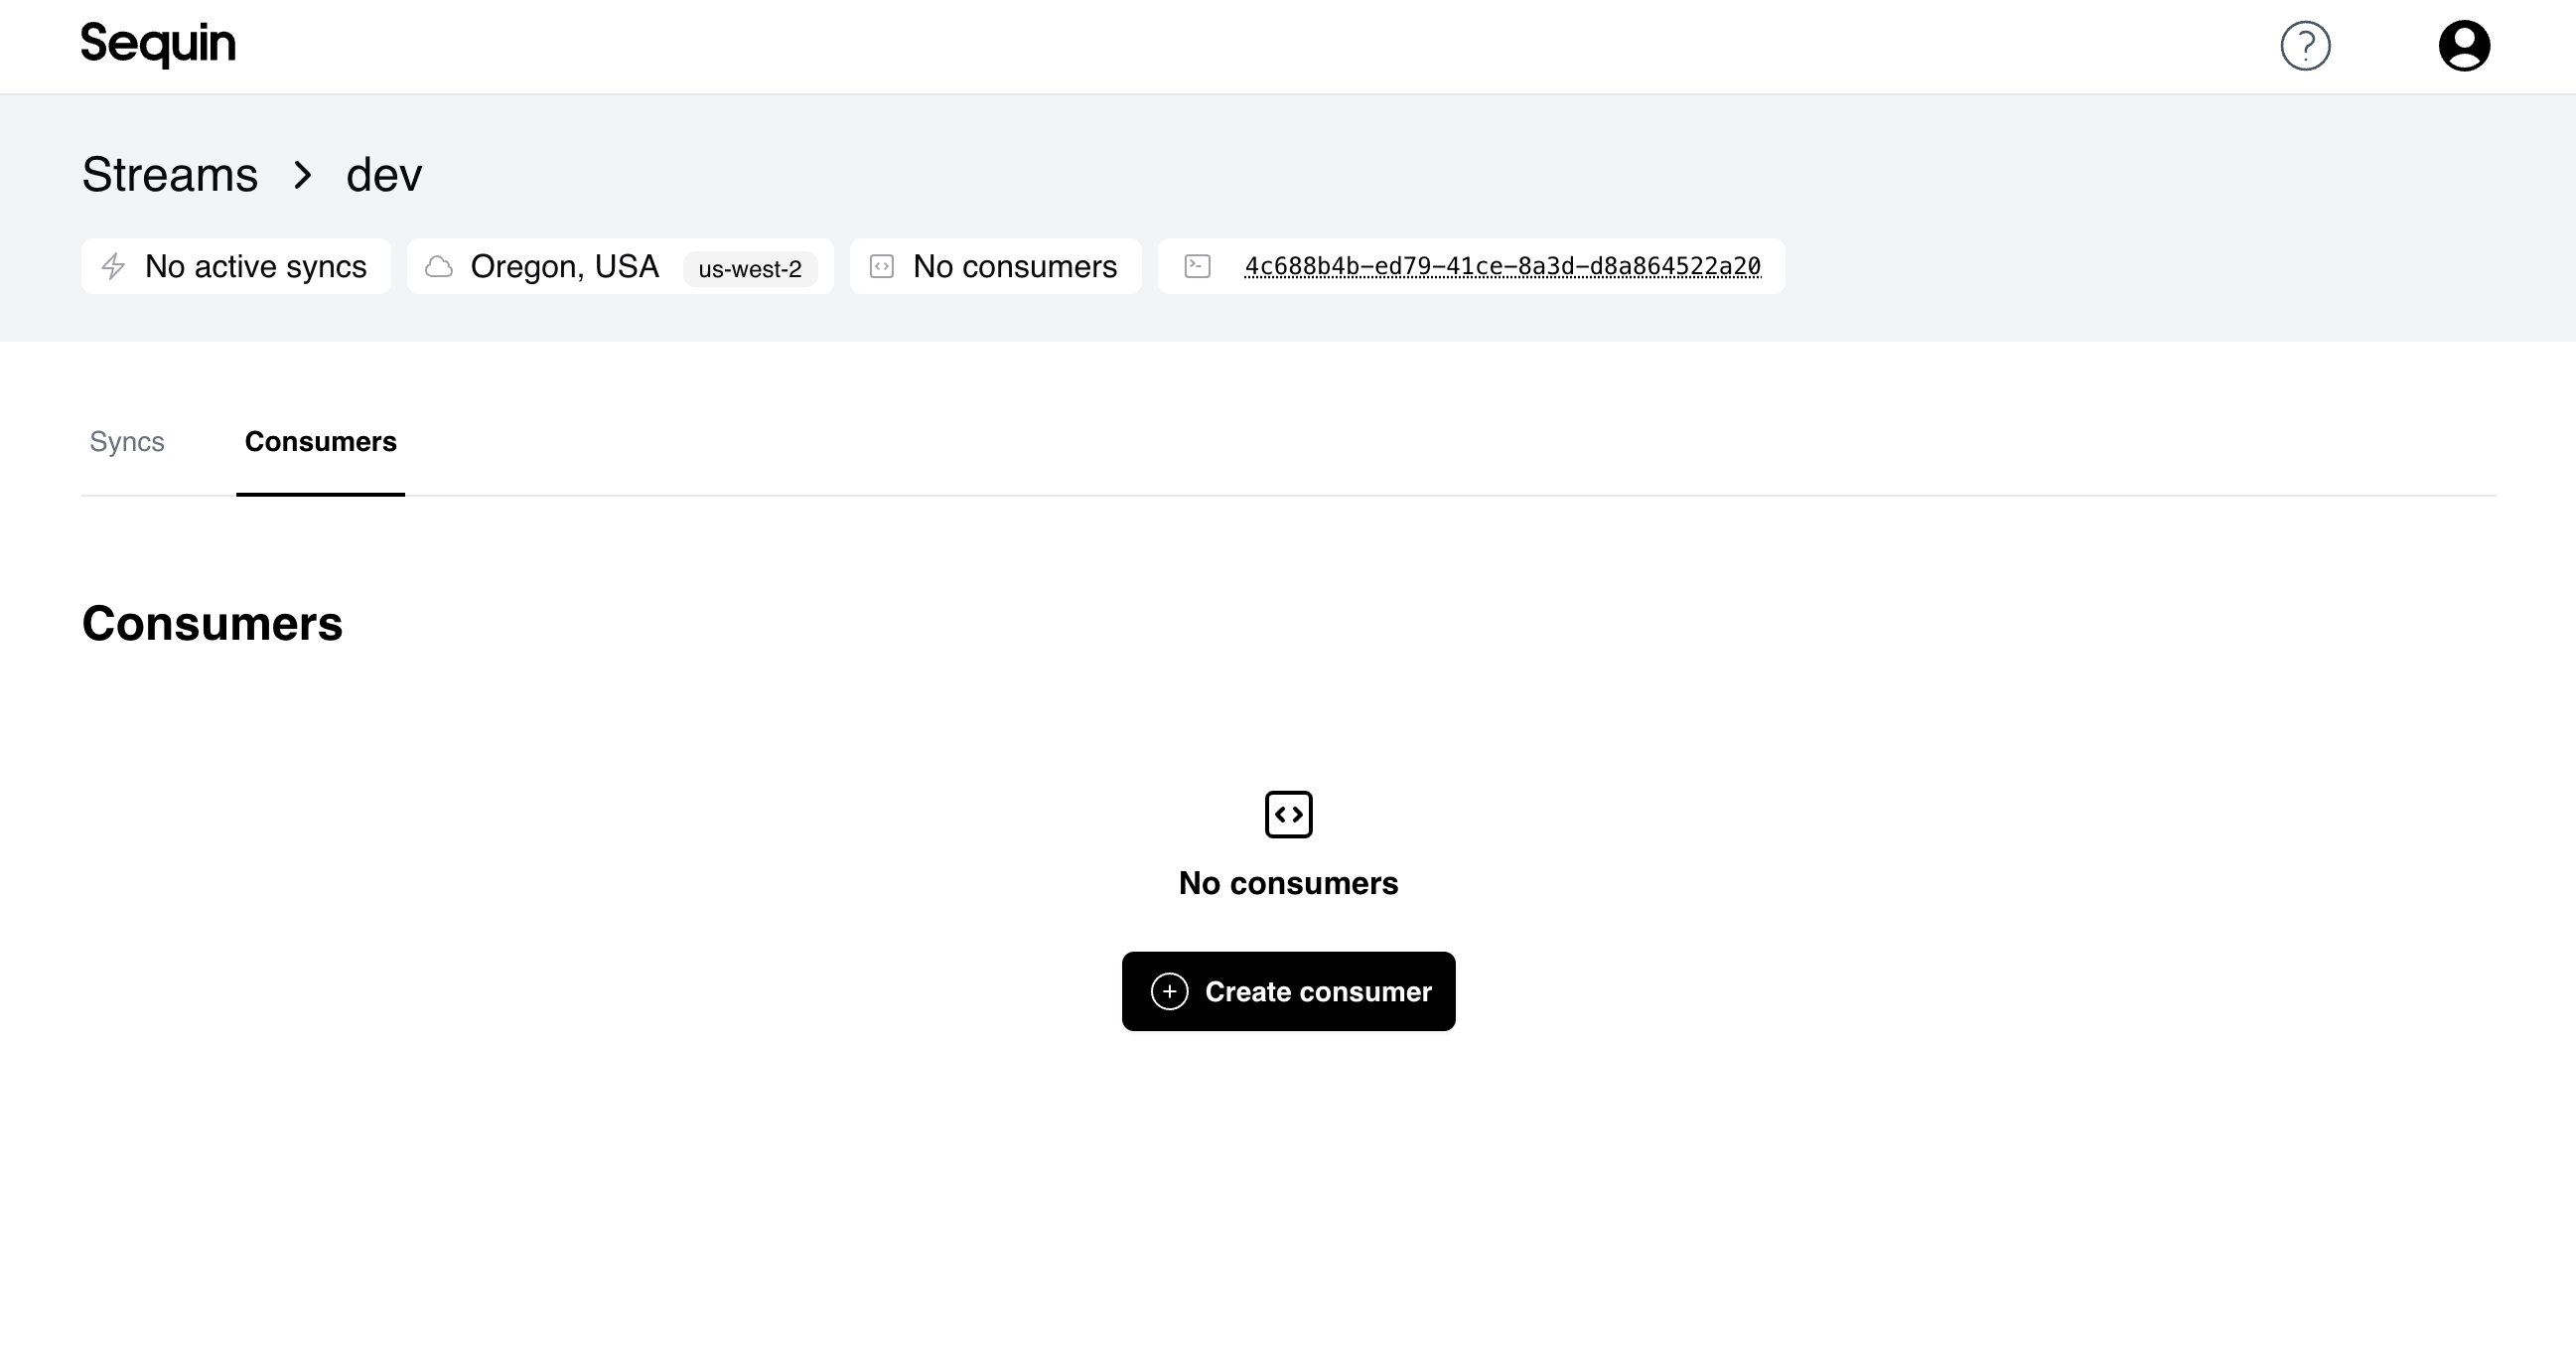
Create a consumer to read data
Now that you are syncing data to your stream, let’s add add a consumer to read data into your application.
Sequin’s Consume API is an HTTP interface for processing all your API data. It provides the same capabilities as modern messaging systems, like Kafka or NATS. You can process data in parallel, at high-throughput, and with strong guarantees about message delivery.
Navigate to your dev stream page and click the Consumers tab. Click Create consumer:
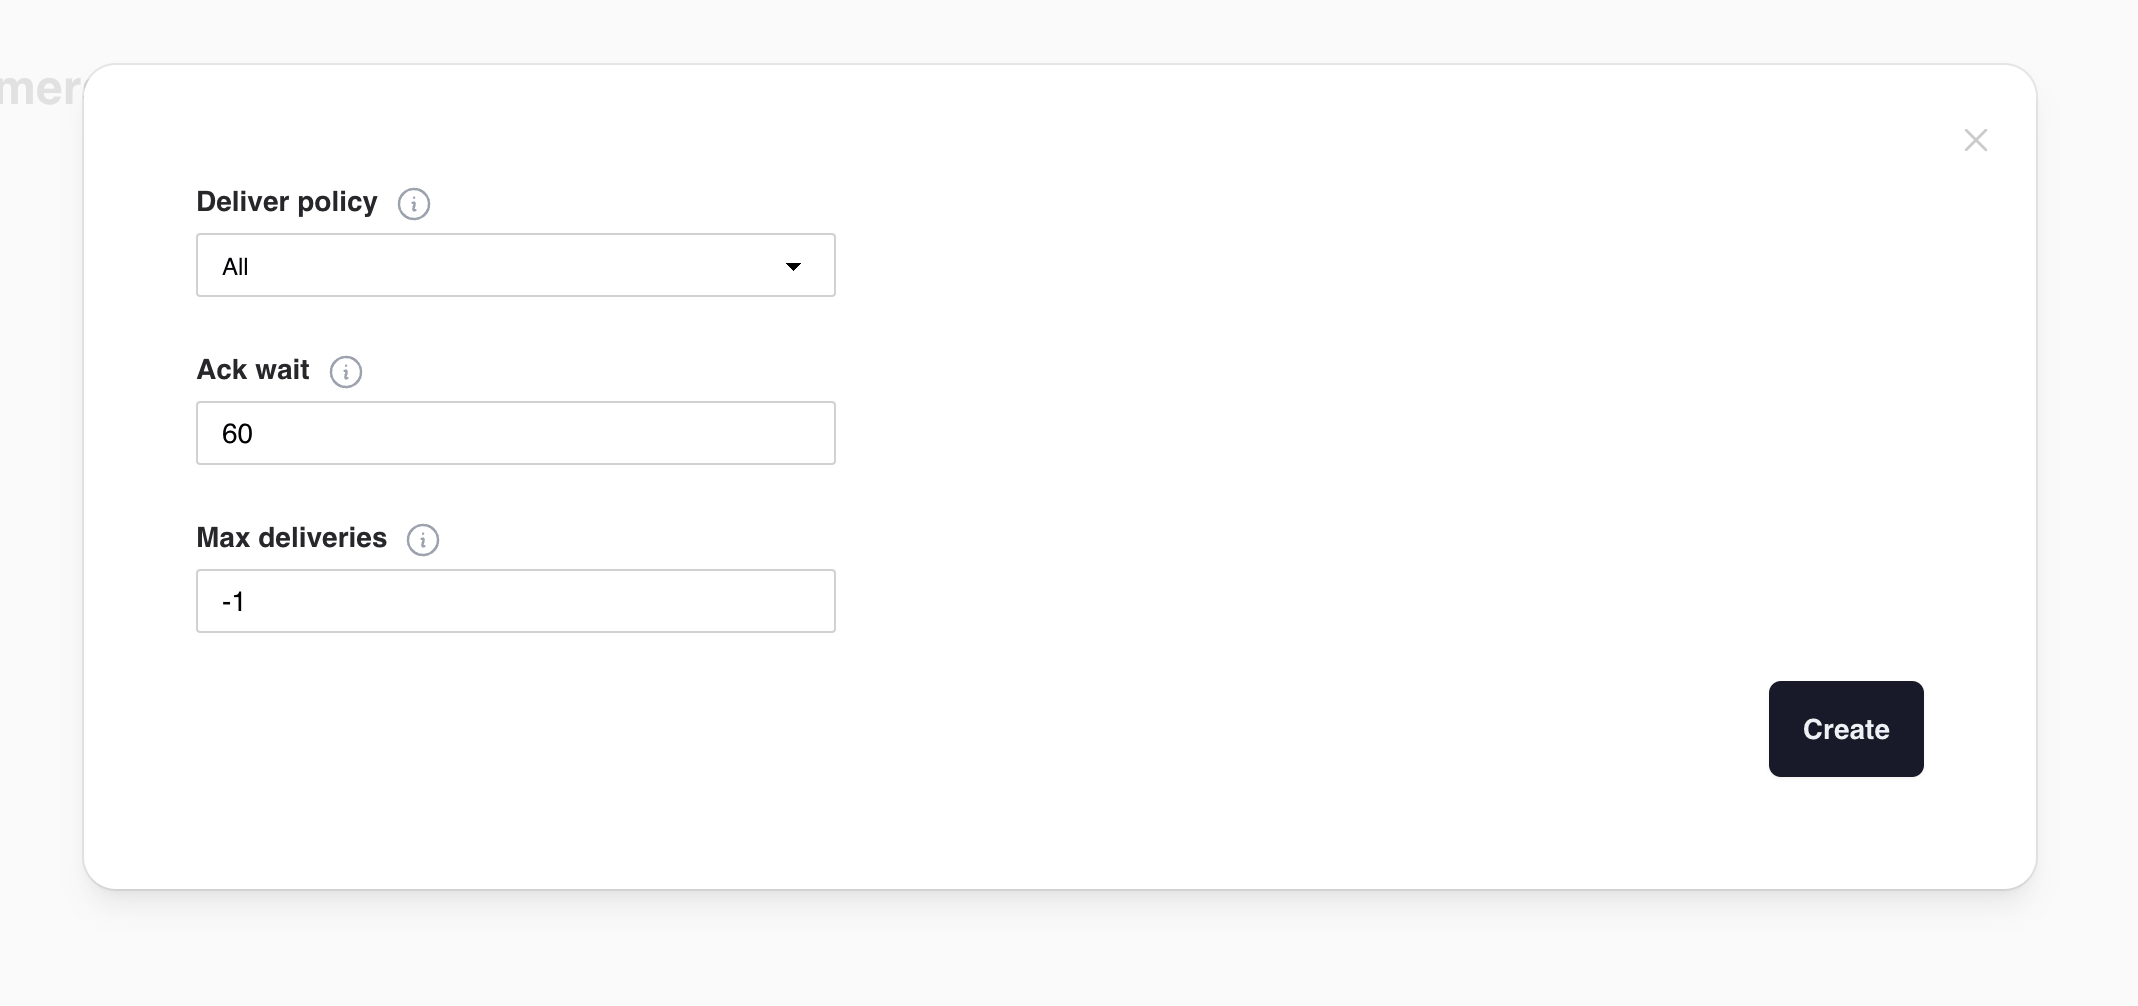
There are a few configuration options available when creating a consumer:
Where in the stream the consumer starts.
all (default): the consumer will start from the beginning of the stream.new: the consumer will start from the most recent message.
How long to wait for a message to be acknowledged, in seconds. Defaults to 60 seconds.If a worker doesn’t acknowledge a message within this time, the message will be redelivered (i.e. reappear for other workers to process).
Maximum number of times a message can be redelivered to workers. For example, if a message causes your workers to crash, it will be redelivered up to max_deliver times before being discarded.Defaults to -1, which means there is no maximum.
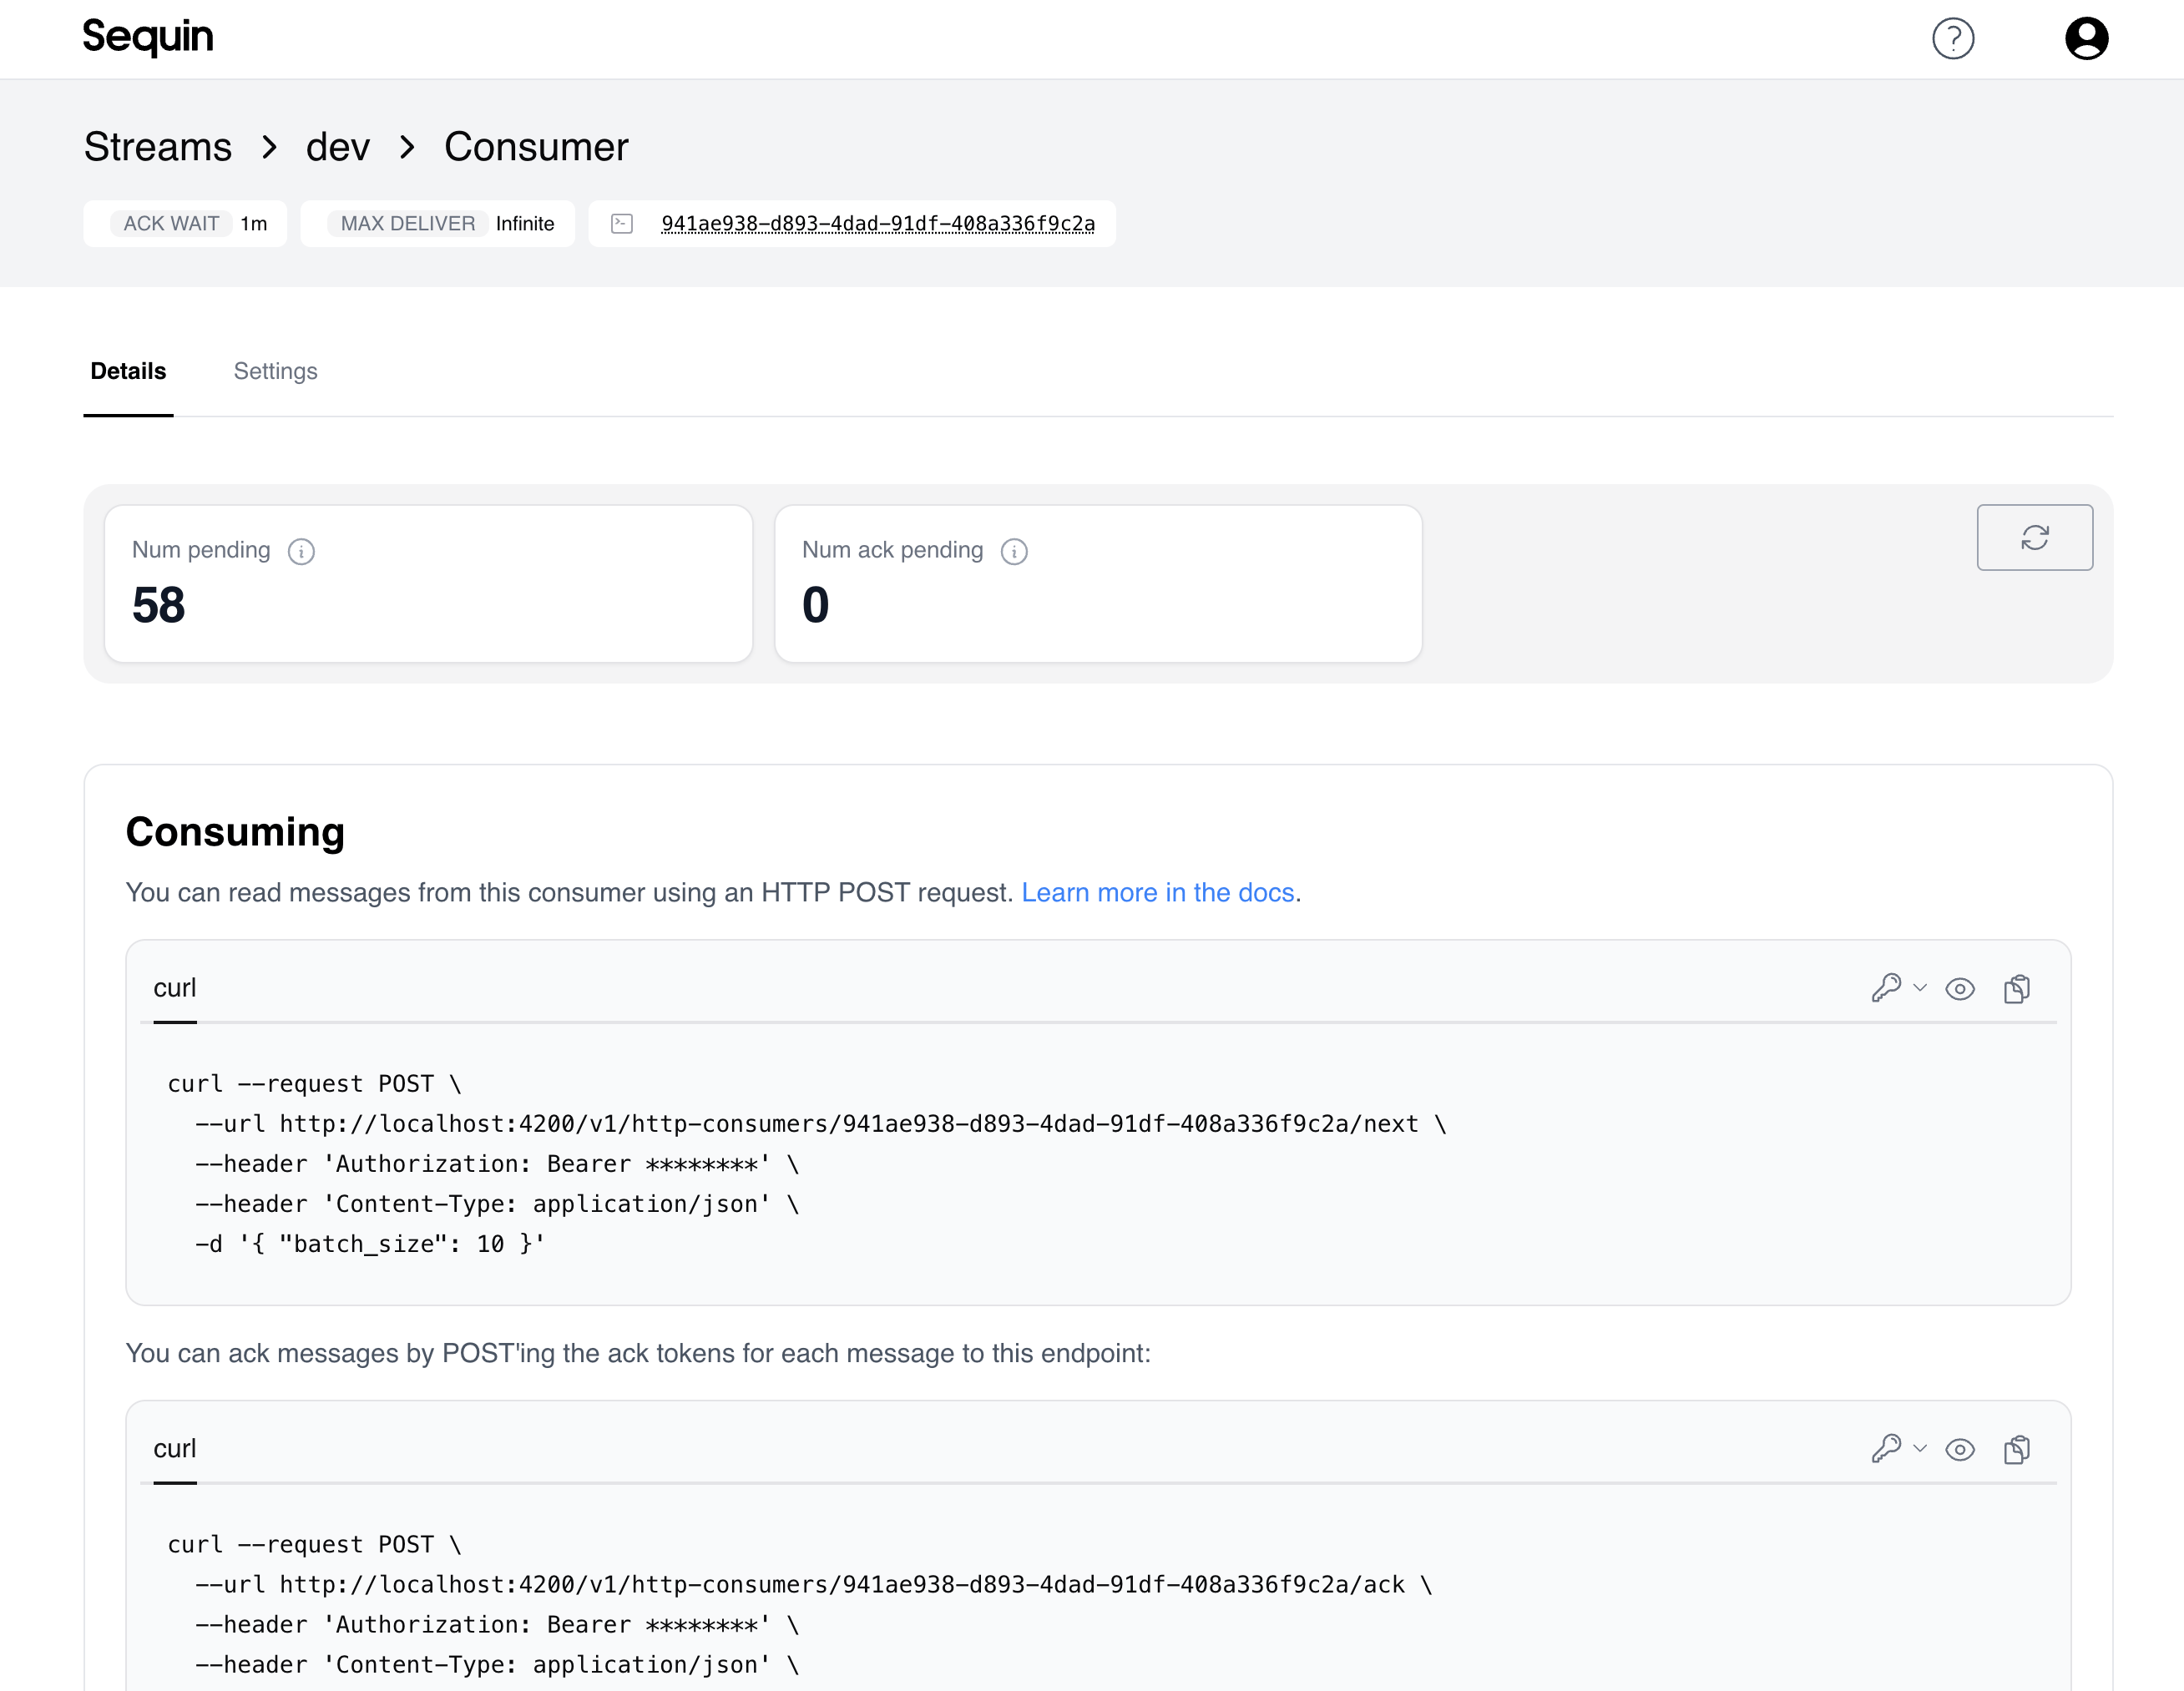
- The configuration details you selected
- The number of messages that are pending delivery (
num pending)
- The number of messages that are pending acknowledgement (
num ack pending)
- Code snippets to consume records from this consumer
At this point, if you have not already, you should create an API Token. Navigate to Account -> API Tokens and click “Create API Token”. /next snippet into your terminal to request your first batch of records!
curl --request POST \
  --url https://api.sequin.io/v1/http-consumers/{id}/next \
  --header 'Authorization: Bearer {api token}' \
  --header 'Content-Type: application/json' \
  -d '{ "batch_size": 10 }'
[
  {
    "ack_token": "NjA1",
    "record": {
      "sync_id": "my-sync-id",
      "collection_id" : "stripe:subscription",
      "upstream_id": "sub_tognkns00nj",
      "updated_idx": 2745327037,
      "upstream_created_at": "2024-11-10T18:38:00.070453Z",
      "upstream_updated_at": "2024-11-10T18:38:00.070453Z",
      "data": {
        "id": "sub_tognkns00nj",
        "object": "subscription",
        "billing": "charge_automatically",
        // …
      }
    }
  },
  // ...
]
Mutate data
On top of reading data, your integration probably needs to write data back to APIs as well. Sequin has a mutation API that allows you to create, update, and delete API records.
With the mutation API, mutations look the same regardless of the API. The data payload for API records matches the same shape used everywhere in Sequin.
Mutations are linked to syncs. When you create a mutation, you’ll specify the sync ID of the sync you want to mutate. Sequin will route the mutation to the right place.
Here’s an example of creating a Salesforce Contact:
curl -X POST \
  https://api.sequin.io/v1/mutations/run \
  -H 'content-type: application/json' \
  -d '{
        "kind": "create",
        "sync_id": "my-sync-id",
        "collection_id": "salesforce:contact",
        "data": [
          {
            "FirstName": "Paul",
            "LastName": "Atreides",
            "Email": "paul@arrakis.org"
          }
        ]
      }'
Management API
Everything you can do in the Sequin console you can do via Sequin’s Management API. This empowers you to write code that starts syncs, manages consumers, or anything else.
You’ll use the Management API if you’re programmatically connecting to your customers’ API accounts. For example, if you’re building a product that syncs data from your customers’ Salesforce accounts to your app, you’ll use the Management API to capture credentials and spin up syncs for each customer.
You can also use the Management API to integrate Sequin into your development and CI/CD workflows.
There’s a lot you can do with the Management API. Here’s a sampling of some common tasks:
List syncs
List all the syncs in your account:
curl --request GET \
  --url https://api.sequin.io/v1/syncs \
  --header 'Authorization: Bearer <YOUR_API_KEY>'
Add a credential
Add a credential to your account:
curl --request POST \
  --url https://api.sequin.io/v1/credentials \
  --header 'Content-Type: application/json' \
           'Authorization: Bearer <YOUR_API_KEY>' \
  --data '{
    "kind": "stripe_oauth2",
    "access_token": "sk_live_7eC39HqLyjWDarjtT1zdp7dc",
    "oauth_app_id": "8ff58ef0-d376-4ae8-b2e2-9f0206aa65b8",
    "metadata": { "custom_property": 42 }
  }'
Create a sync
Create a new sync using the credential you just created:
curl --request POST
  --url https://api.sequin.io/v1/syncs
  --header 'Content-Type: application/json' \
           'Authorization: Bearer <YOUR_API_KEY>' \
  --data '{
    "provider": "stripe",
    "name": "Choam Corp - Stripe Production",
    "collection_ids": ["stripe:customer", "stripe:invoice"],
    "rate_limit": {
      "allowed_requests": 100,
      "interval": 60,
      "max_concurrent_requests": 0
    },
    "credential_id": "8ff58ef0-d376-4ae8-b2e2-9f0206aa65b8",
    "metadata": { "custom_property": 42 }
  }'
Questions and support
If you have any issues or questions, don’t hesitate to reach out. We’d love to hear what you’re building.