

Documentation Index
Fetch the complete documentation index at: https://sequin.io/docs/llms.txt
Use this file to discover all available pages before exploring further.
Building a Retool app that’s connected to Salesforce
In this tutorial, you’ll build a tool to manage Salesforce leads using Retool. The app will allow your sales team to enrich and qualify new leads all in one action.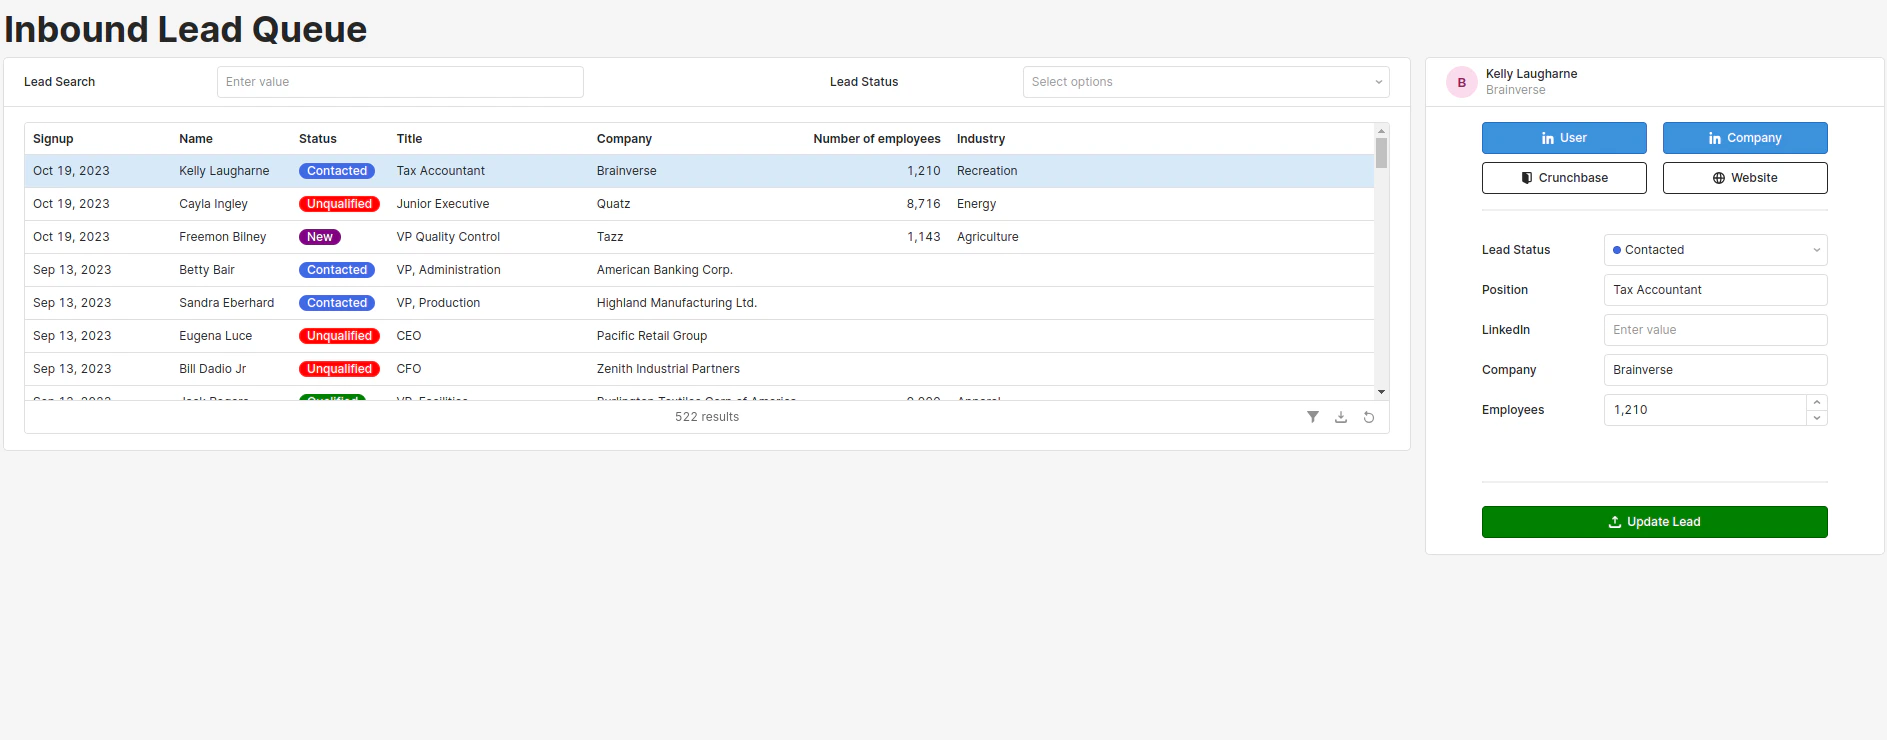
Salesforce Setup
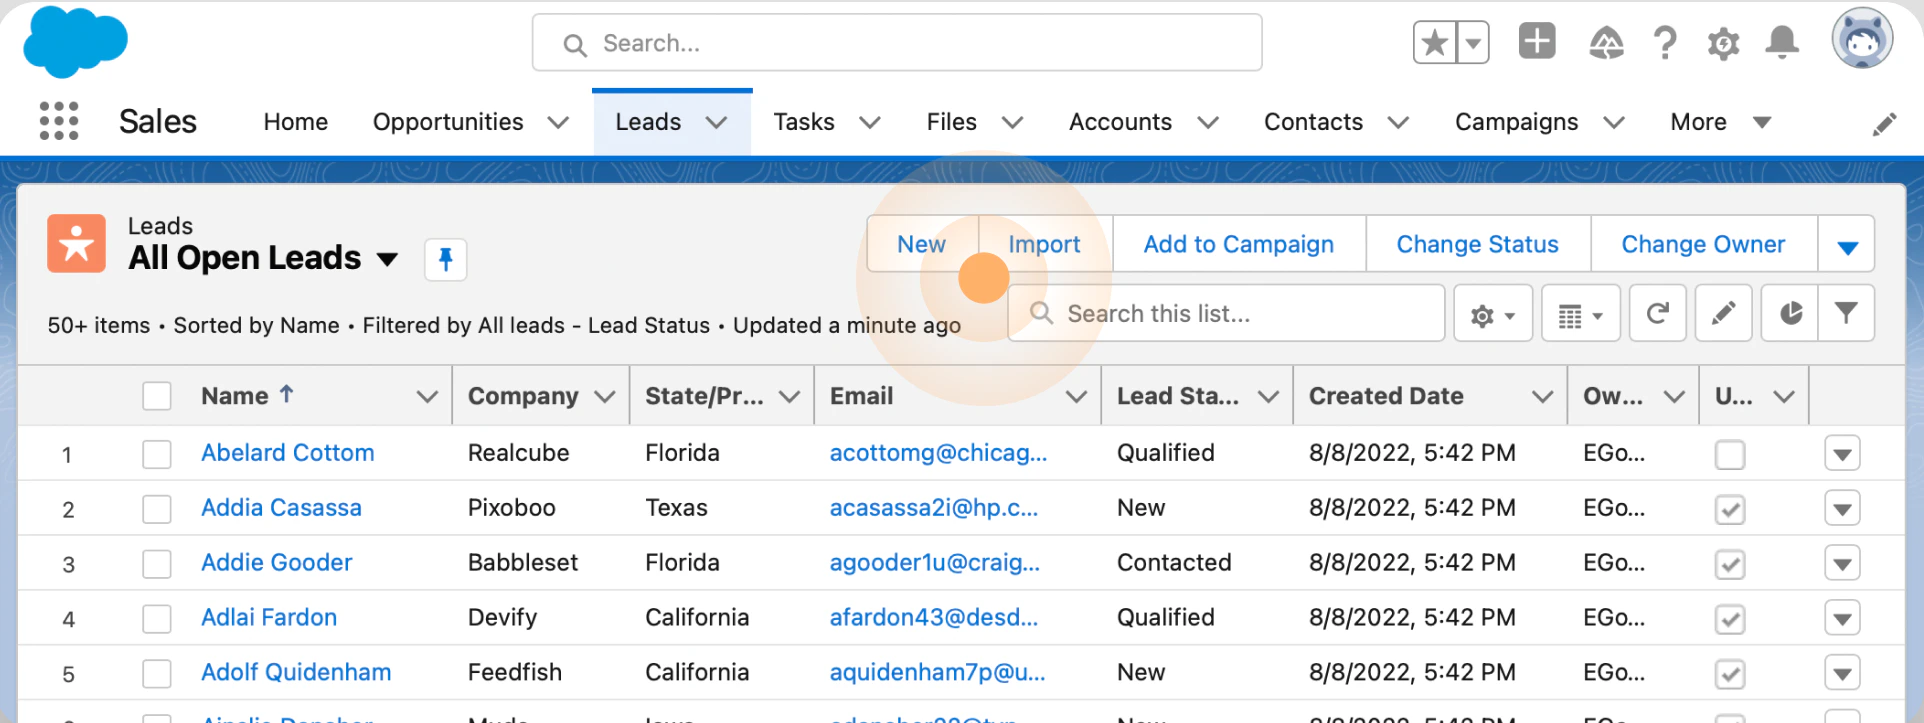
The scenario for this tutorial is very common: New users sign up for your service and your sales team needs to do a little research to determine if these new users are qualified leads. While an everyday task, this kind of workflow in Salesforce is cumbersome: Lots of repetitive copy, paste, and page reloads. Creating and maintaining a custom set of interfaces in Salesforce isn’t an easy option. A custom Retool app is a great alternative. For this tutorial, you’ll need access to a standard or dev Salesforce account. You’ll work with the standard leads object throughout this tutorial. You’ll also work with a custom field to structure and store information the sales team finds during their research, like the link to the lead’s LinkedIn profile. To get started, create a custom field in Salesforce:- Log into your Salesforce account and navigate to Setup by clicking the gear icon in the top right (next to your user thumbnail).
-
The setup screen will open in a new tab. Now use the Quick Find to find and open the Object Manager:
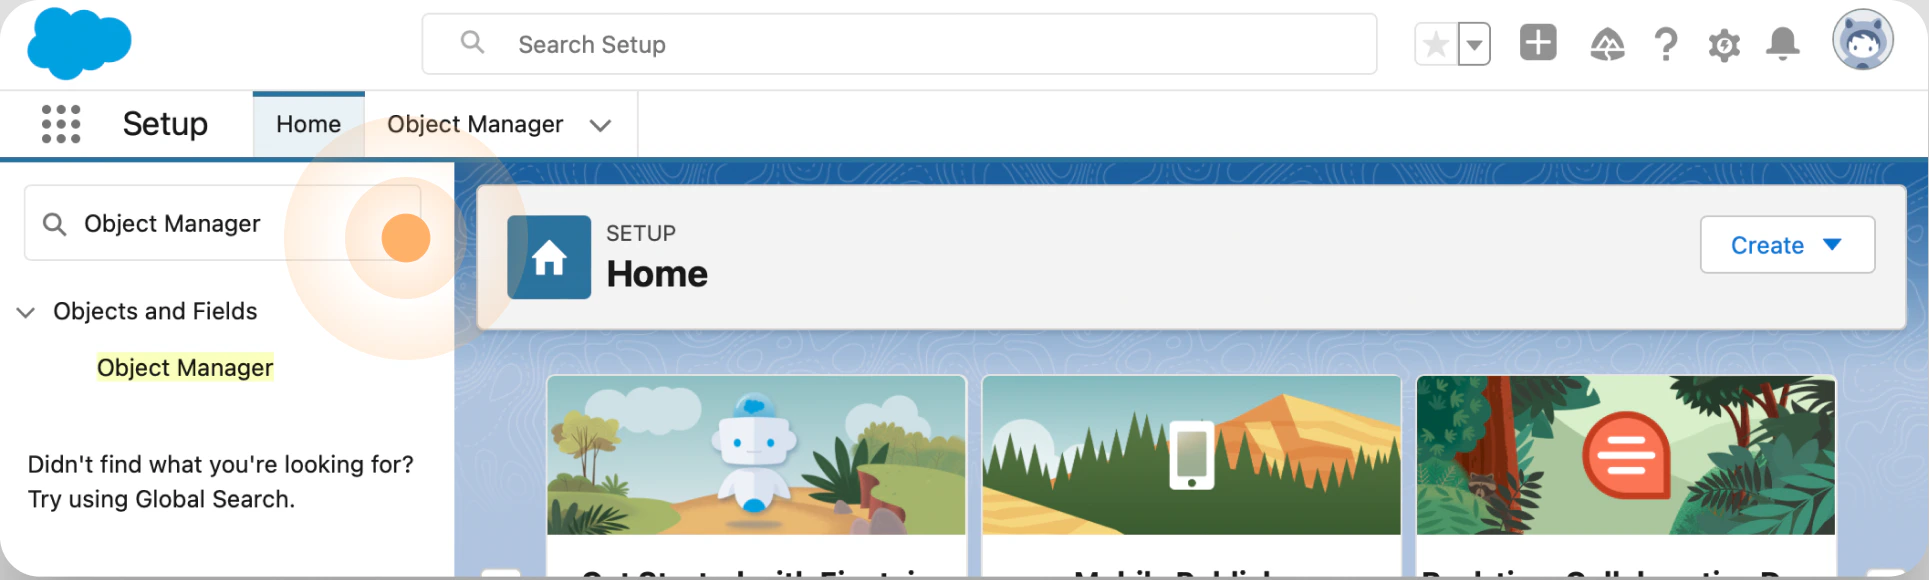
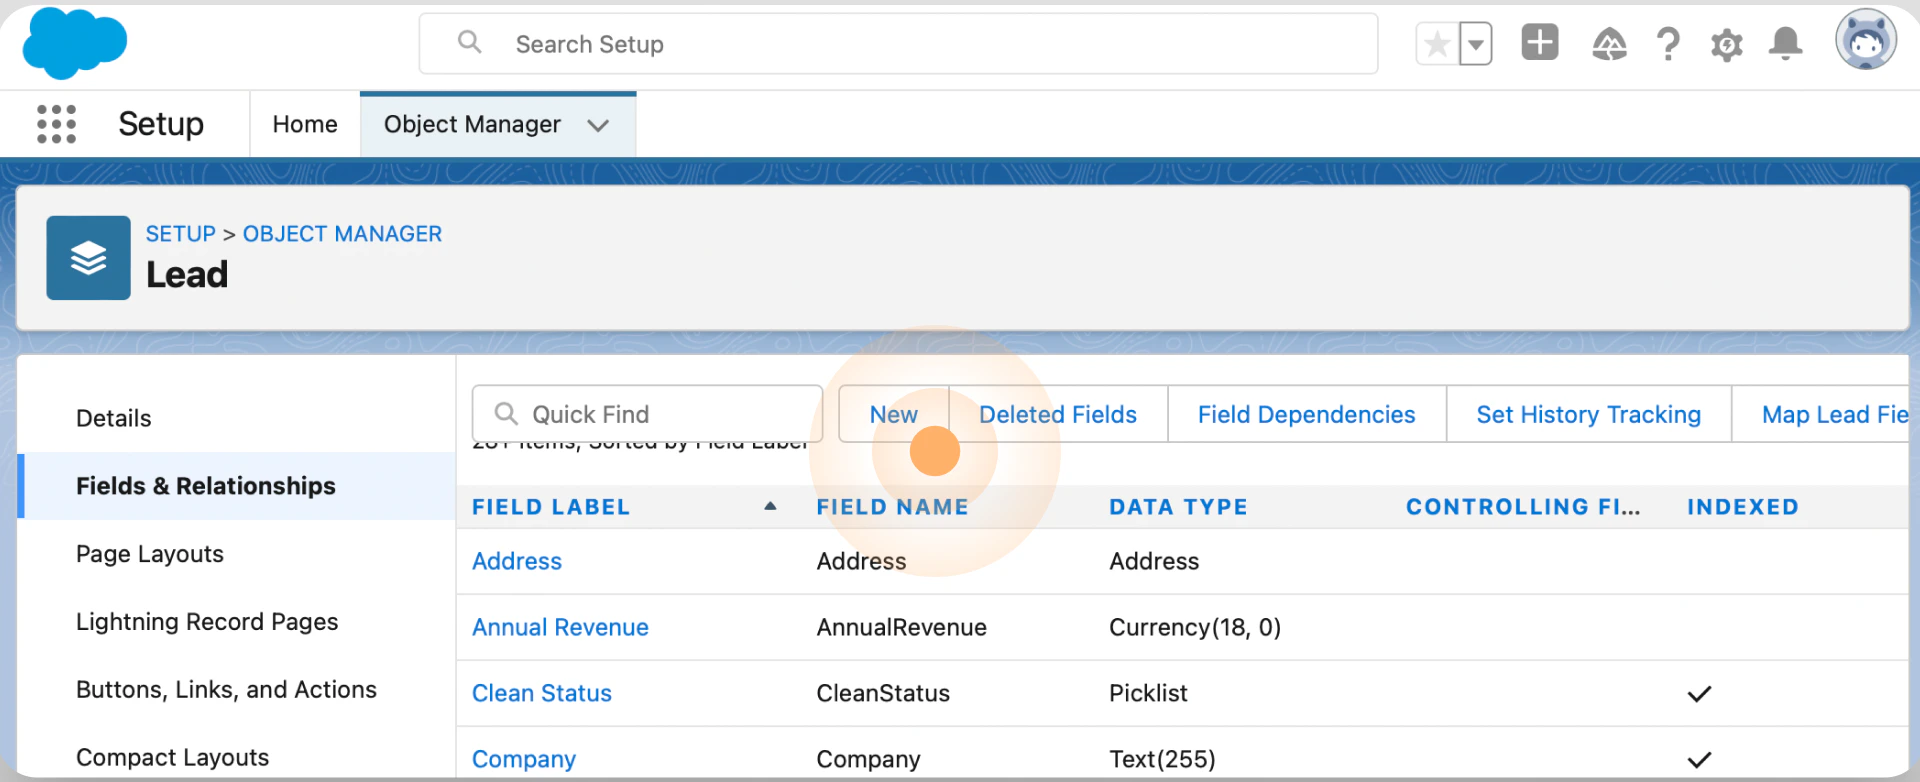
- In the Object Manager, use the Quick Find again to find and select the Lead object.
-
Select Fields & Relationships in the left menu bar and click the New button to create a new custom field:
-
For datatype, recall that you’ll be storing a link to LinkedIn — so select URL and click Next to name and label the field
LinkedIn. Feel free to add a description and help text then click Next. -
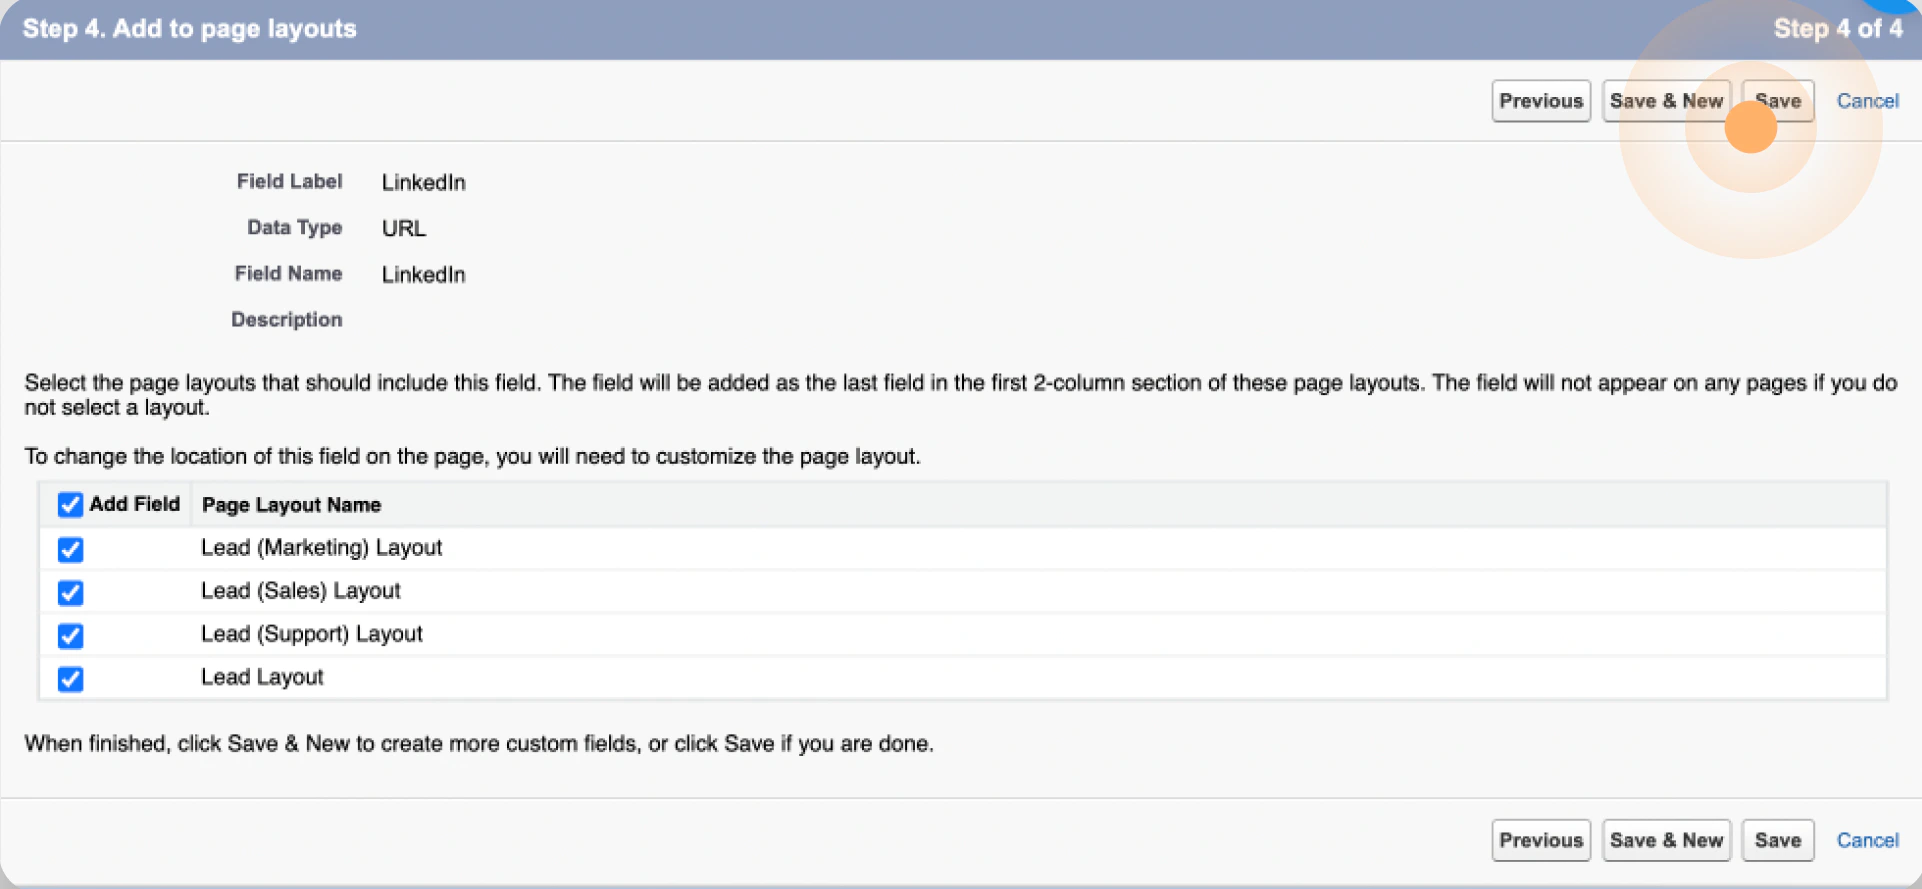
Review the configuration of the new LinkedIn field and click Save to add it to your lead object:
- Select Lead Status from the list of fields on the Fields & Relationships page.
-
In the Lead Status Picklist Values section, edit the options to be
New,Contacted,Qualified,Unqualified:
Sequin Setup
Create a sync between Salesforce and your Postgres database so you can easily work with the leads you just created.- Go to https://console.sequin.io/signup and create an account.
- Connect Salesforce by going through the tutorial or clicking the Add Sync button.
-
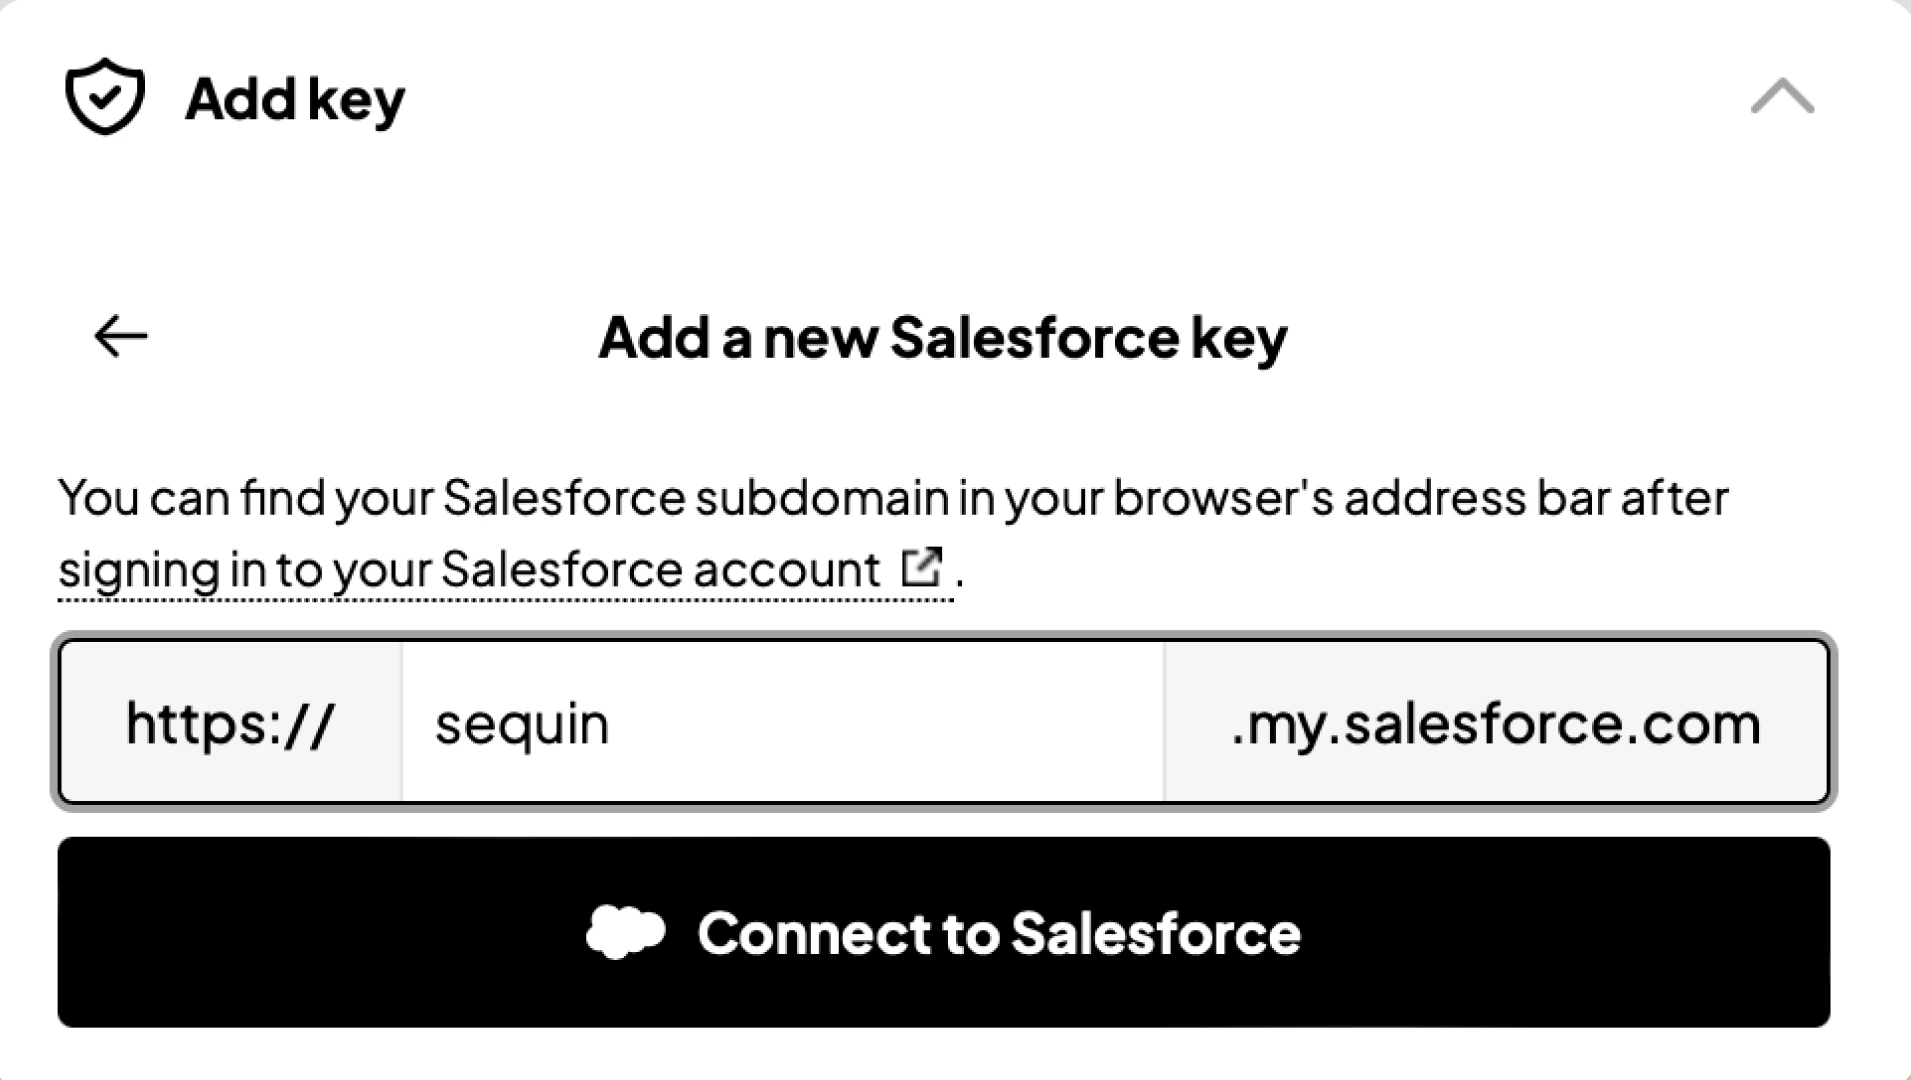
You’ll be prompted to enter your Salesforce subdomain. Then follow the Salesforce authentication steps by entering your Salesforce username and password in the modal:
-
You’ll now select which Salesforce objects and fields you want to sync. For now, just select the
Leadobject. You can adjust which objects and fields you sync at any time: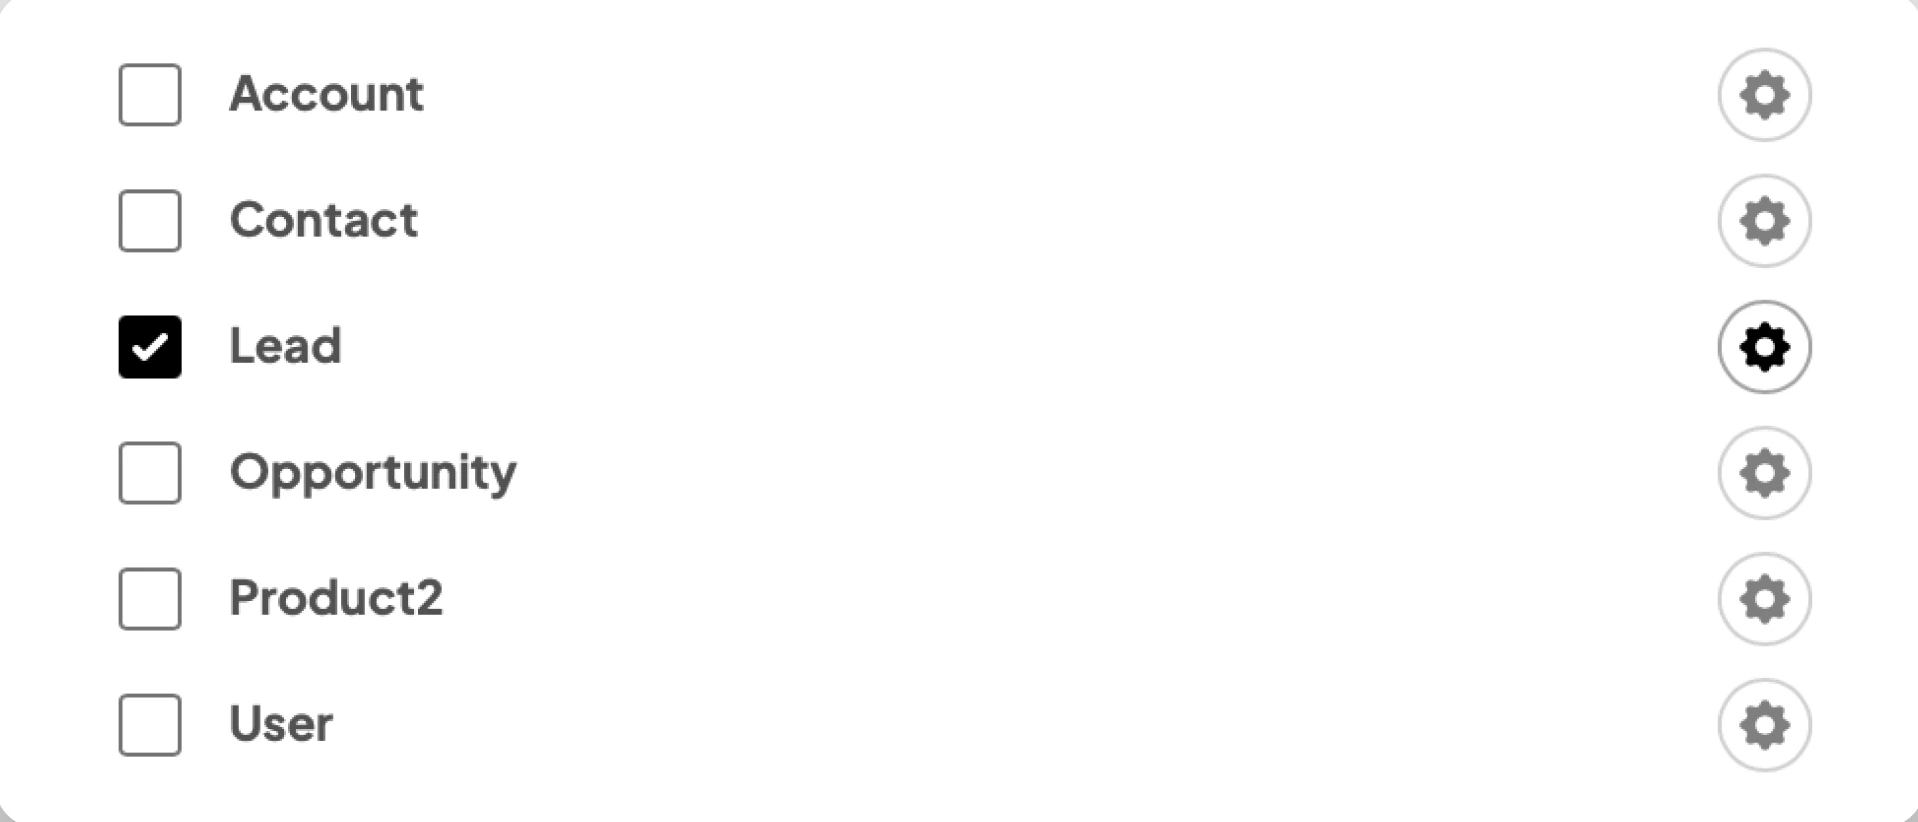
- In the Destination section, you can connect to your Postgres database. Or, for the purposes of this tutorial, spin up a Sequin demo database by selecting New Sequin Database.
- When everything is configured, click Create. Sequin will now start backfilling all your Salesforce leads to Postgres and maintain a real-time sync.
Retool Resource Setup
Sequin uses a Postgres Proxy to interface with your Sequin-synced Salesforce tables. The Proxy lets Sequin capture inserts, updates, and deletes you make in your database and commit them to Salesforce. To add Sequin’s Postgres Proxy as a Retool resource, you can treat it as a regular Postgres resource and enter the connection details in the resource configuration:- In a new tab, log into Retool. In the top menu bar click Resources and then the blue Create New button.
- Select Postgres from the list of resource types.
-
Enter the name for your resource (i.e. “Salesforce Database”) and then enter the
Host,Port,Database name,Database username, andPasswordfor your Sequin Proxy. You can copy and paste these from Sequin. Then click the blue Create resource button: - Retool will confirm that your resource was created. Click Back to resources for now.
Retool App Setup
With Salesforce successfully connected to Retool using Sequin, you are ready to build an app that allows your sales team to quickly qualify leads. First, get the app set up in Retool.-
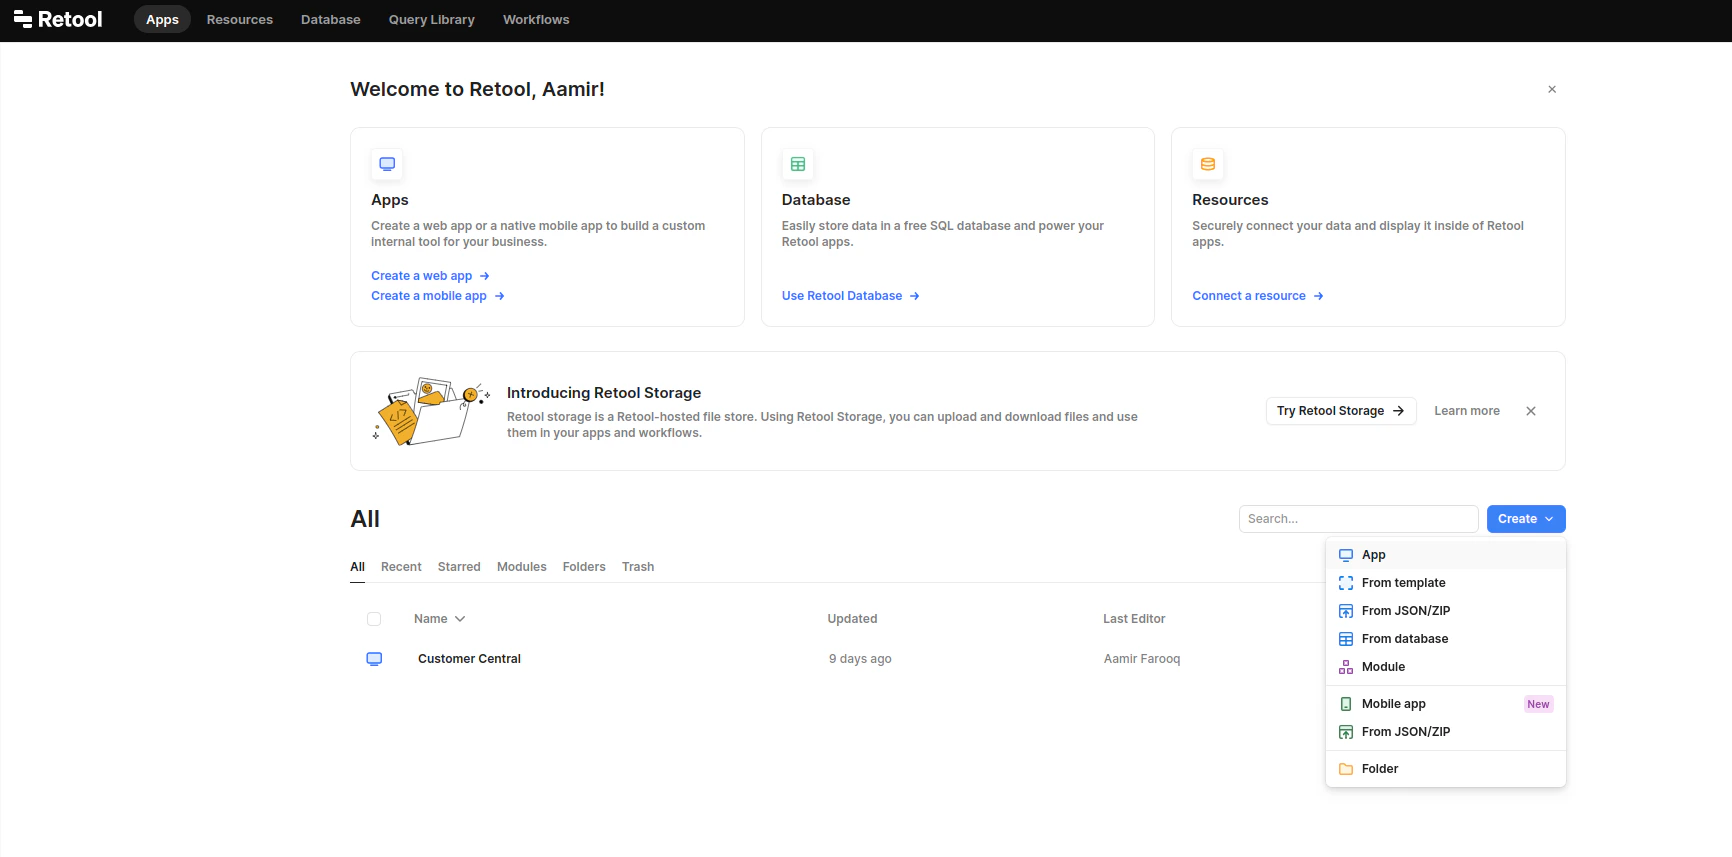
On the Retool home page, click the blue Create new button and select App:
- Give your app a name. Something like Inbound Qualifier will work just fine and then click Create app.
-
You’ll now see a blank Retool app in edit mode. To start building the app, drag and drop a text field into the header. Then, in the inspector panel on the right, enter
# Inbound Qualifieras the value to give your app a nice H1 header:
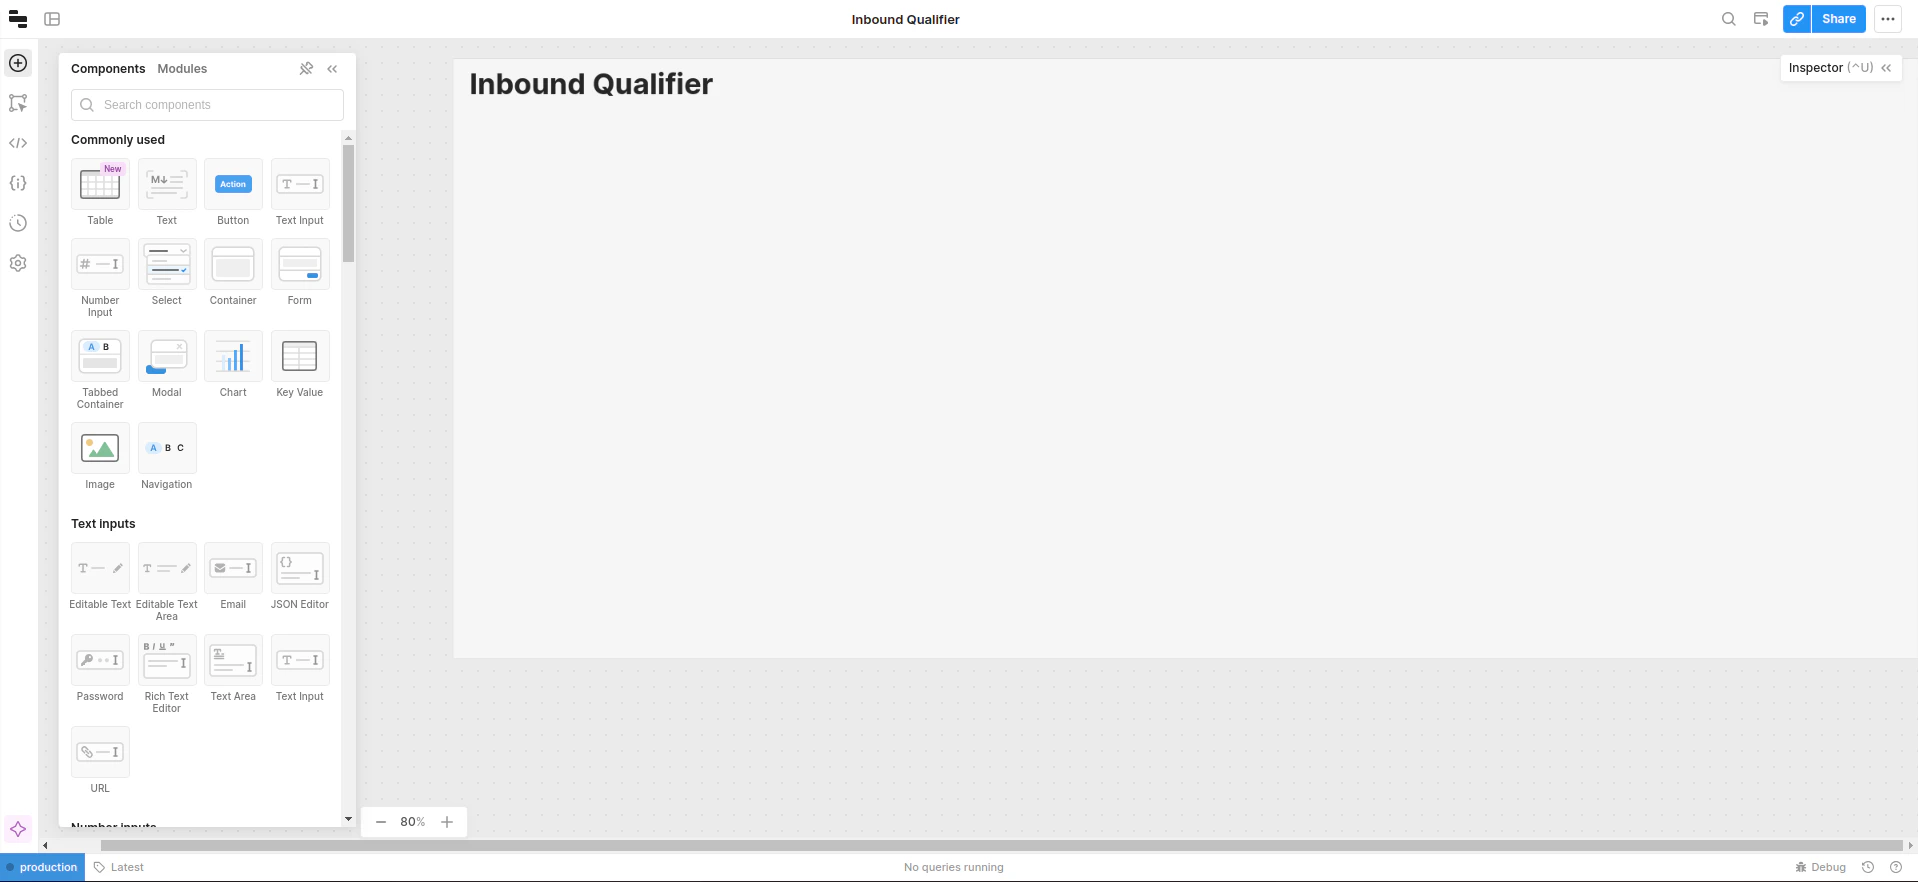
- Drag and drop the visual components into your app.
- Configure the data and interactions for the component.
- Polish the UI of the component.
Searchable leads
You are now ready to build the core functionality of your app, starting with a searchable table that shows new leads.Scaffold the UI
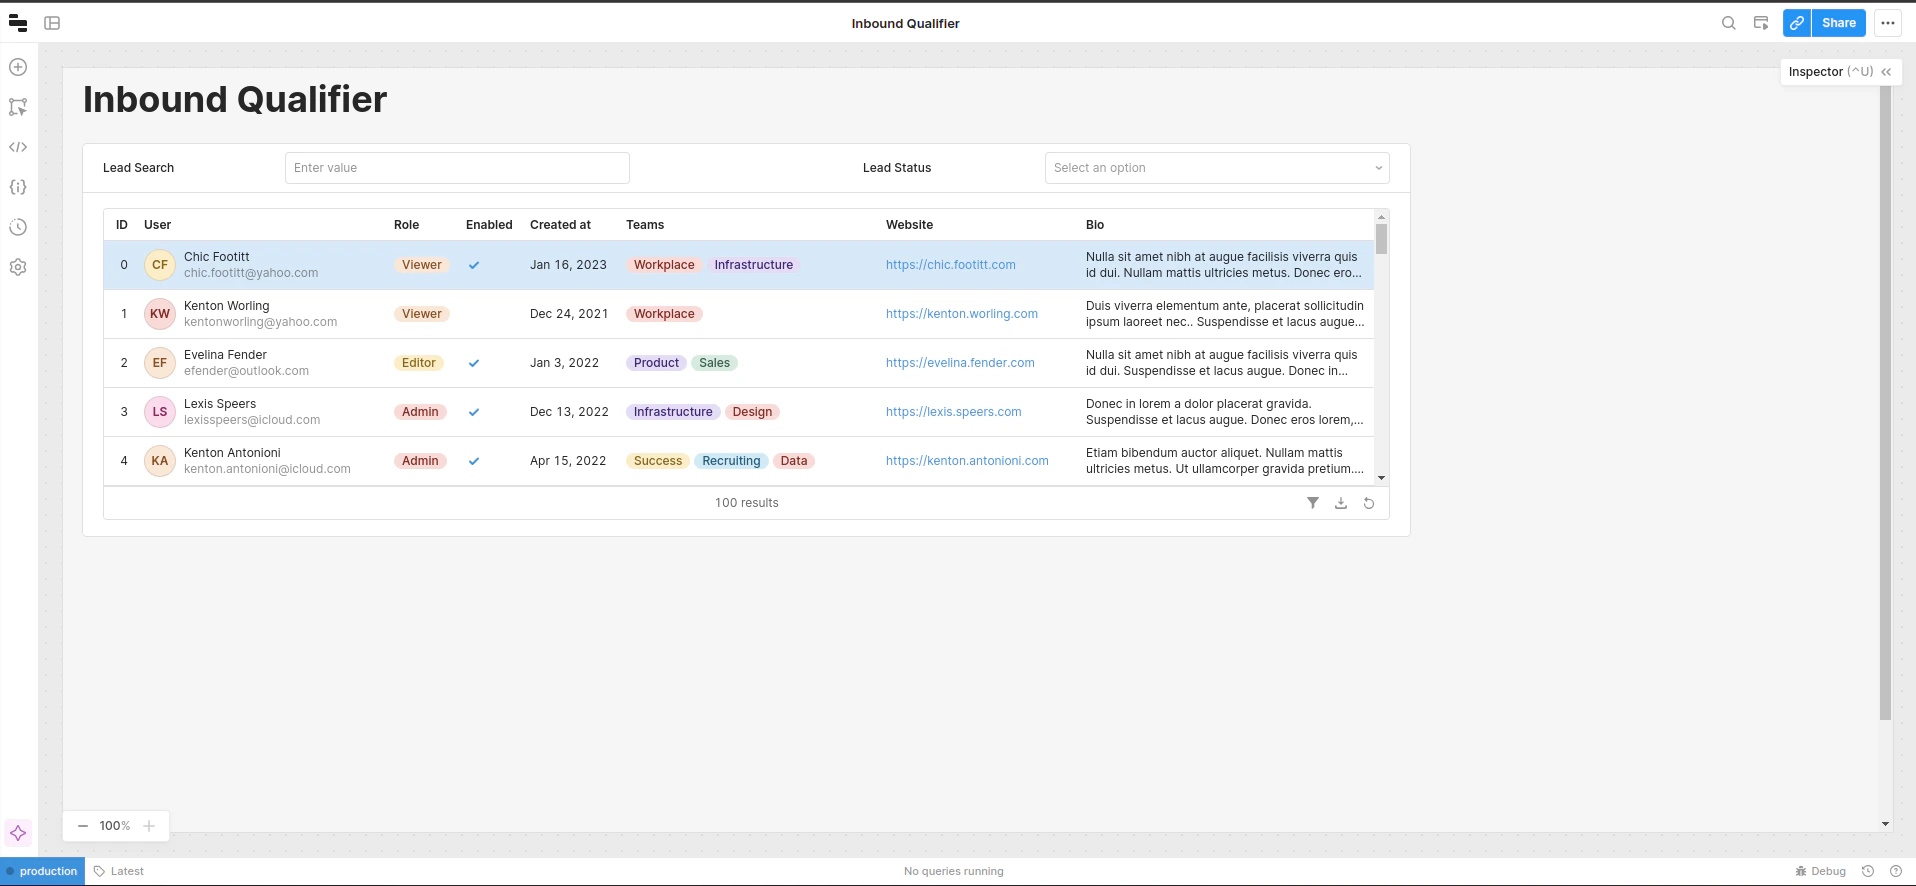
You’ll start by dragging and dropping the components you need for this section of the app onto the canvas:- Drag and drop a Container component to the top left corner of the canvas. Resize it to a width of about 9 columns.
- Drag and drop a Table component into the main section of the container you just created.
- Delete the text in the header of the container. In its place, drag over a Text input component. This will serve as the search bar — so in the inspector on the right, change the label for this component to
Lead Search. - To finish this section of the UI, drag and drop a Multi-select input component into the top right of the container on the canvas. This will allow your sales team to filter the leads by status. So in the inspector, change the Label for this component to
Lead Status.
Connect your leads
To add the underlying Salesforce leads to your app, you’ll query your Sequin database using SQL. To step into this paradigm, you’ll first query for the data you need and then expand your query to add search and filtering.-
Click the Code icon (i.e.
</Frame>) in the left toolbar and create a new resource query. The resource query editor will open at the bottom of the canvas. For the resource, select Sequin Postgres resource you created earlier. Enter the SQL statement below: -
When you click the Preview button you’ll see that this query pulls in the fields your sales team needs to evaluate a lead, including the custom
LinkedInfield you created earlier: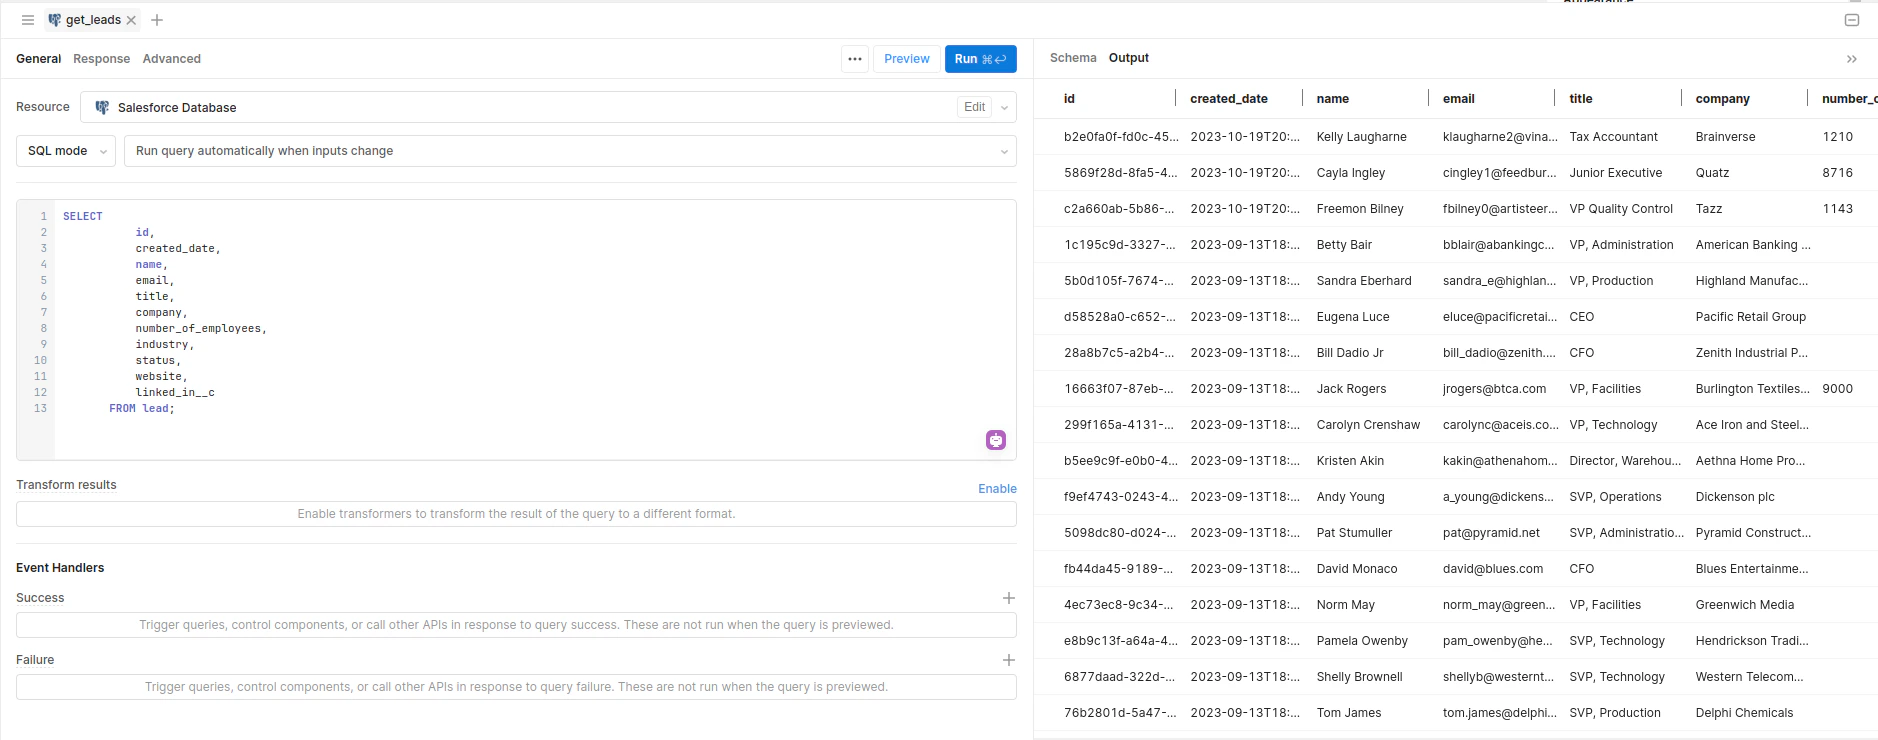
-
This query looks good for now, so click the Save & Run button and then name the query
get_leadsby clicking and editing the name of the query. -
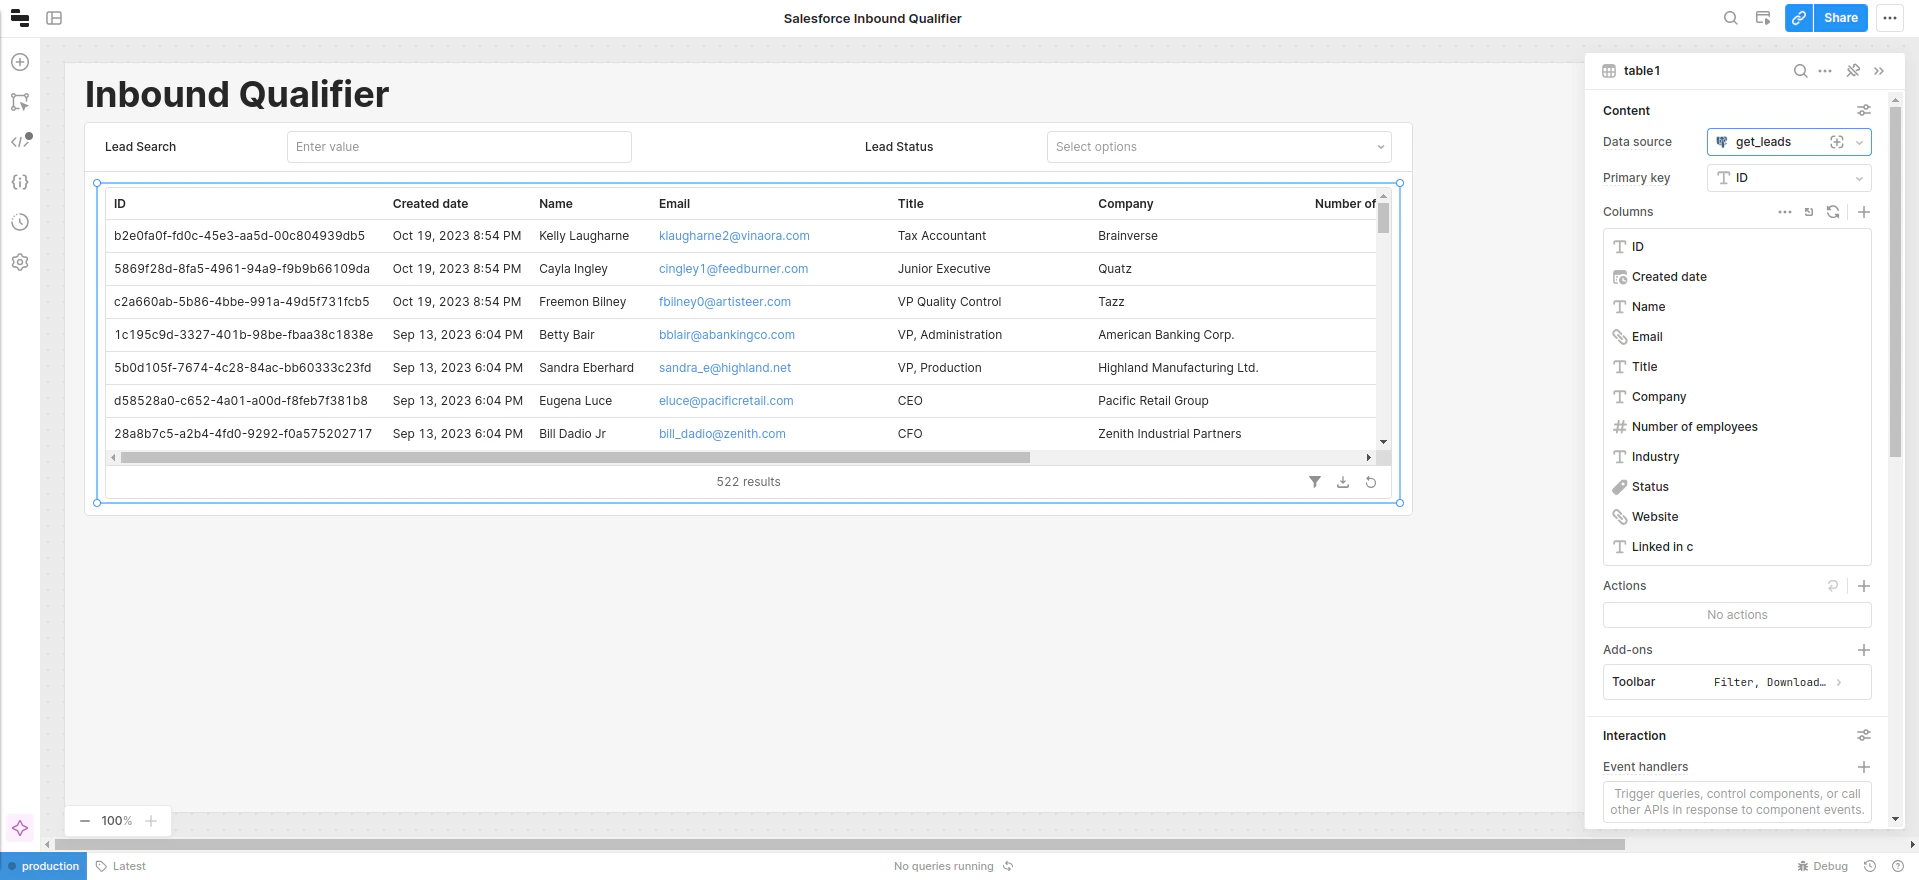
To connect the data from the
get_leadsquery you just created to the table component in your app, select the table in the canvas to open the inspector, and in the Data source field selectget_leads. -
You’ll see the data from your query populate the table:
get_leads query.
-
First, add search to your app by opening up your
get_leadsquery in the bottom drawer panel and add the followingWHEREclause:ThisWHEREclause is performing two actions:- First, it checks if there is a value in the text input (i.e.
textInput1.value). If there is nothing in the text input, then nothing happens. The double brackets indicate that you’re using Javascript in the query. - If there is text in the text input, then it uses Postgres
iliketo search across your lead’s names, emails, and companies.
- First, it checks if there is a value in the text input (i.e.
-
Next, add filtering to your app by adding one additional statement to your
WHEREclause:Like the priorWHEREstatement, this one also checks to see if there are any filters in themultiselectinput. If there are no values (i.e. the array is empty) then nothing happens. If there are filter values in themultiselect, then the query is filtered to just the leads with those specific statuses. -
Click the Save & Run button and you’ll now see that when you search for a name, email, or company, the table immediately responds. But, your
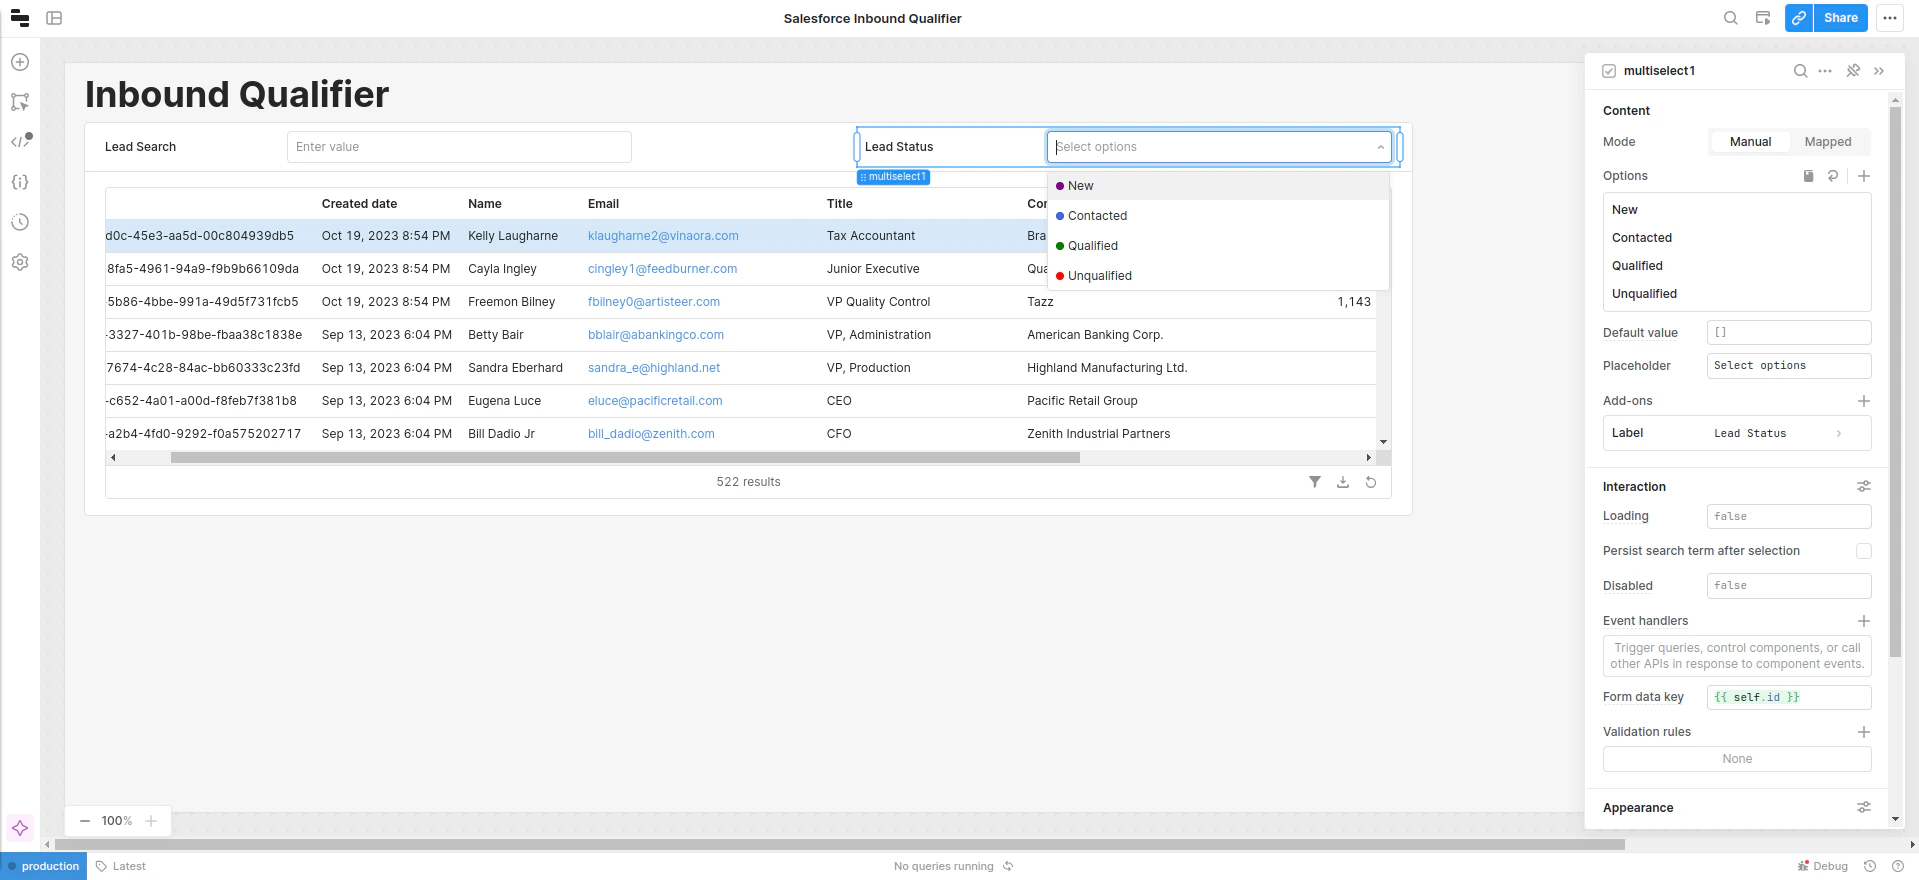
multiselectisn’t configured yet. To fix this, select yourmultiselectcomponent in the canvas andopen the. Configure the options to match the statuses in Salesforce:Value Label Color New New ”Purple” Contacted Contacted ”RoyalBlue” Qualified Qualified ”Green” Unqualified Unqualified ”Red”
Polish the table
As a last step, clean up your table and interface to make it easy to use.- Select the table in the canvas and open the right panel.
-
Simplify the table by removing data that is helpful to the app, but not to your sales team. In this case, you can hide the
email,website,linked_in__c, andidcolumns from the table by clicking the eye icon in the inspector. -
Next, name and format each column in your table by selecting each column in the inspector, changing the name, and setting the data type. For instance, edit the
created_datecolumn so the Column title is nowSign up, and the Column type isDate Time: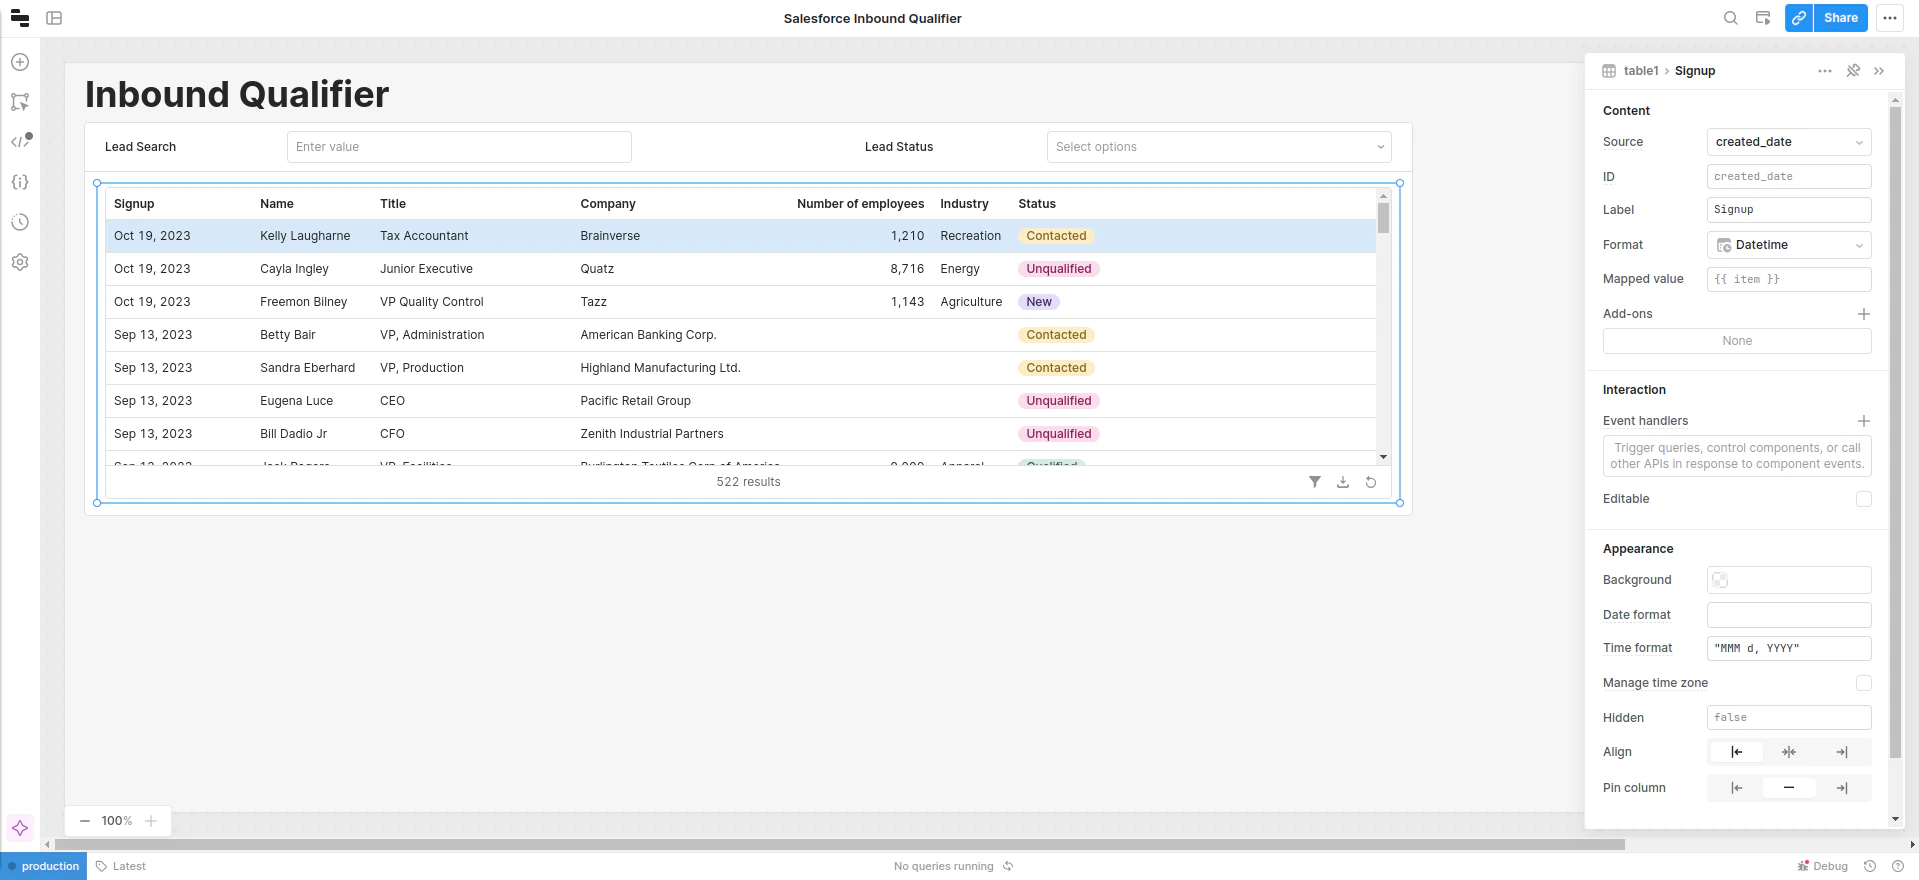
-
Finally, make the
statuscolumn standout. It’s the key field your sales team will be working with the most. To make it pop, select thestatuscolumn, change the Column title toStatus, change the Column type toTag, uncheck Assign tag colors automatically and then in the Color enter the following:This will make the color of each status tag match the colors you used in themultiselectfilter. Nice!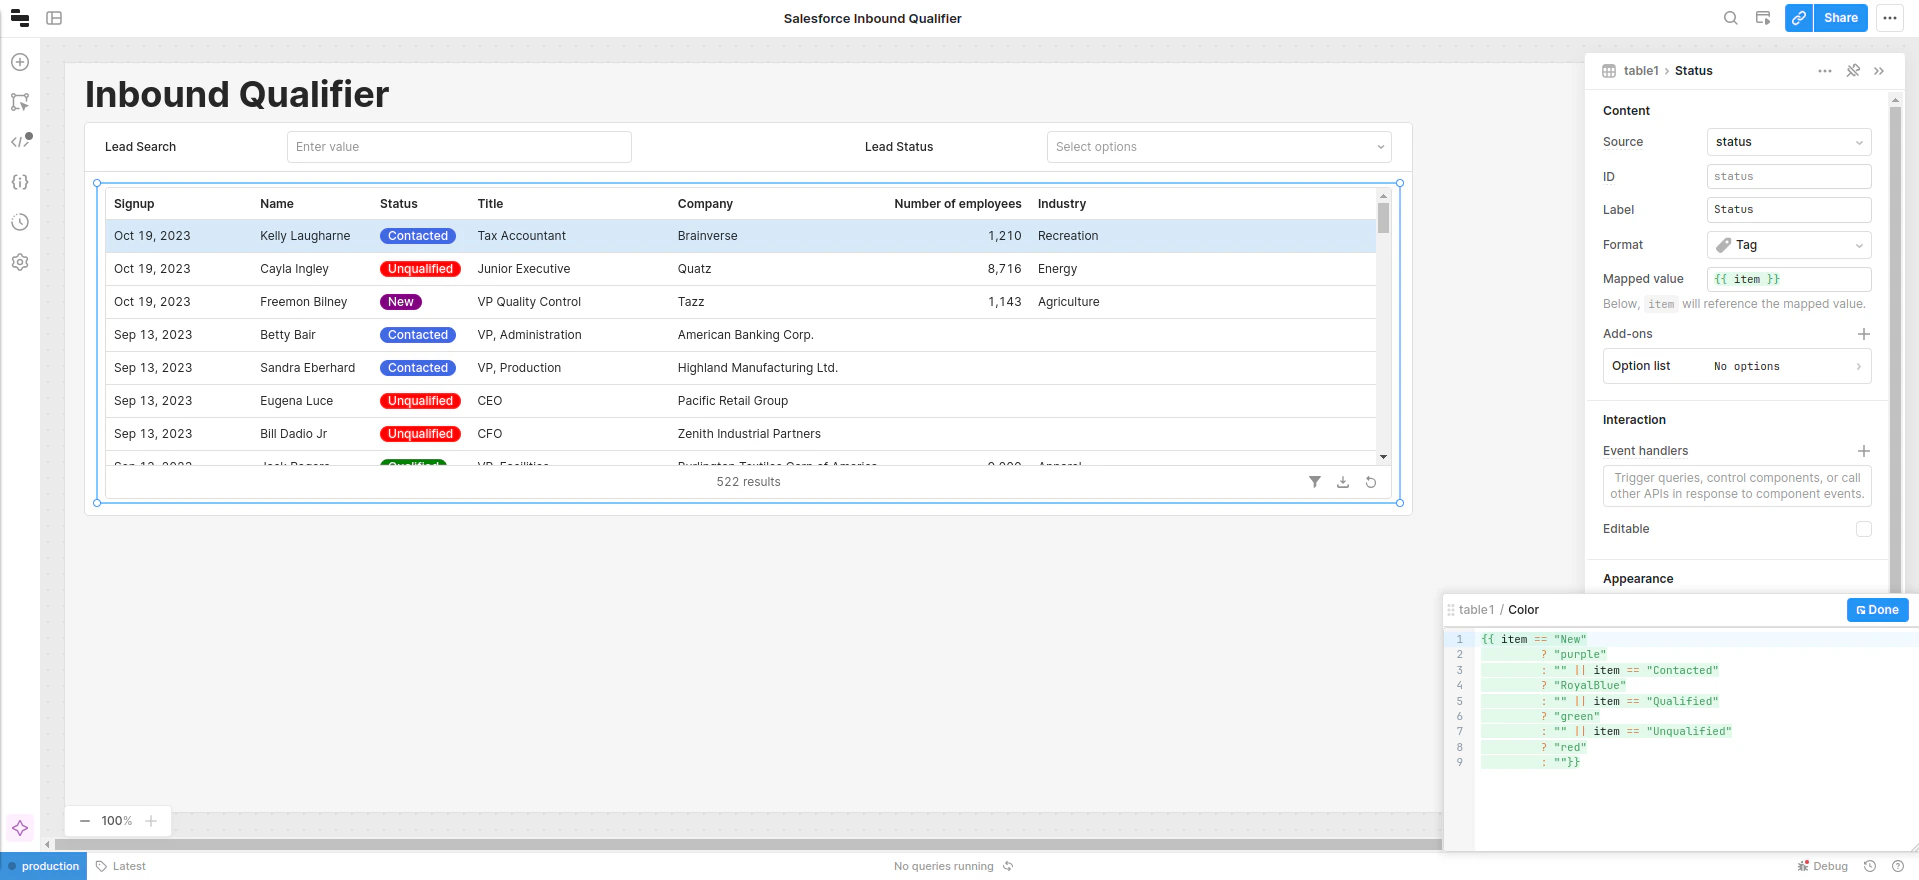
Enrich leads
As your sales team finds and selects a lead in the table, you’ll show the details of the lead on the right. Here, the sales person will be able to research the lead with a click and then edit the lead’s details based on what they learn.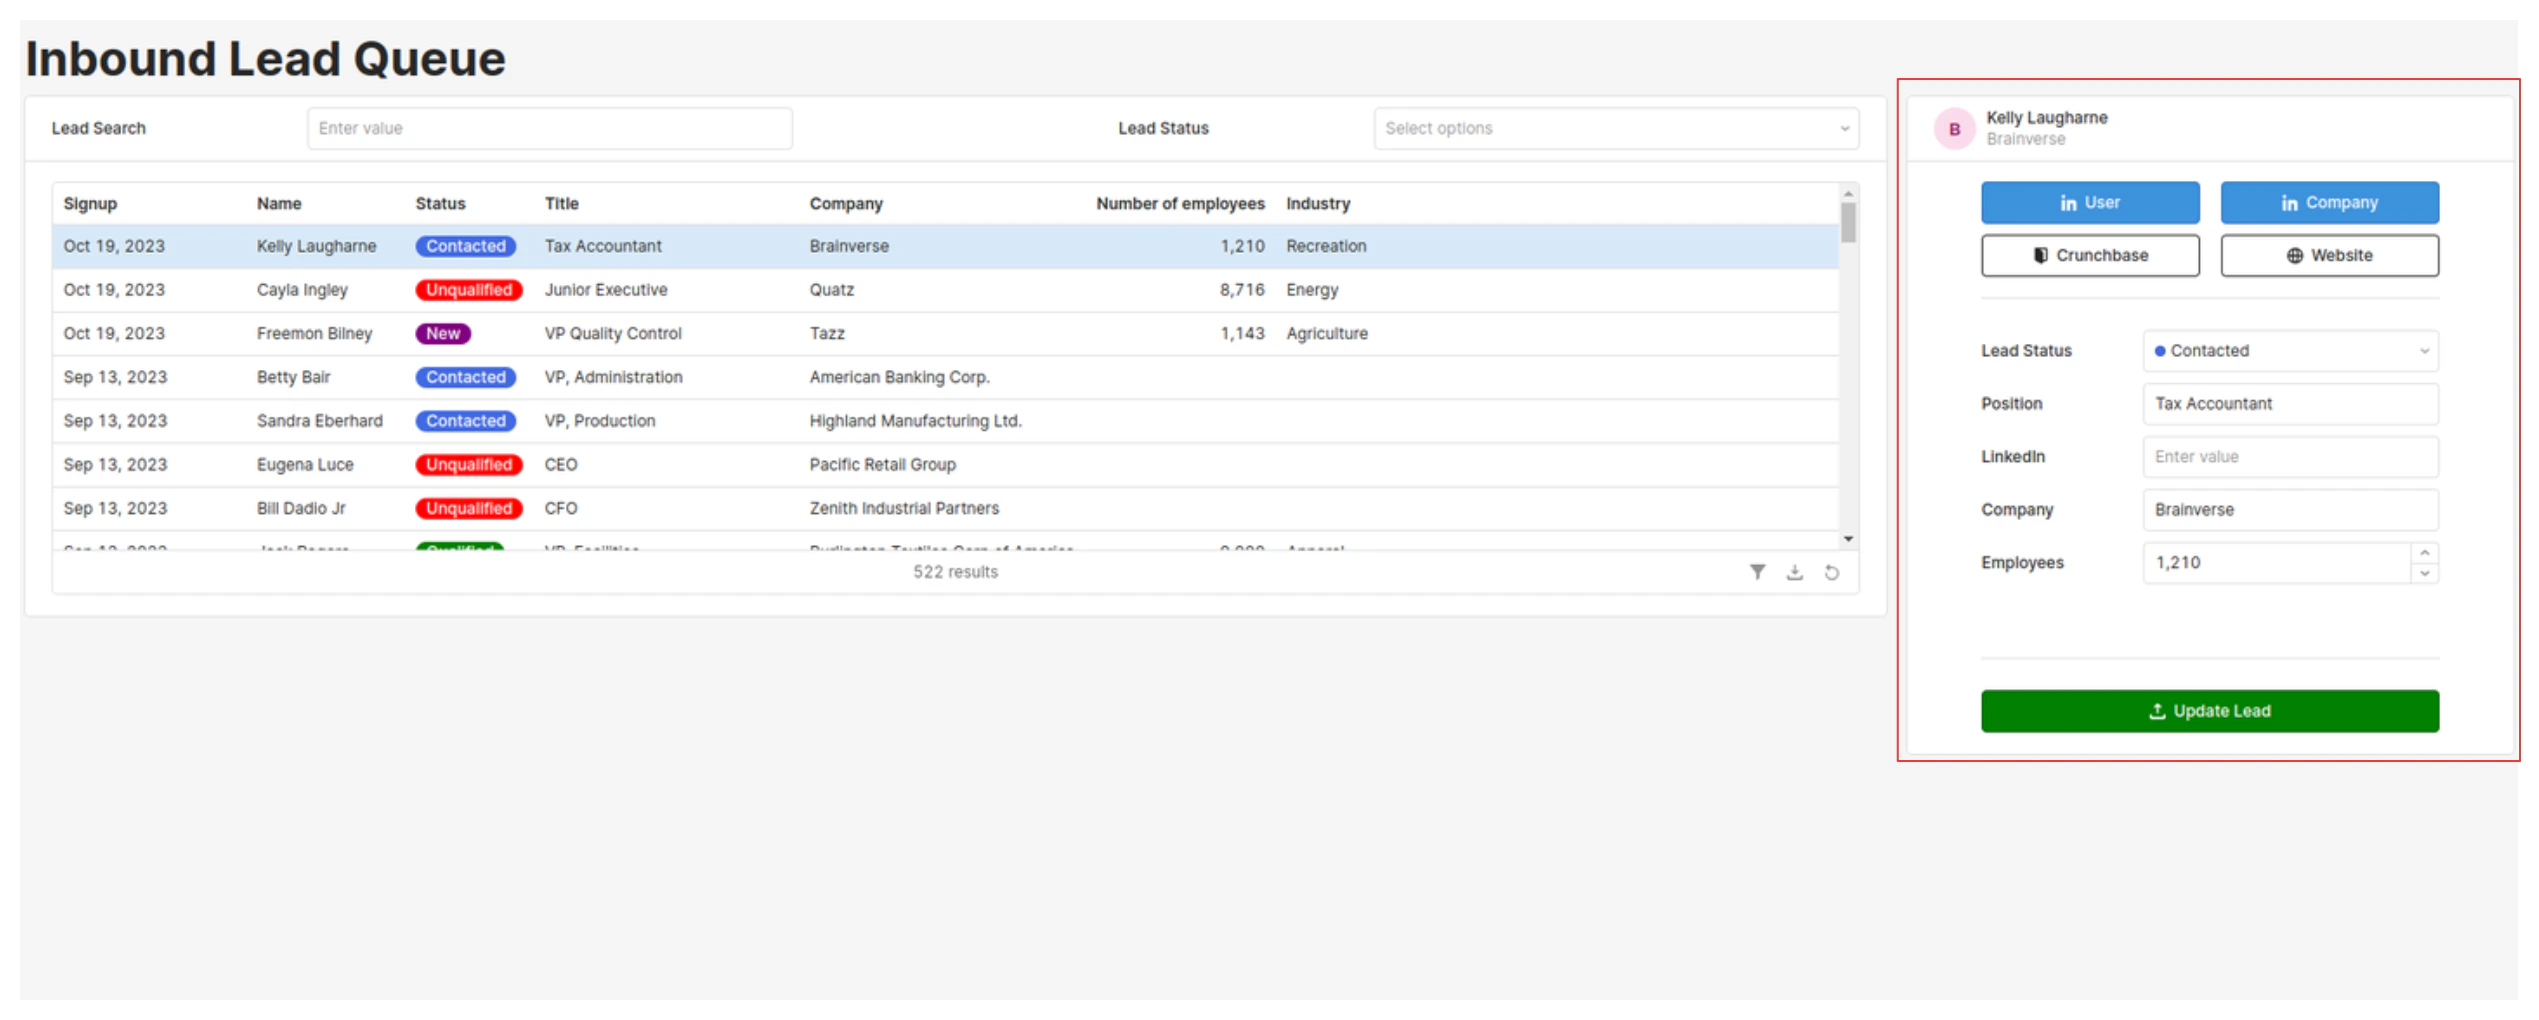
Scaffold the UI
This section of the app is a form that is populated with data from the selected lead in the table. As before, start by getting the component parts of this section onto the canvas:- Drag and drop a Container component next to the table. As before, delete the container title and in it’s place drag and drop an Avatar component.
-
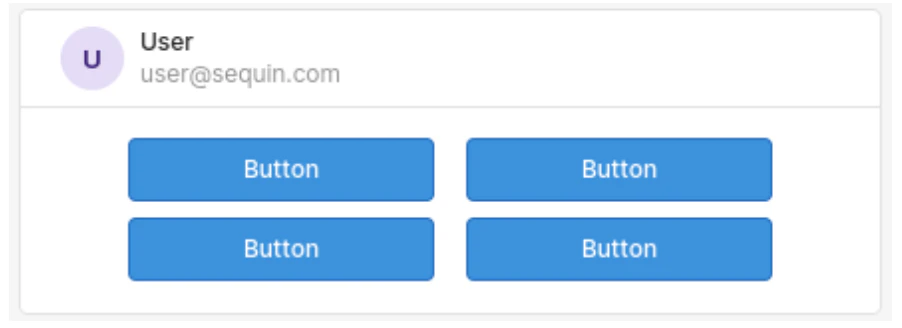
Next, create the quick link buttons by dragging and dropping four Button components into the container. At this point, this section of the app will look something like this:
-
Now, you’ll add the editable inputs starting with Lead Status. Since you’ve already configured the Lead Status
multiselectcomponent in your table container, you can just duplicate that component to jump start this section of the app. To do so, right-click the Lead Status component and click Duplicate. Drag the duplicated component into your new container. You only need a single select component here (since a lead can only ever have one status). So change this component to a simpleselectcomponent by clicking the three dots in the top right corner of the inspector, selecting Switch component, and picking the Select component: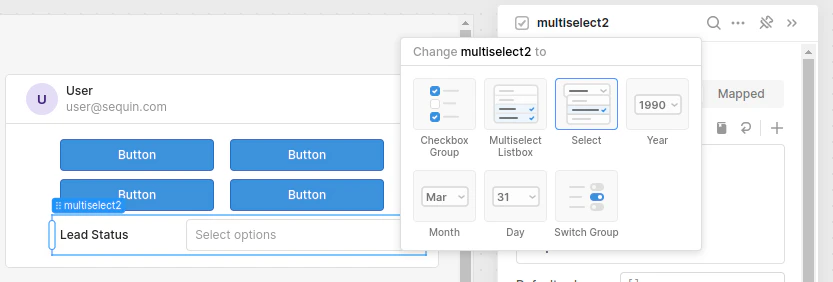
-
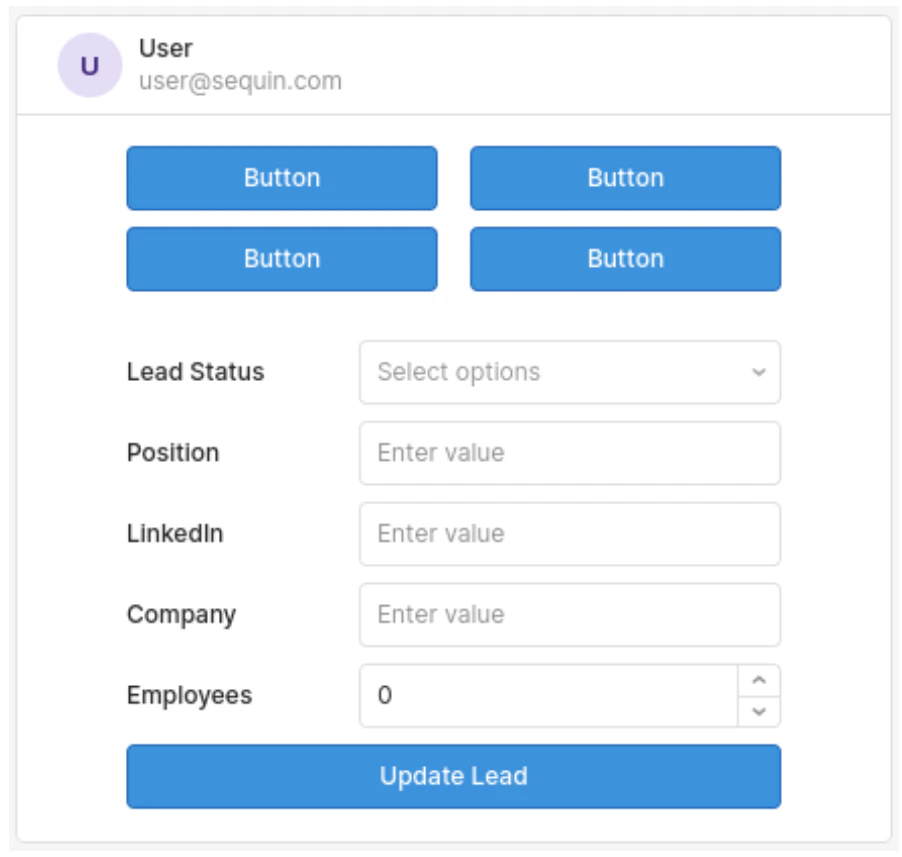
Next, drag and drop three Text Input components, one Number Input component, and one more Button component onto the canvas. Change the labels on each component so this section of your app looks like this:
Connect the data
You’ll connect data to this section of your app in three phases. First, you’ll want to populate the avatar and text input components with the details (eg. name, title, etc.) of the lead selected in the table. Next, you’ll configure the quick link buttons. And finally, you’ll make the form work by connecting the Update Lead button to a query that updates your Sequin database and Salesforce simultaneously.Populate the fields
-
Select the Avatar component. In the inspector, set the Label field to
{{table1.selectedRow.name}}. This pulls in the name from the selected lead in your table. For the Caption pull in the lead’s company by entering{{table1.selectedRow.company}}. Then, to make the avatar look nice, set the Fallback text field to{{table1.selectedRow.company}}. -
Next, select the Lead Status component and set the Default Value to
{{table1.selectedRow.status}}. Repeat this process for the remaining Text input and Number input fields:Field Default Value Position {{table1.selectedRow.title}}LinkedIn {{table1.selectedRow.linked_in__c}}Company {{table1.selectedRow.company}}Employees {{table1.selectedRow.number_of_employees}}
Configure the quick link buttons
You’ll now configure each Button so that your sales team can quickly research the lead by searching LinkedIn, Crunchbase, and the lead’s website.-
Select the top left button and change the Text to
user. Then, configure the button’s action by adding an Event handler. Click the + Add link and in the modal set the Action to Go to URL. For the URL enter:{{"https://www.linkedin.com/search/results/companies/?keywords=" + table1.selectedRow.name}}This URL is configured to pass in the selected lead’s name as a search parameter to LinkedIn, saving the sales team multiple clicks. Nifty!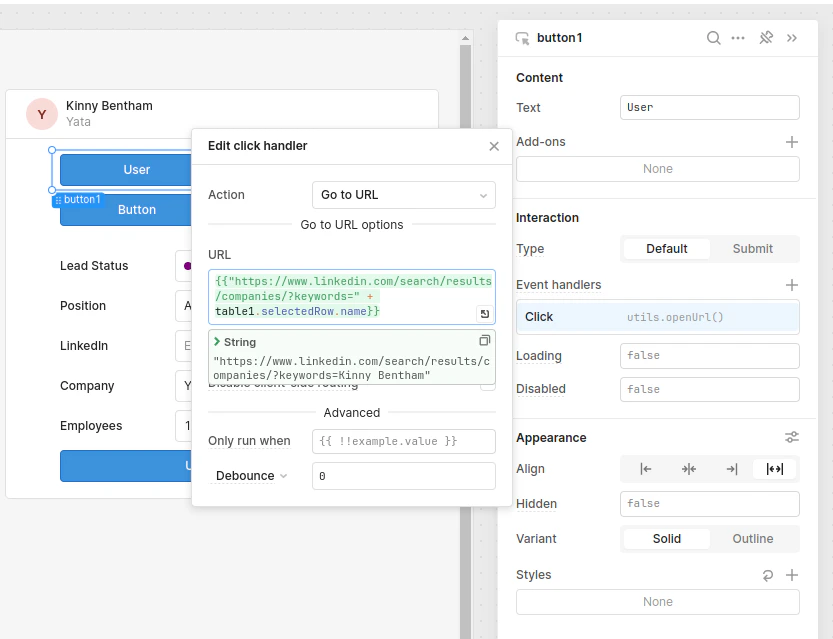
-
Repeat the steps above to configure the remaining buttons:
Button Text URL Company {{"https://www.linkedin.com/search/results/companies/?keywords=" + table1.selectedRow.company}}Crunchbase {{"https://www.crunchbase.com/textsearch?q=" + table1.selectedRow.company}}Website {{table1.selectedRow.website}}
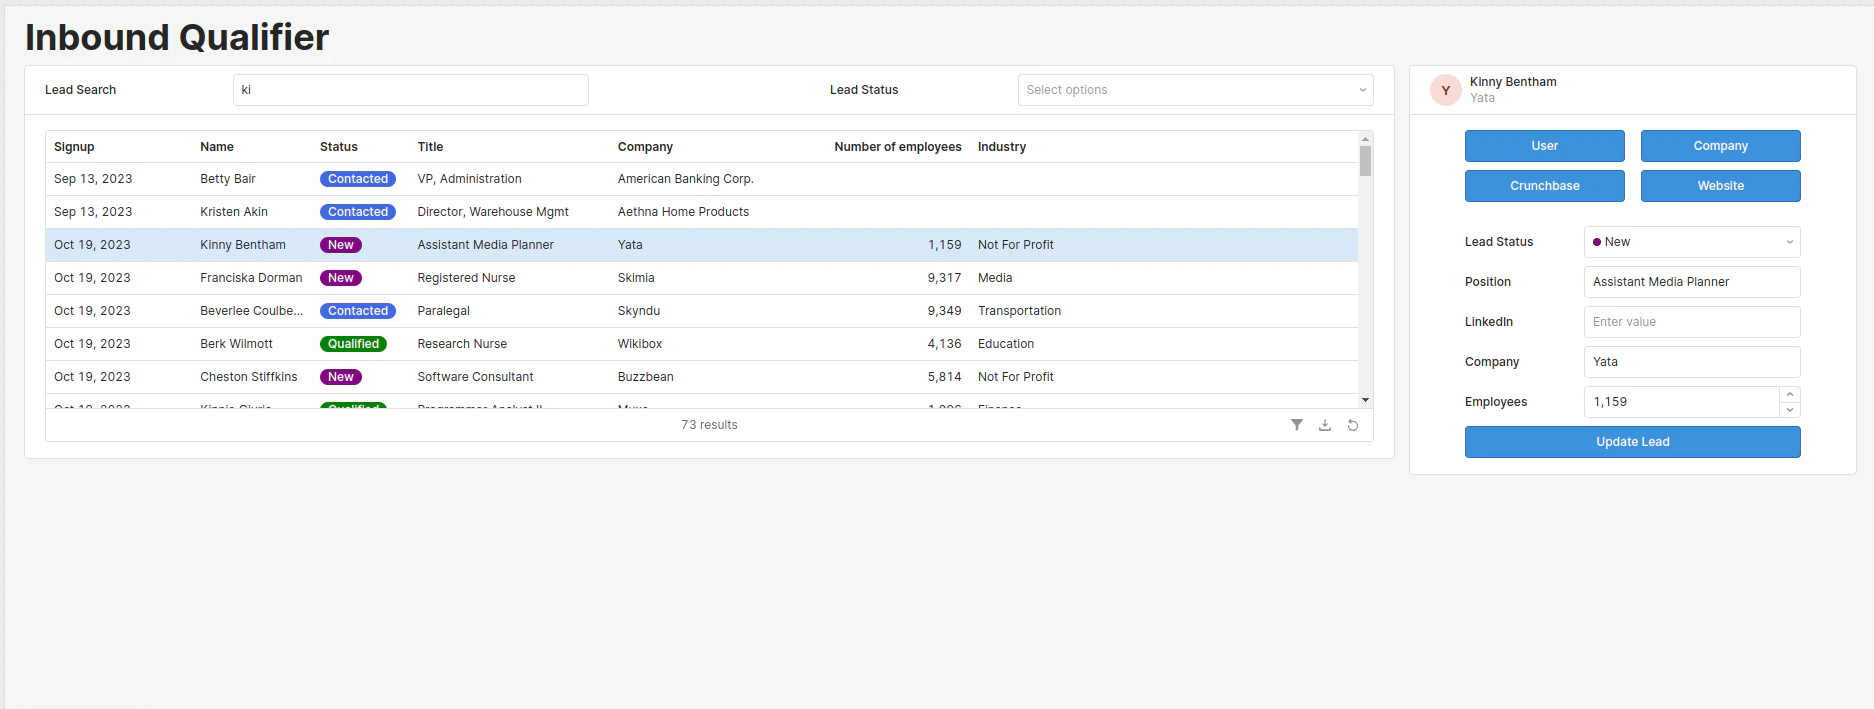
Connect the form
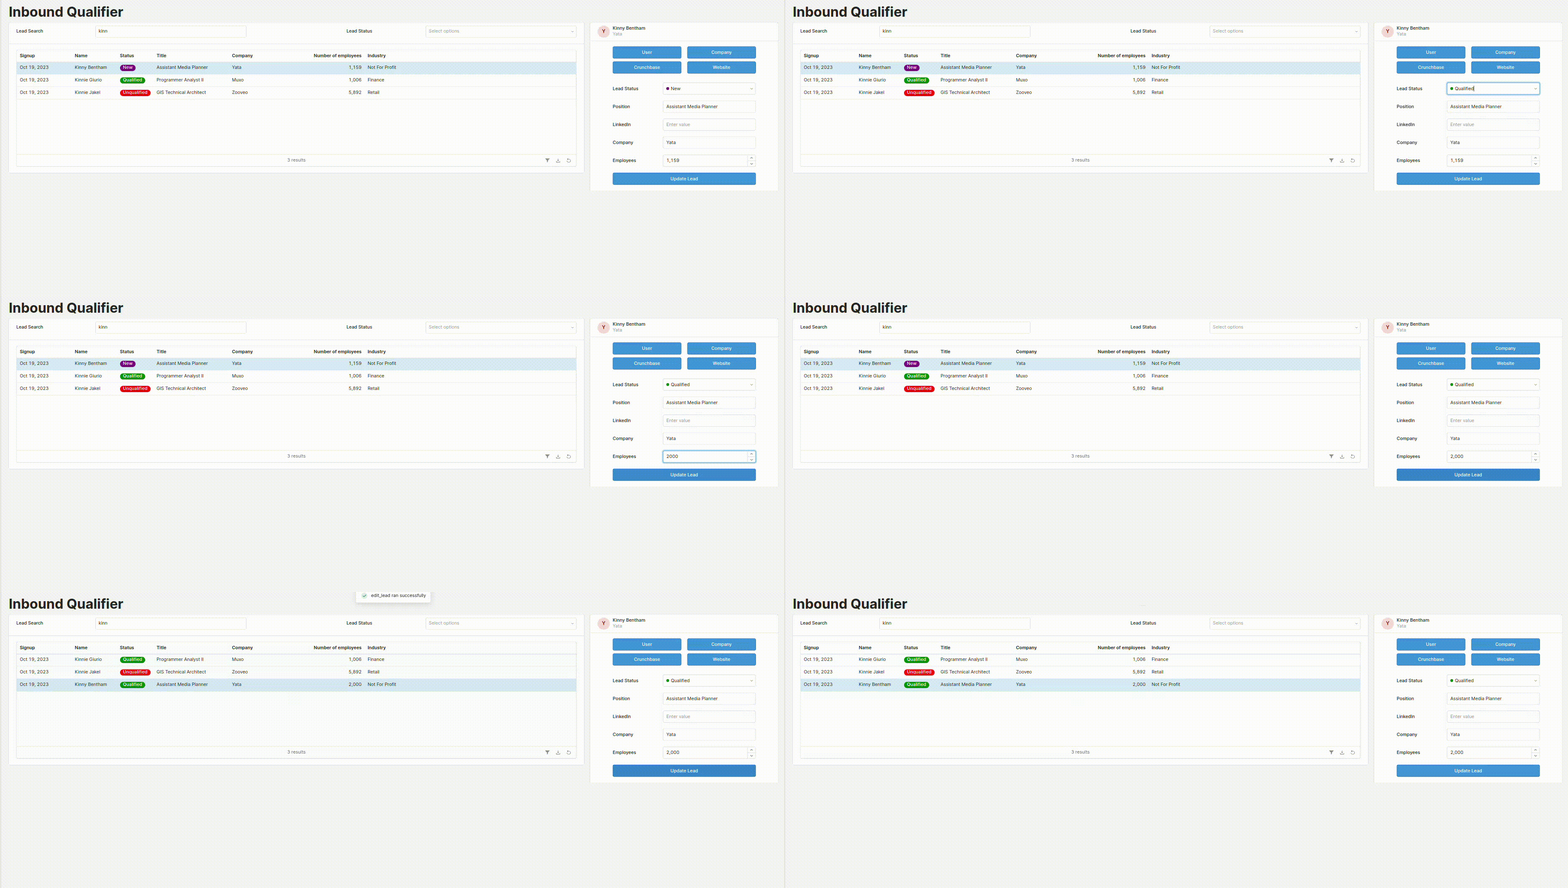
As the sales team learns about the lead, they’ll add a LinkedIn profile URL and enrich the leads details. When they are done, they’ll click the Update Lead button to push those changes back to Salesforce using the Sequin Proxy.- Open the query editor by clicking the Code button (i.e.
</Frame>) in the left rail and clicking the + button. In bottom panel select your Sequin Postgres resource. - Now, you’ll create the udpate query. For simplicity, use the GUI mode and configure the query as follows:
- Table:
lead. - Action type:
Update an existing record. - Filter by:
id = {{table1.selectedRow.contactid}}. - Changeset:
- status:
{{multiselect2.value}} - title:
{{textInput2.value}} - linked_in__c:
{{textInput3.value}} - company:
{{textInput4.value}} - number_of_employees:
{{numberInput1.value}}
- status:
- Table:
- After you update a lead, you’ll want to refresh the data in your app. So in the Event handlers section of your query, click to + Add an
on successevent handler that will trigger theget_leadsquery. - When you are done, click save and name the query
edit_lead: - As a last step, connect this query to the Update Lead button in your app by selecting the button in the canvas, opening the inspector on the right, clicking to + Add an event handler, and setting the Action to
Control query. Set the Query toedit_lead.
Polish
You now have a functioning app the reads and writes data to Salesforce. To make it more usable, polish this component by changing the button colors, adding icons, and spacing out components. Here is one approach you can take: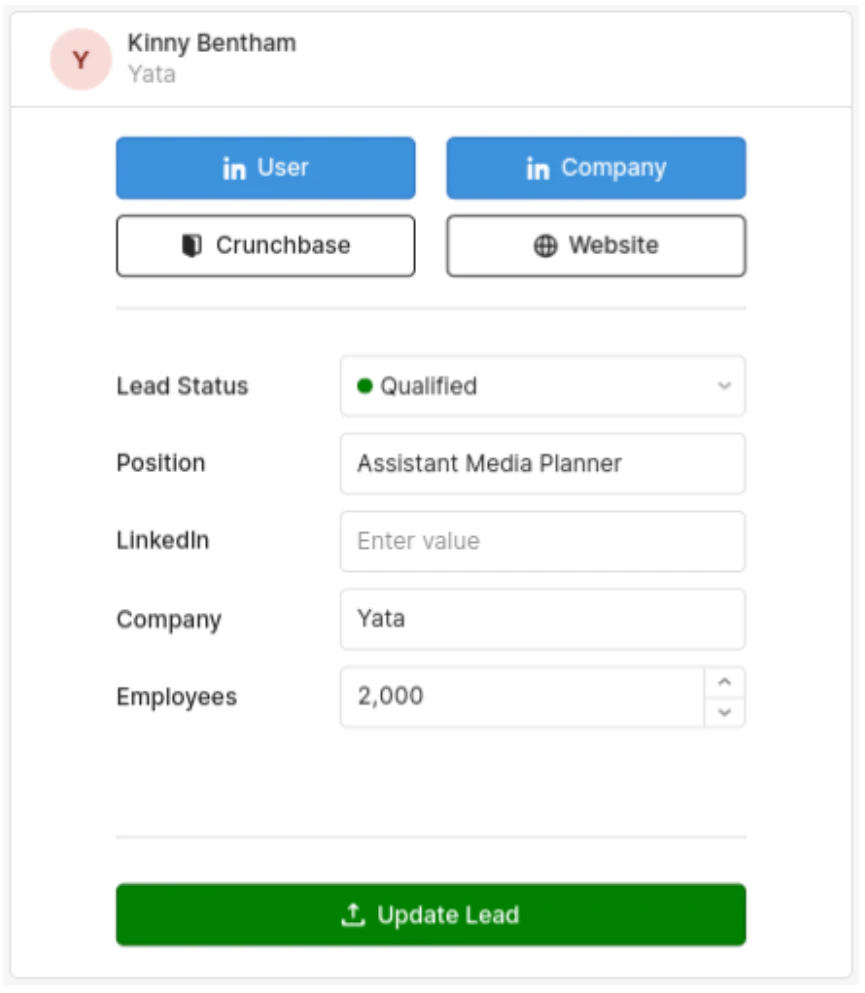
- Add icons to the buttons and fields by selecting the button, opening the inspector, clicking Add-ons and setting Prefix icons.
- Change the colors of the buttons. In the inspector, make the save button green and help the user navigate by making styling the buttons.
- Drag and drop divider components to help space our the information.
Bulk actions
One thing that is particularly hard to do in Salesforce that is easy to do with Sequin and Retool is allow your sales team to quickly edit multiple leads at once. For example, your team might qualify 5 new leads because they all come from the same company. Save your team the clicks by letting them just update the fields in your leads table. Here is how:-
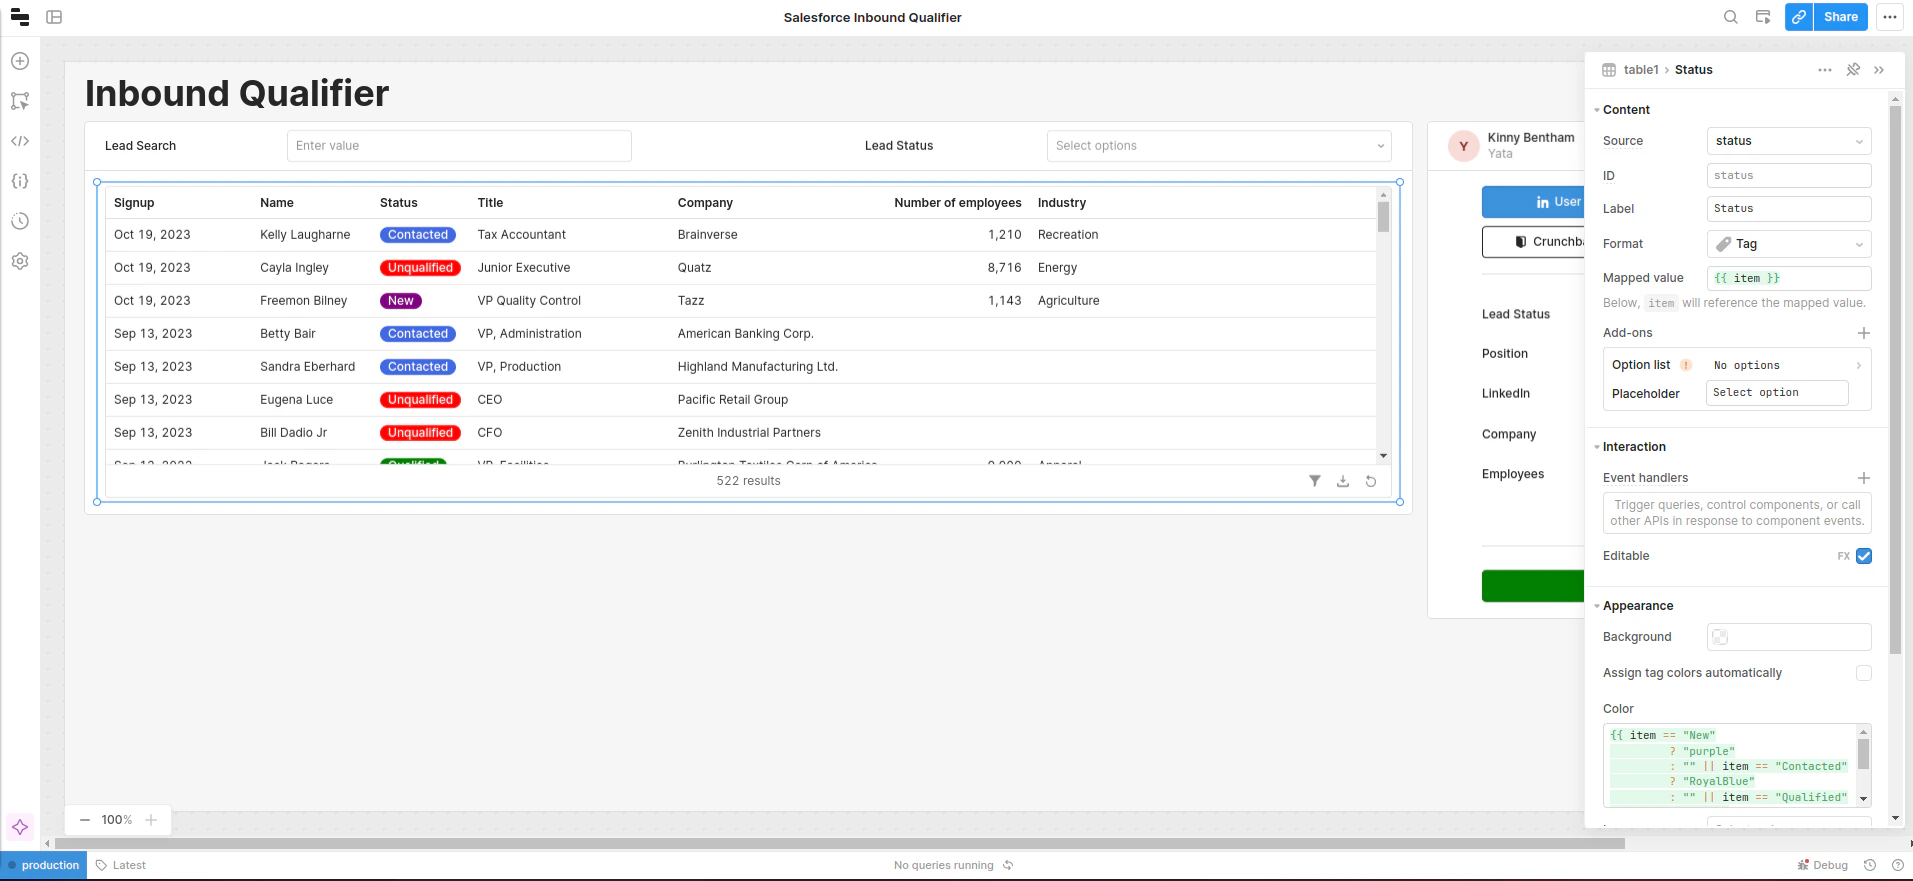
First, make the Status field in your table editable. Select the table on the canvas, open the inspector in the right panel, and then click the three dots … next to the Status column and select Editable.
-
Now the the Status field can be edited in the table, you need to define the status options (just as you did before in with the filter and form). To do so, click on the
statuscolumn in the inspector. In the Add-on section, click Option list. Then manually define the four options:- New
- Contacted
- Qualified
- Unqualified
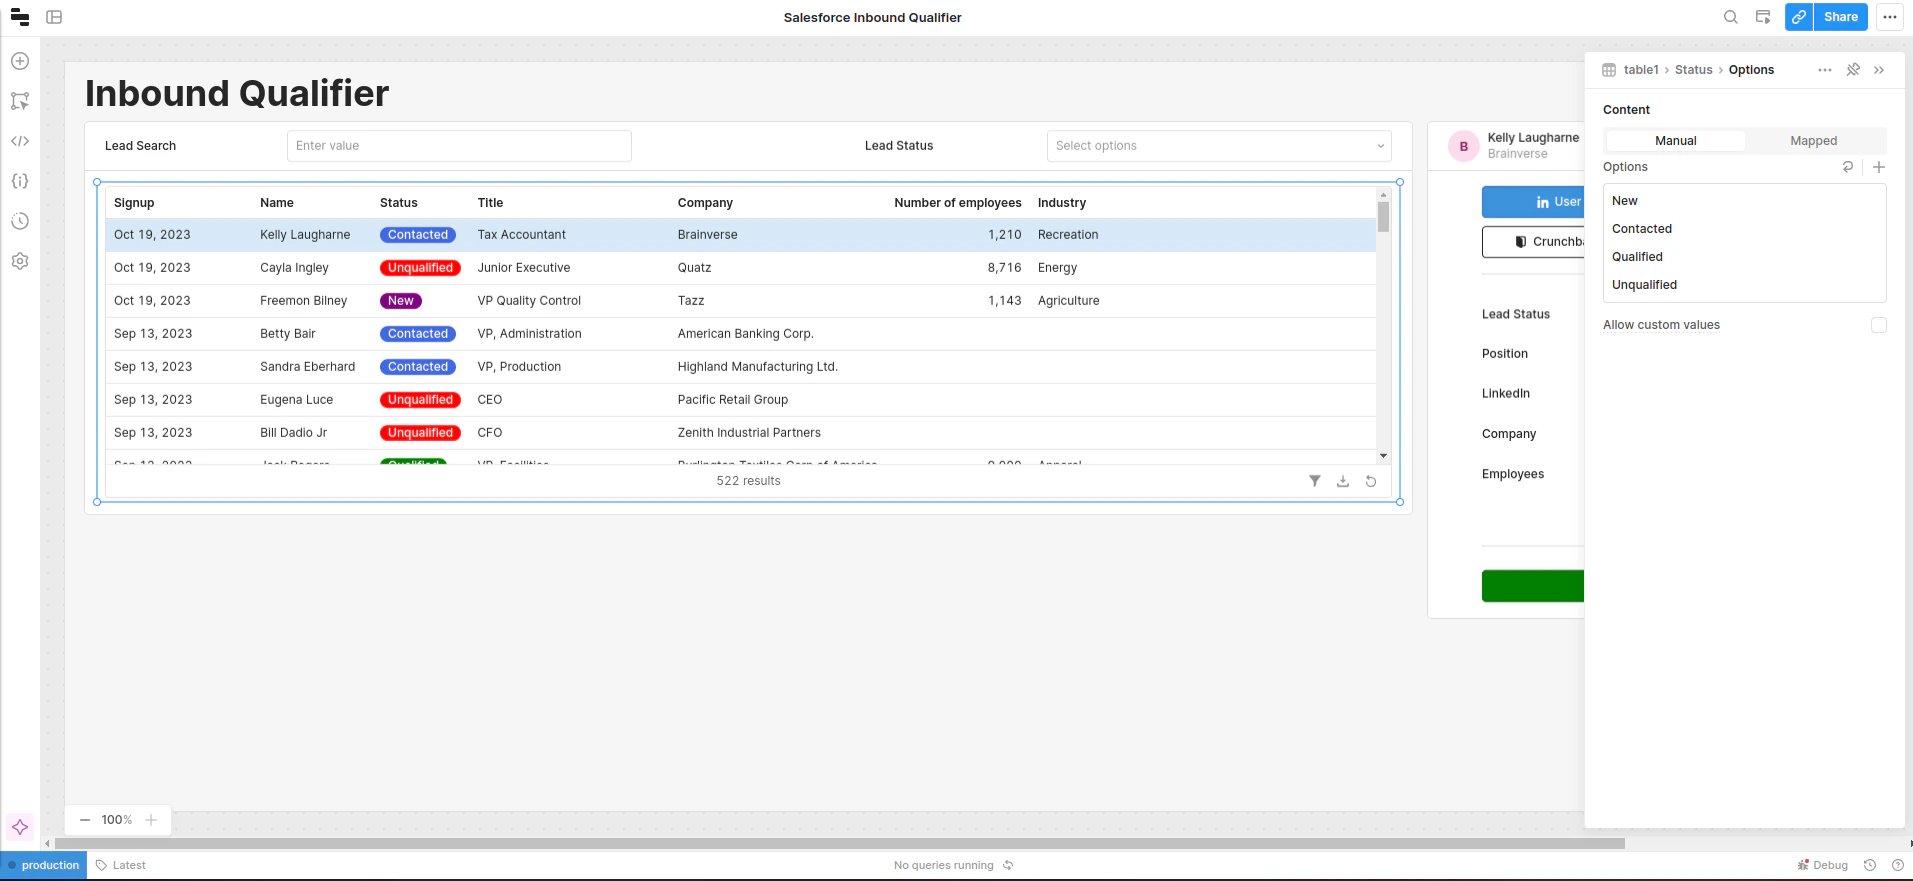
-
As the sales team changes the status of multiple leads, you’ll want to save these changes back to Salesforce. To do so, create a new query in the bottom panel with the following configuration:
- Resource -
Salesforce Database - Table -
lead - Action type -
Bulk update via primary key - Primary key column -
id - Array of records to update -
{{table1.changesetArray.map(l => ({"id":l.id,"status":l.status}))}} - Event handler: Success -
Trigger get_leads
idfrom the array of objects intable1.changesetArray, find the records that match theidin yourSalesforce Database, and thenUPDATEthestatusfield in those records. Click to Save your query and name itbulk_edit_lead_statusin the query list on the left.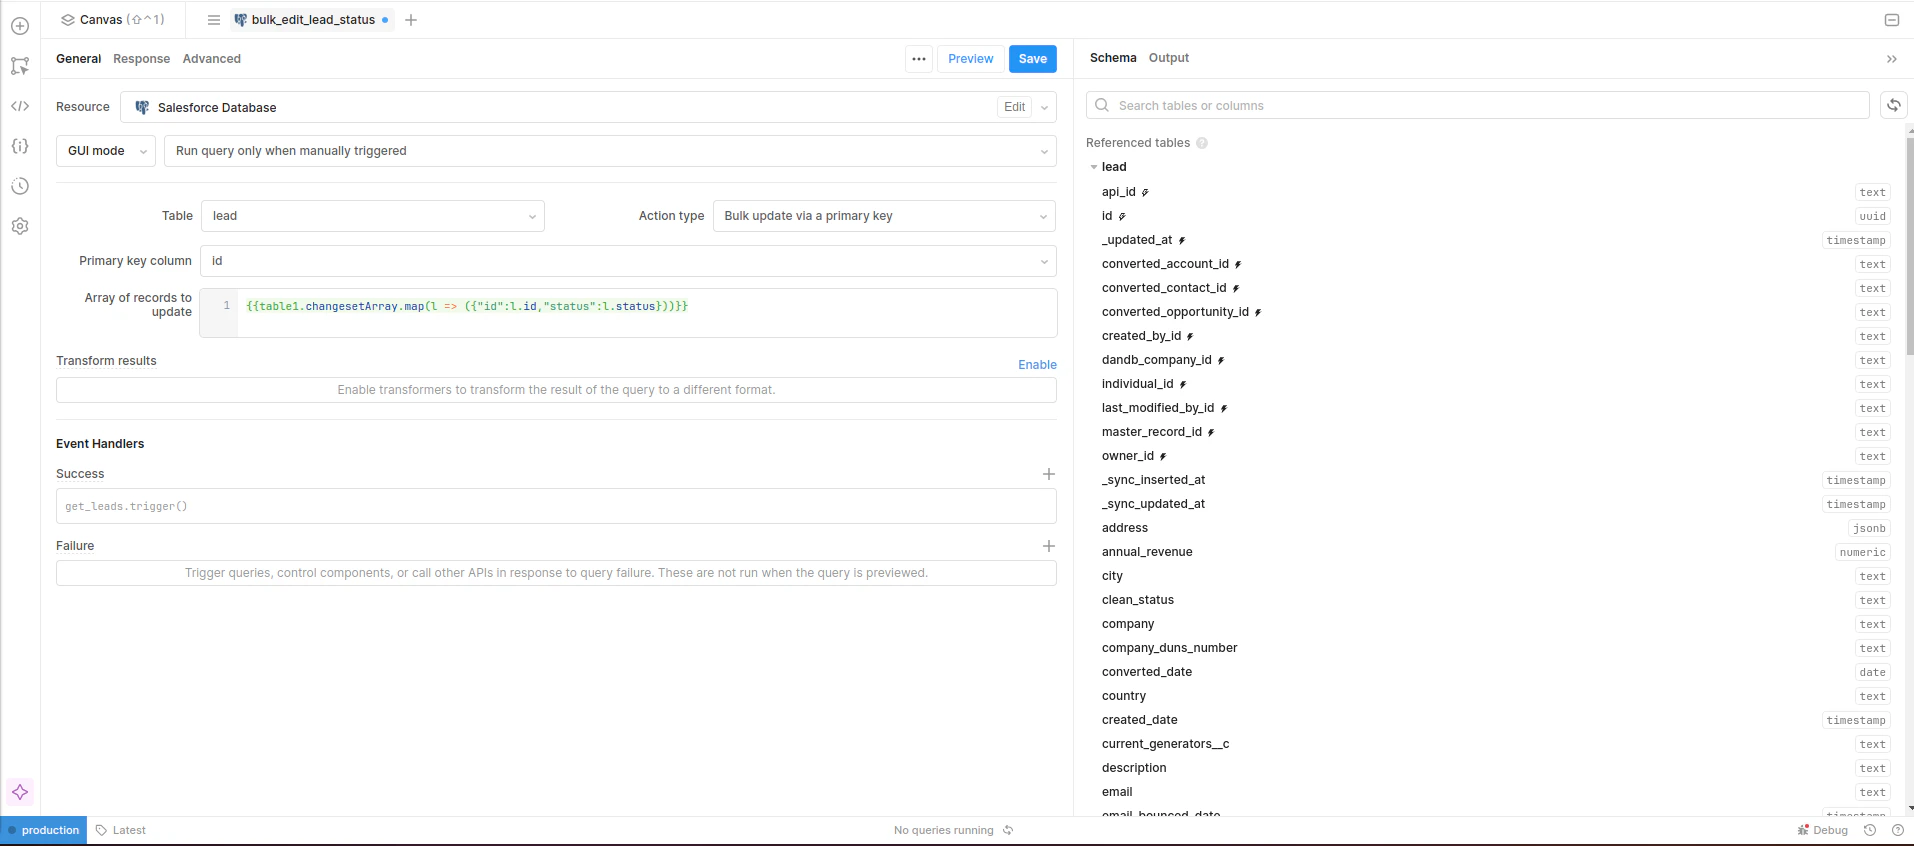
- Resource -
-
As a last step, connect your
bulk_edit_lead_statusquery to your table. Select the table in the canvas, open the inspector in the right panel, in the Add-on section click to add + an event handler that will trigger thebulk_edit_lead_statusquery when the user clicksSave changes: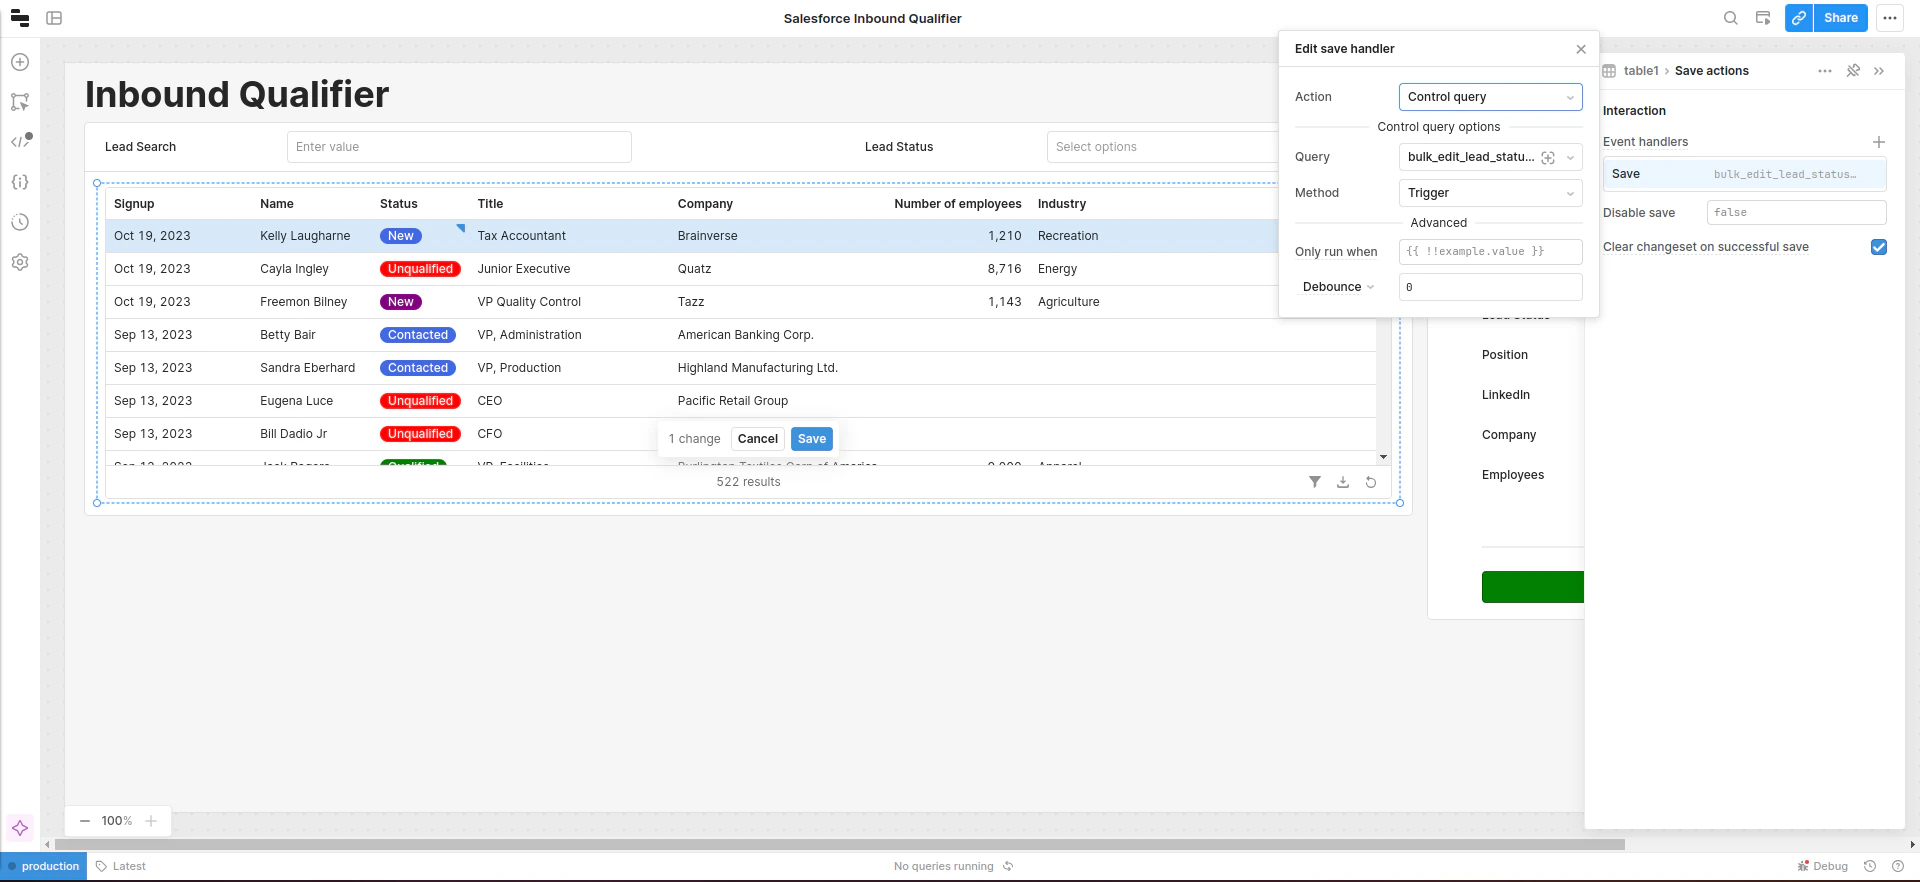
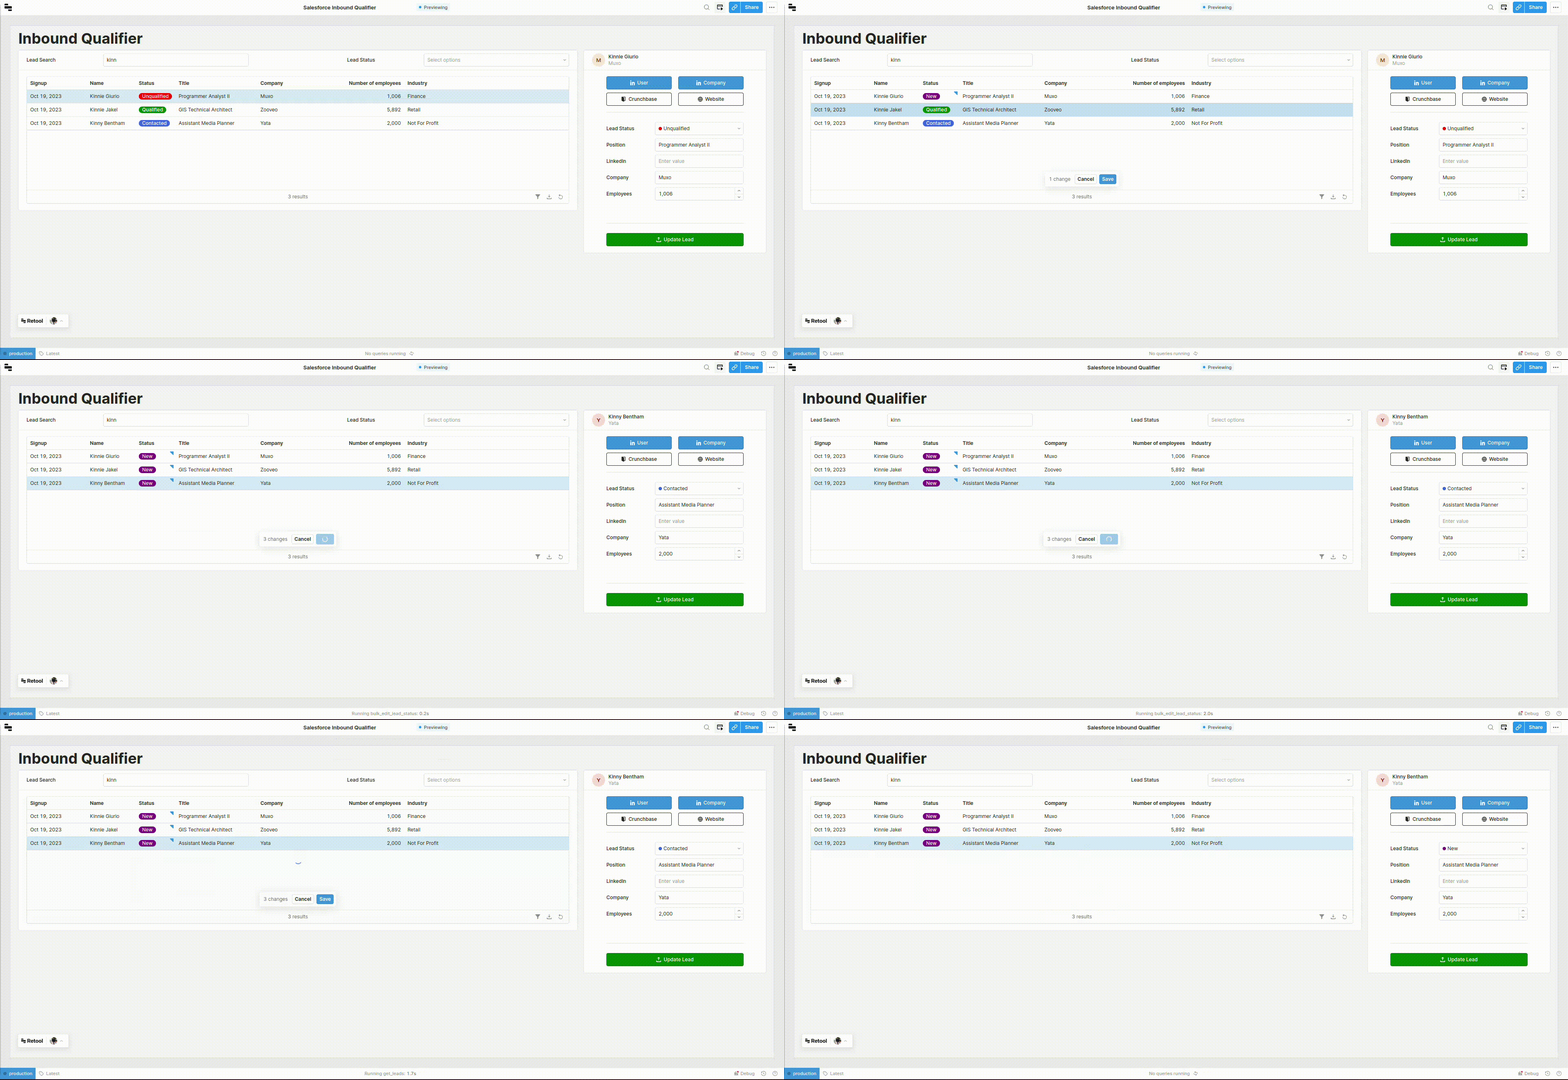
Customize
You now have a custom internal tool that will help your sales team quickly qualify leads. With Retool and Sequin, you didn’t touch SOQL or APEX to get to this point. You didn’t need to paginate queries, deal with rate limits, or worry about response times. All you needed was a little SQL and a smidgen of JavaScript. From here, tailor this app to your sales team’s needs. Bring in data from your production database andjoin it to your Salesforce data to give your sales team even more context (Sequin can put your Salesforce data in your database!) Add more fields to let your sales team capture notes - or even trigger emails. This is truly just the beginning.