Documentation Index
Fetch the complete documentation index at: https://sequin.io/docs/llms.txt
Use this file to discover all available pages before exploring further.
Build Airtable integrations using AWS Lambda
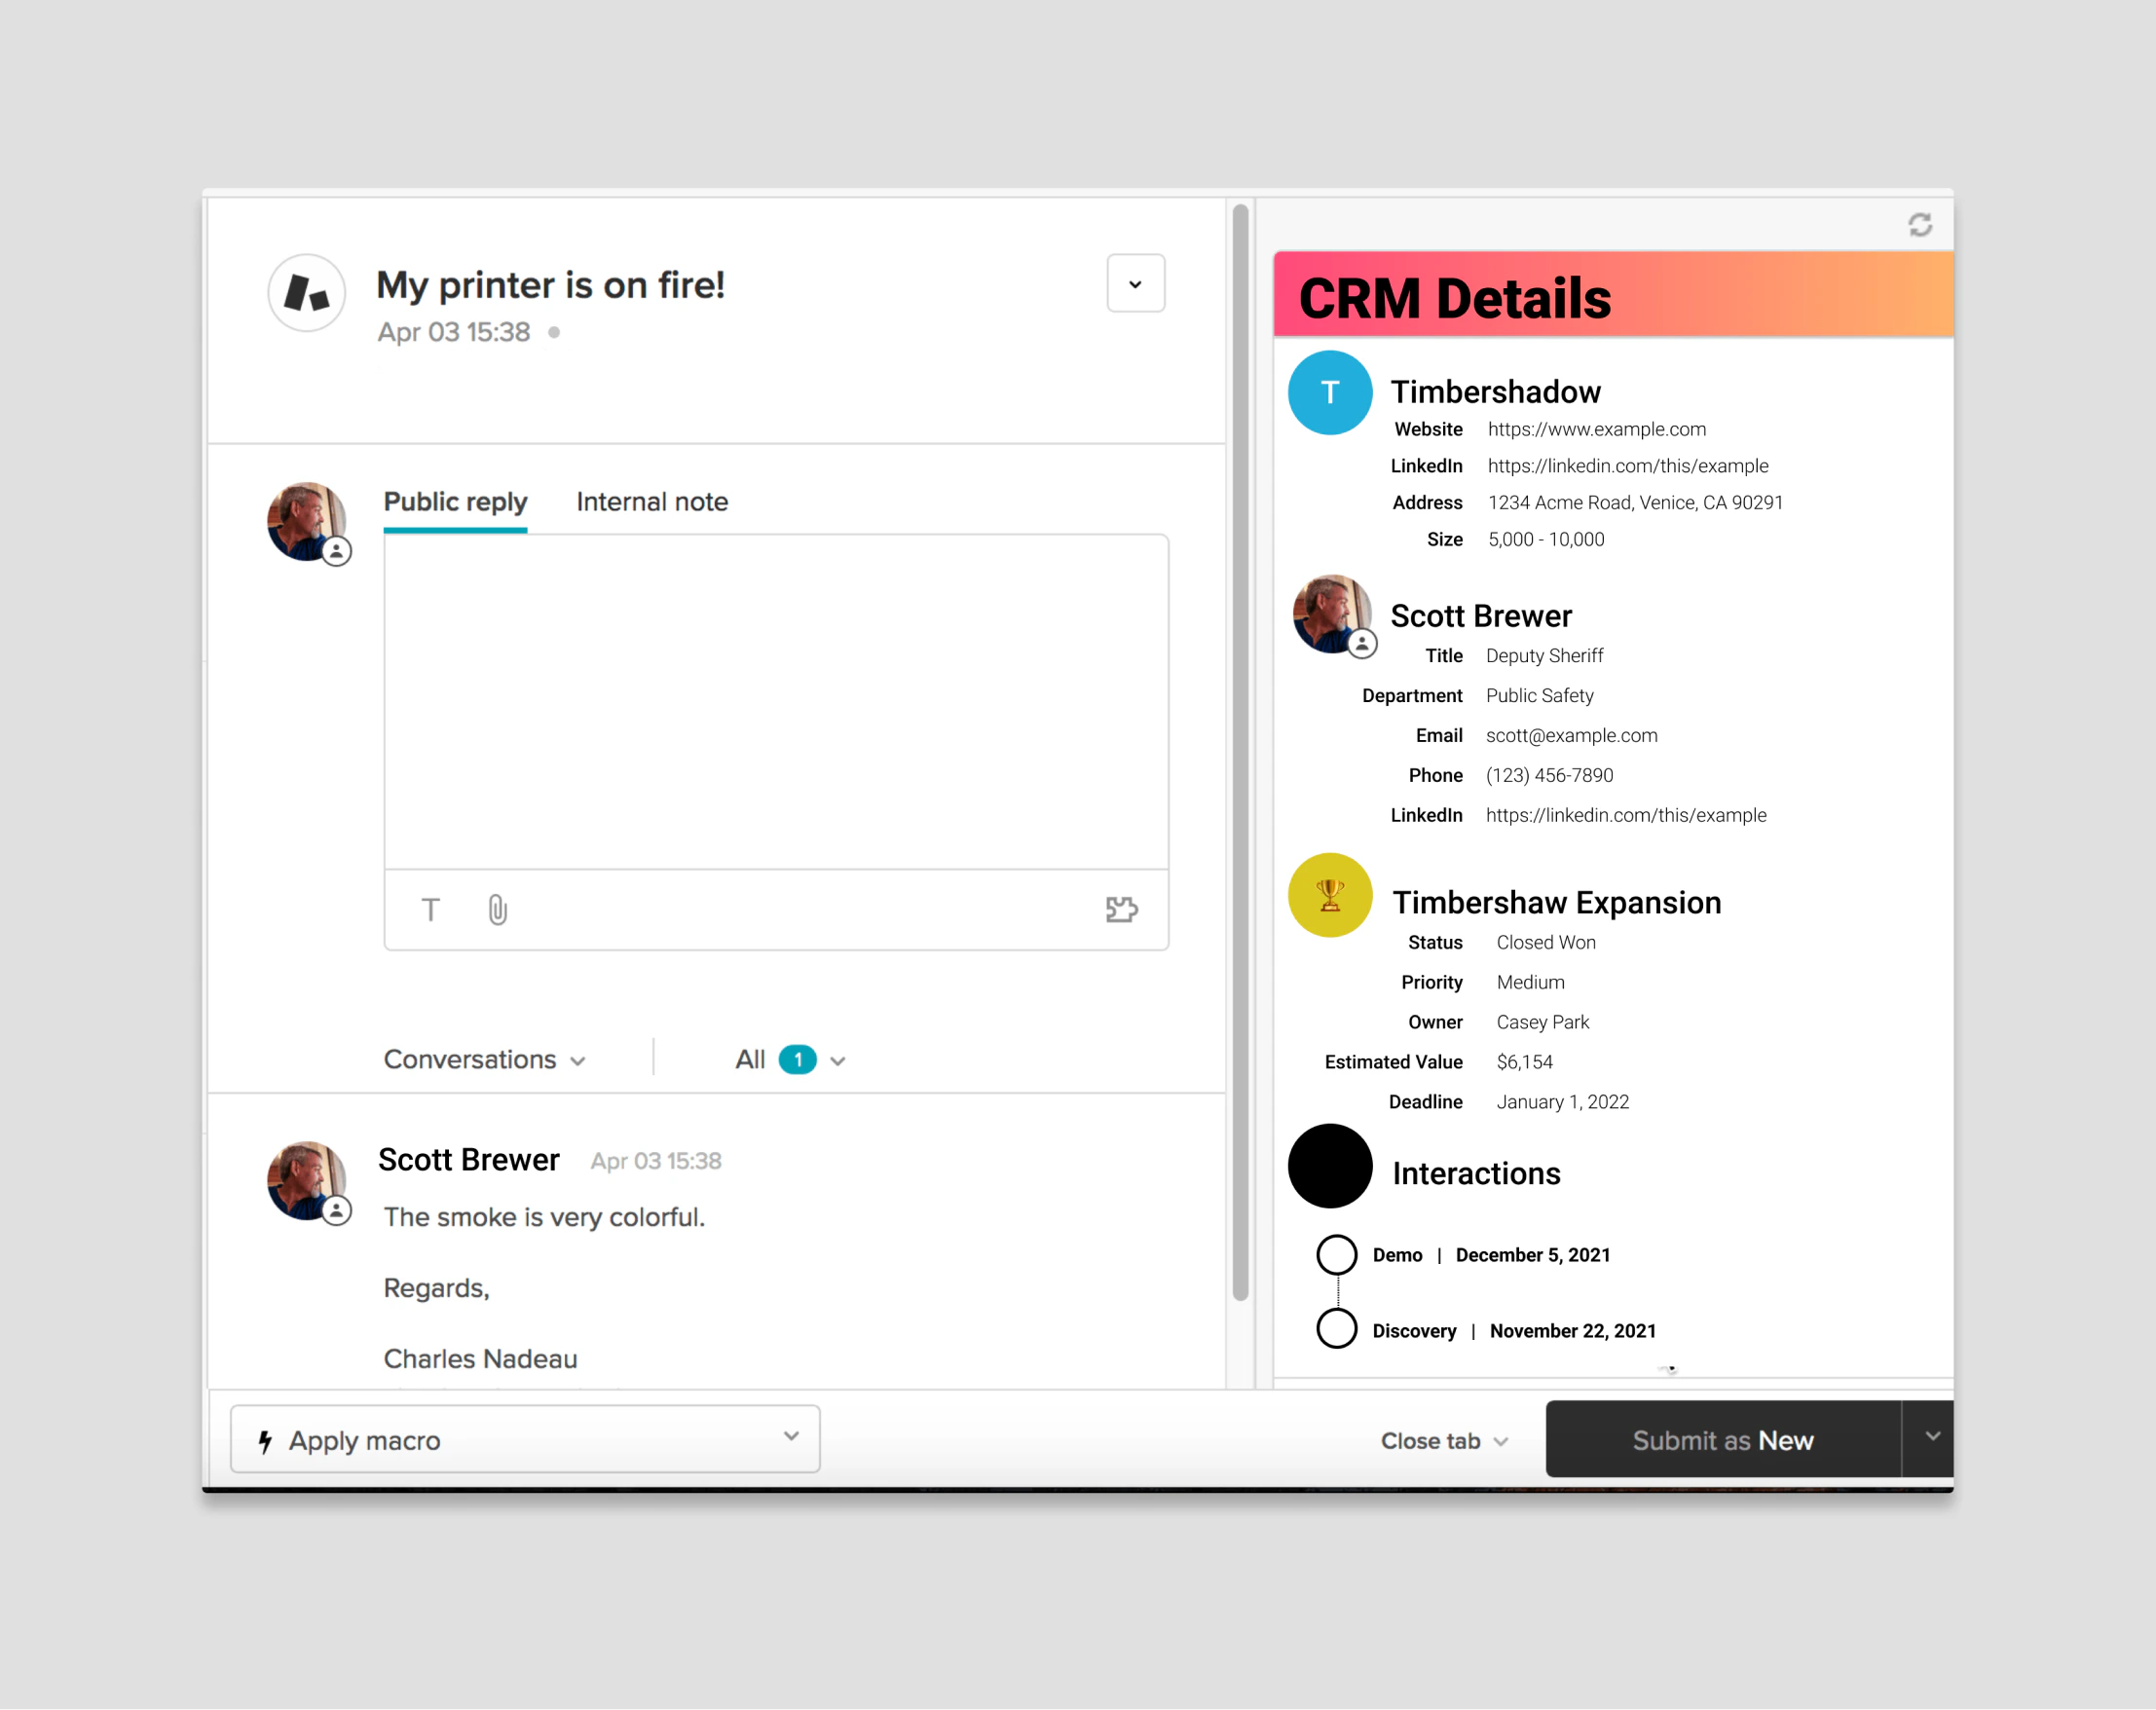
Lets build a custom API endpoint to power internal tools using Airtable with AWS Lambda. The API will allow you toGET all the relevant data from an Airtable CRM with just one API call. Then, you can use this API to surface the account data in your Airtable CRM across your company - from support, to finance, and more.
What is AWS Lambda
AWS Lambda lets you run code in the cloud without needing to set up or manage a server. There are two big benefits of using AWS Lambda:- You don’t need to manage a server. You’re responsible for just the code inside a function – the rest is taken care of for you. No need to mess with configuring servers, deploys, or (to a large extent) worrying about scale.
- Lambdas are economical, especially for the kinds of lighter-weight workloads you’ll typically run on Airtable. You only pay when your function is running. And on the AWS free tier you can trigger a Lambda 1 million times per month and not spend a penny.
The plot
Before we dive in, let’s set the stage for the Lambda you are going to build in this tutorial. Let’s say you you’re using Airtable as a CRM. You have a list of accounts, opportunities (potential new sales), their estimated value, and information about the sales process so far: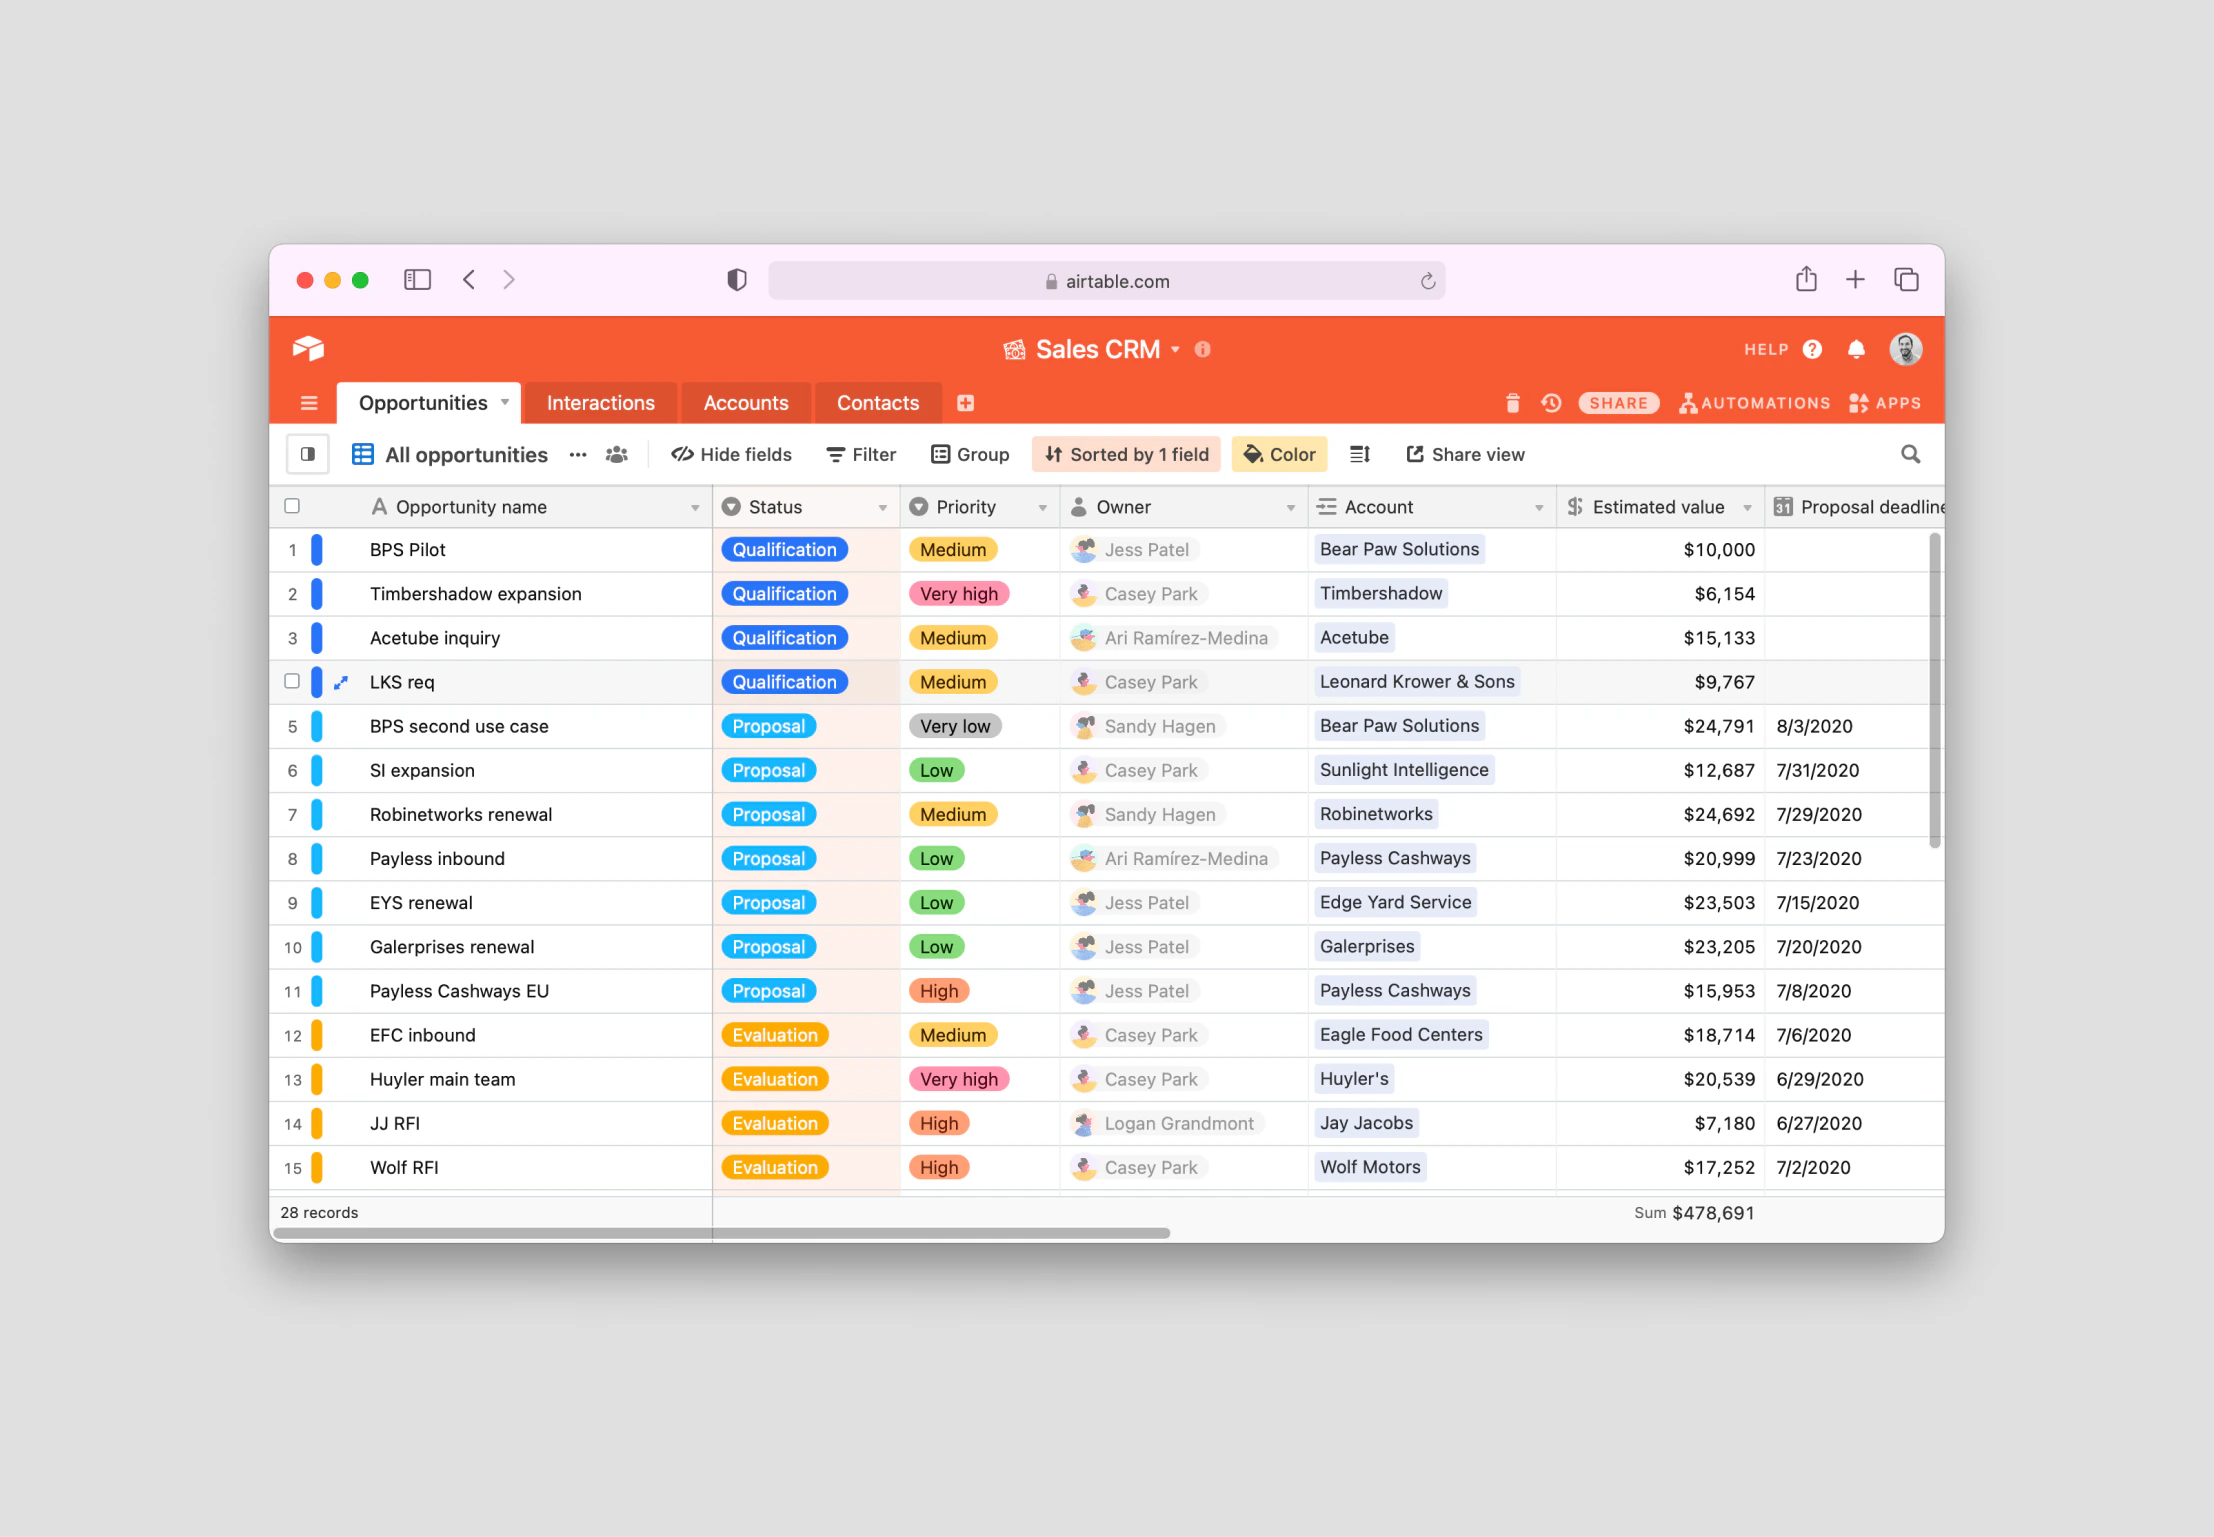
GET request with an account_id as a parameter:
account_id, find the account in Airtable, retrieve all its associated data, and then return a nicely formatted JSON object with all the account details:
filterBy parameter to get the same data set.
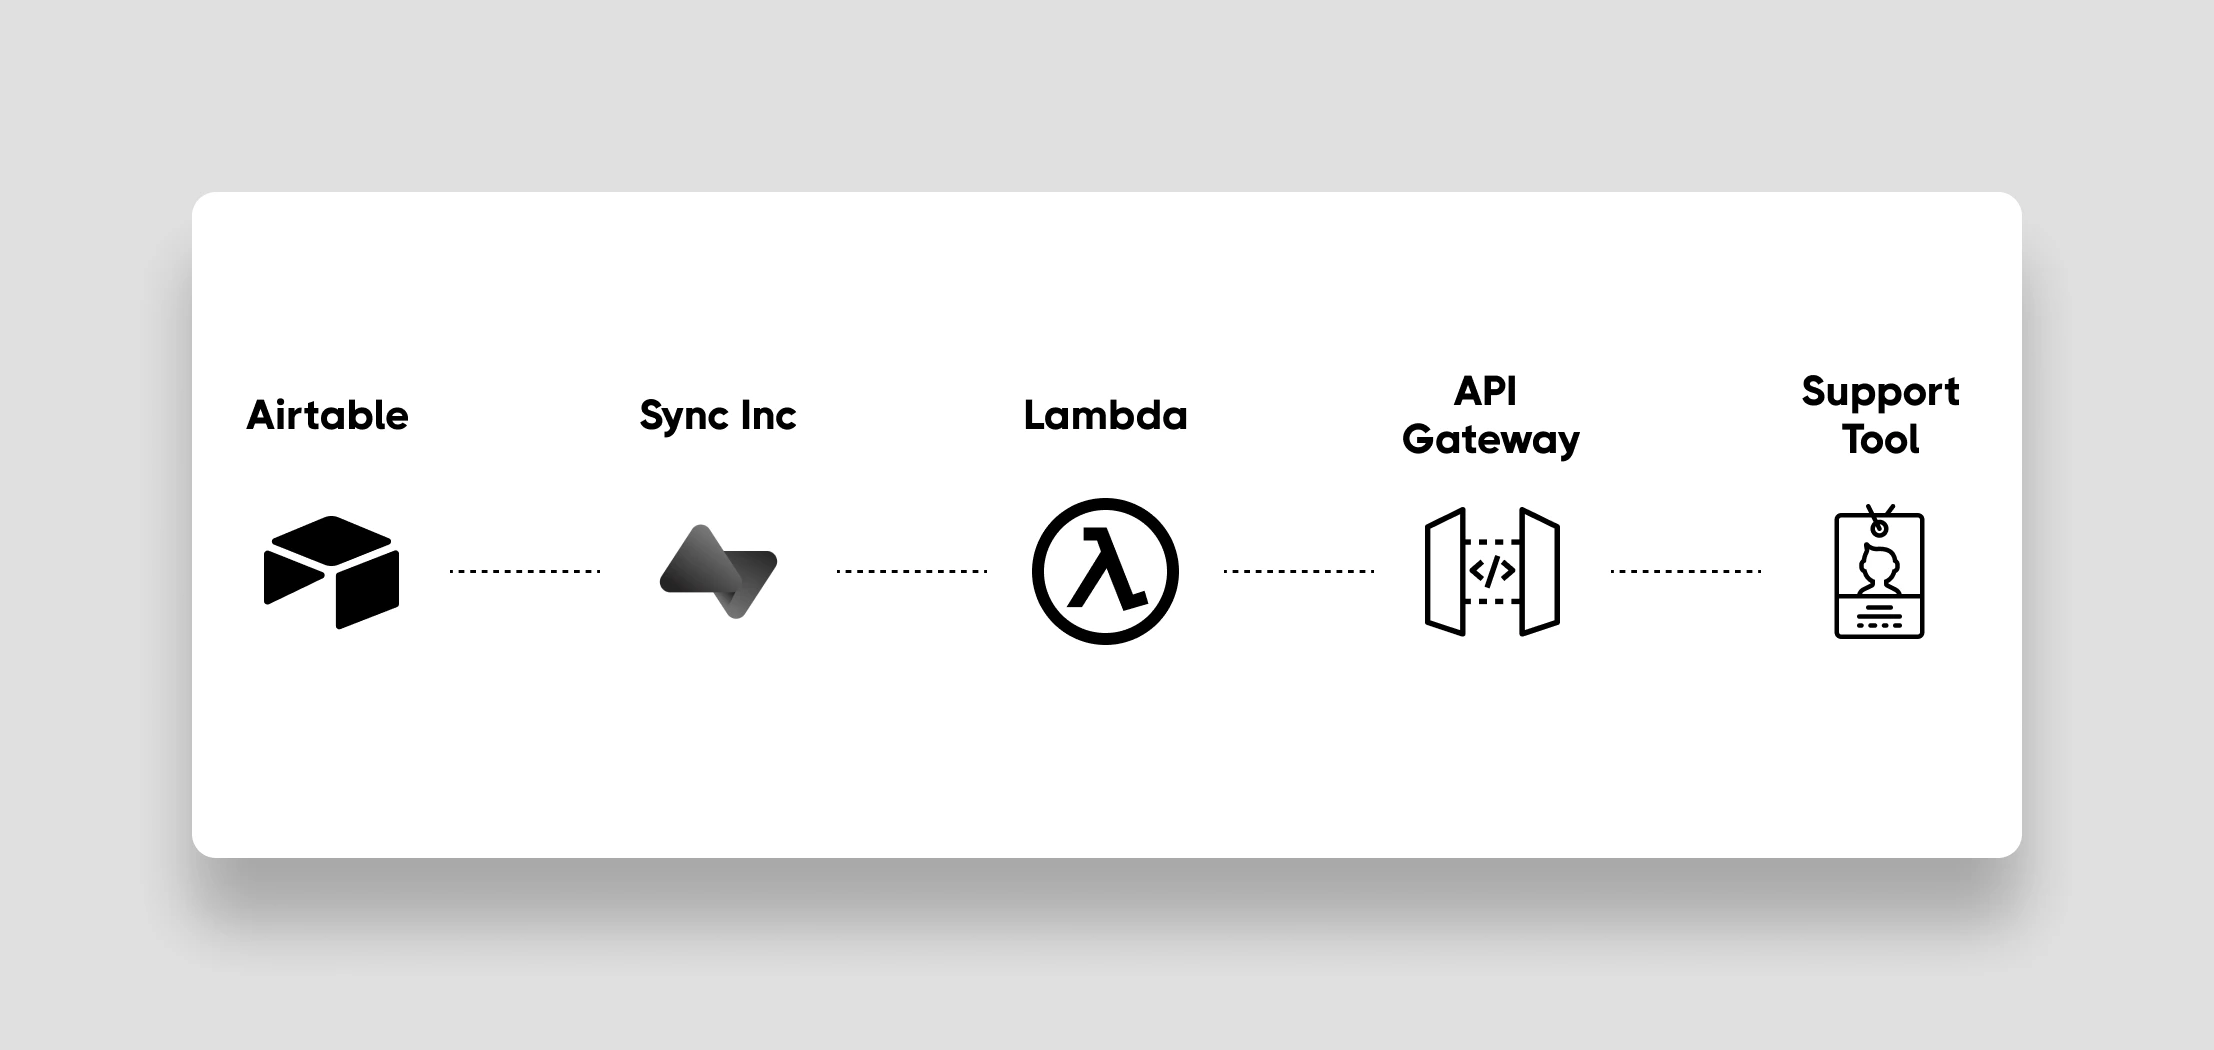
All together, your integration will look something like this:
Airtable Setup
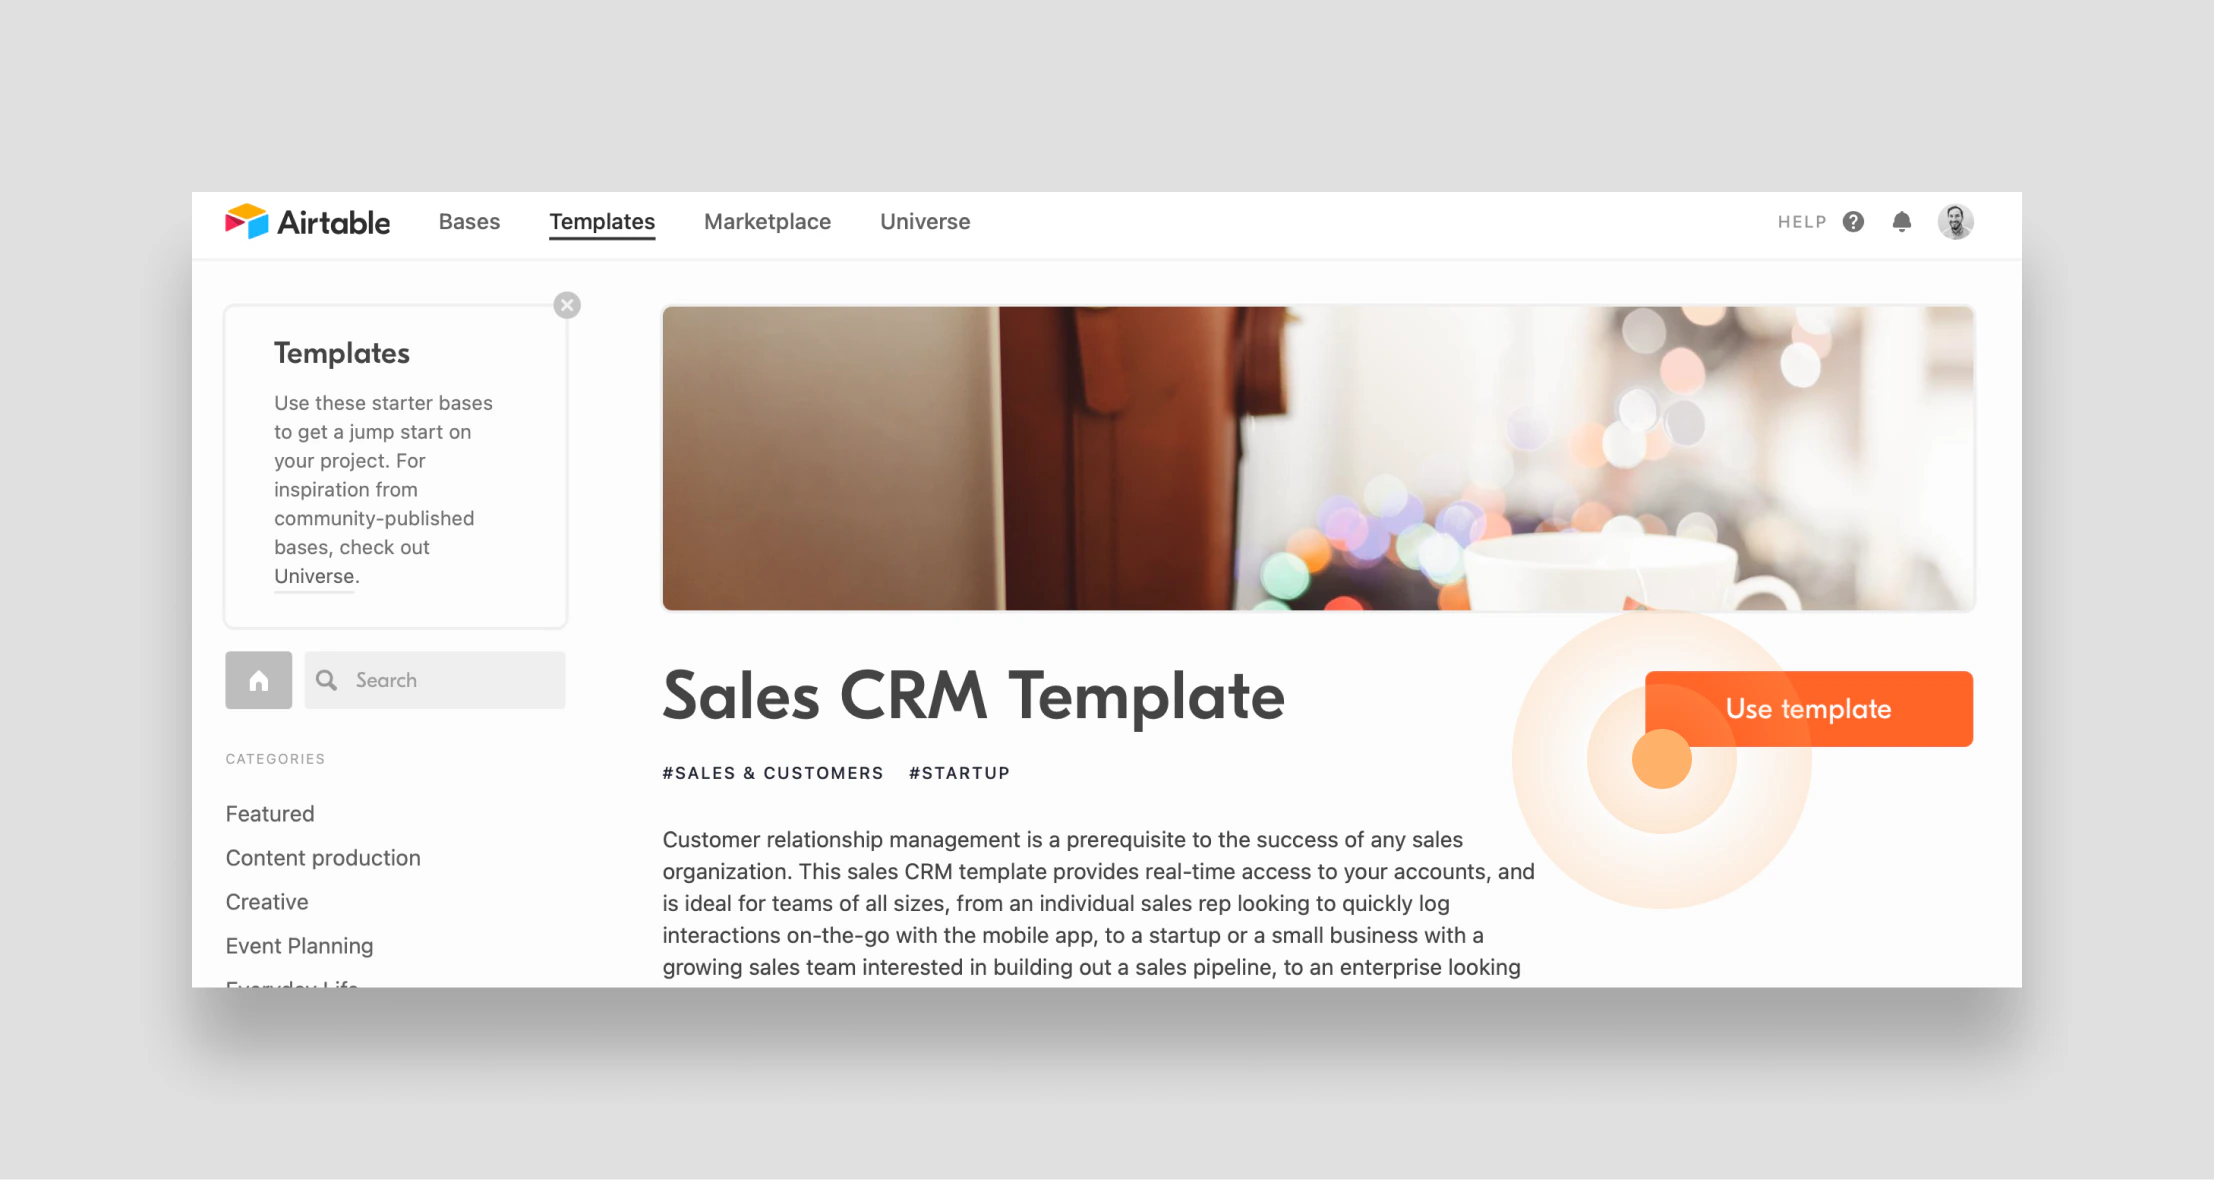
First, get Airtable set up by adding the CRM template to your Airtable workspace:- Log into your Airtable workspace and then open the sales CRM template in a new tab.
- Click the Use template button to add the sales CRM template to your workspace.
Sequin Setup
Now, let’s turn the sales CRM base we just added to Airtable into a Postgres database that works seamlessly with AWS Lambda using Sequin:- Go to https://console.sequin.io/signup and create an account.
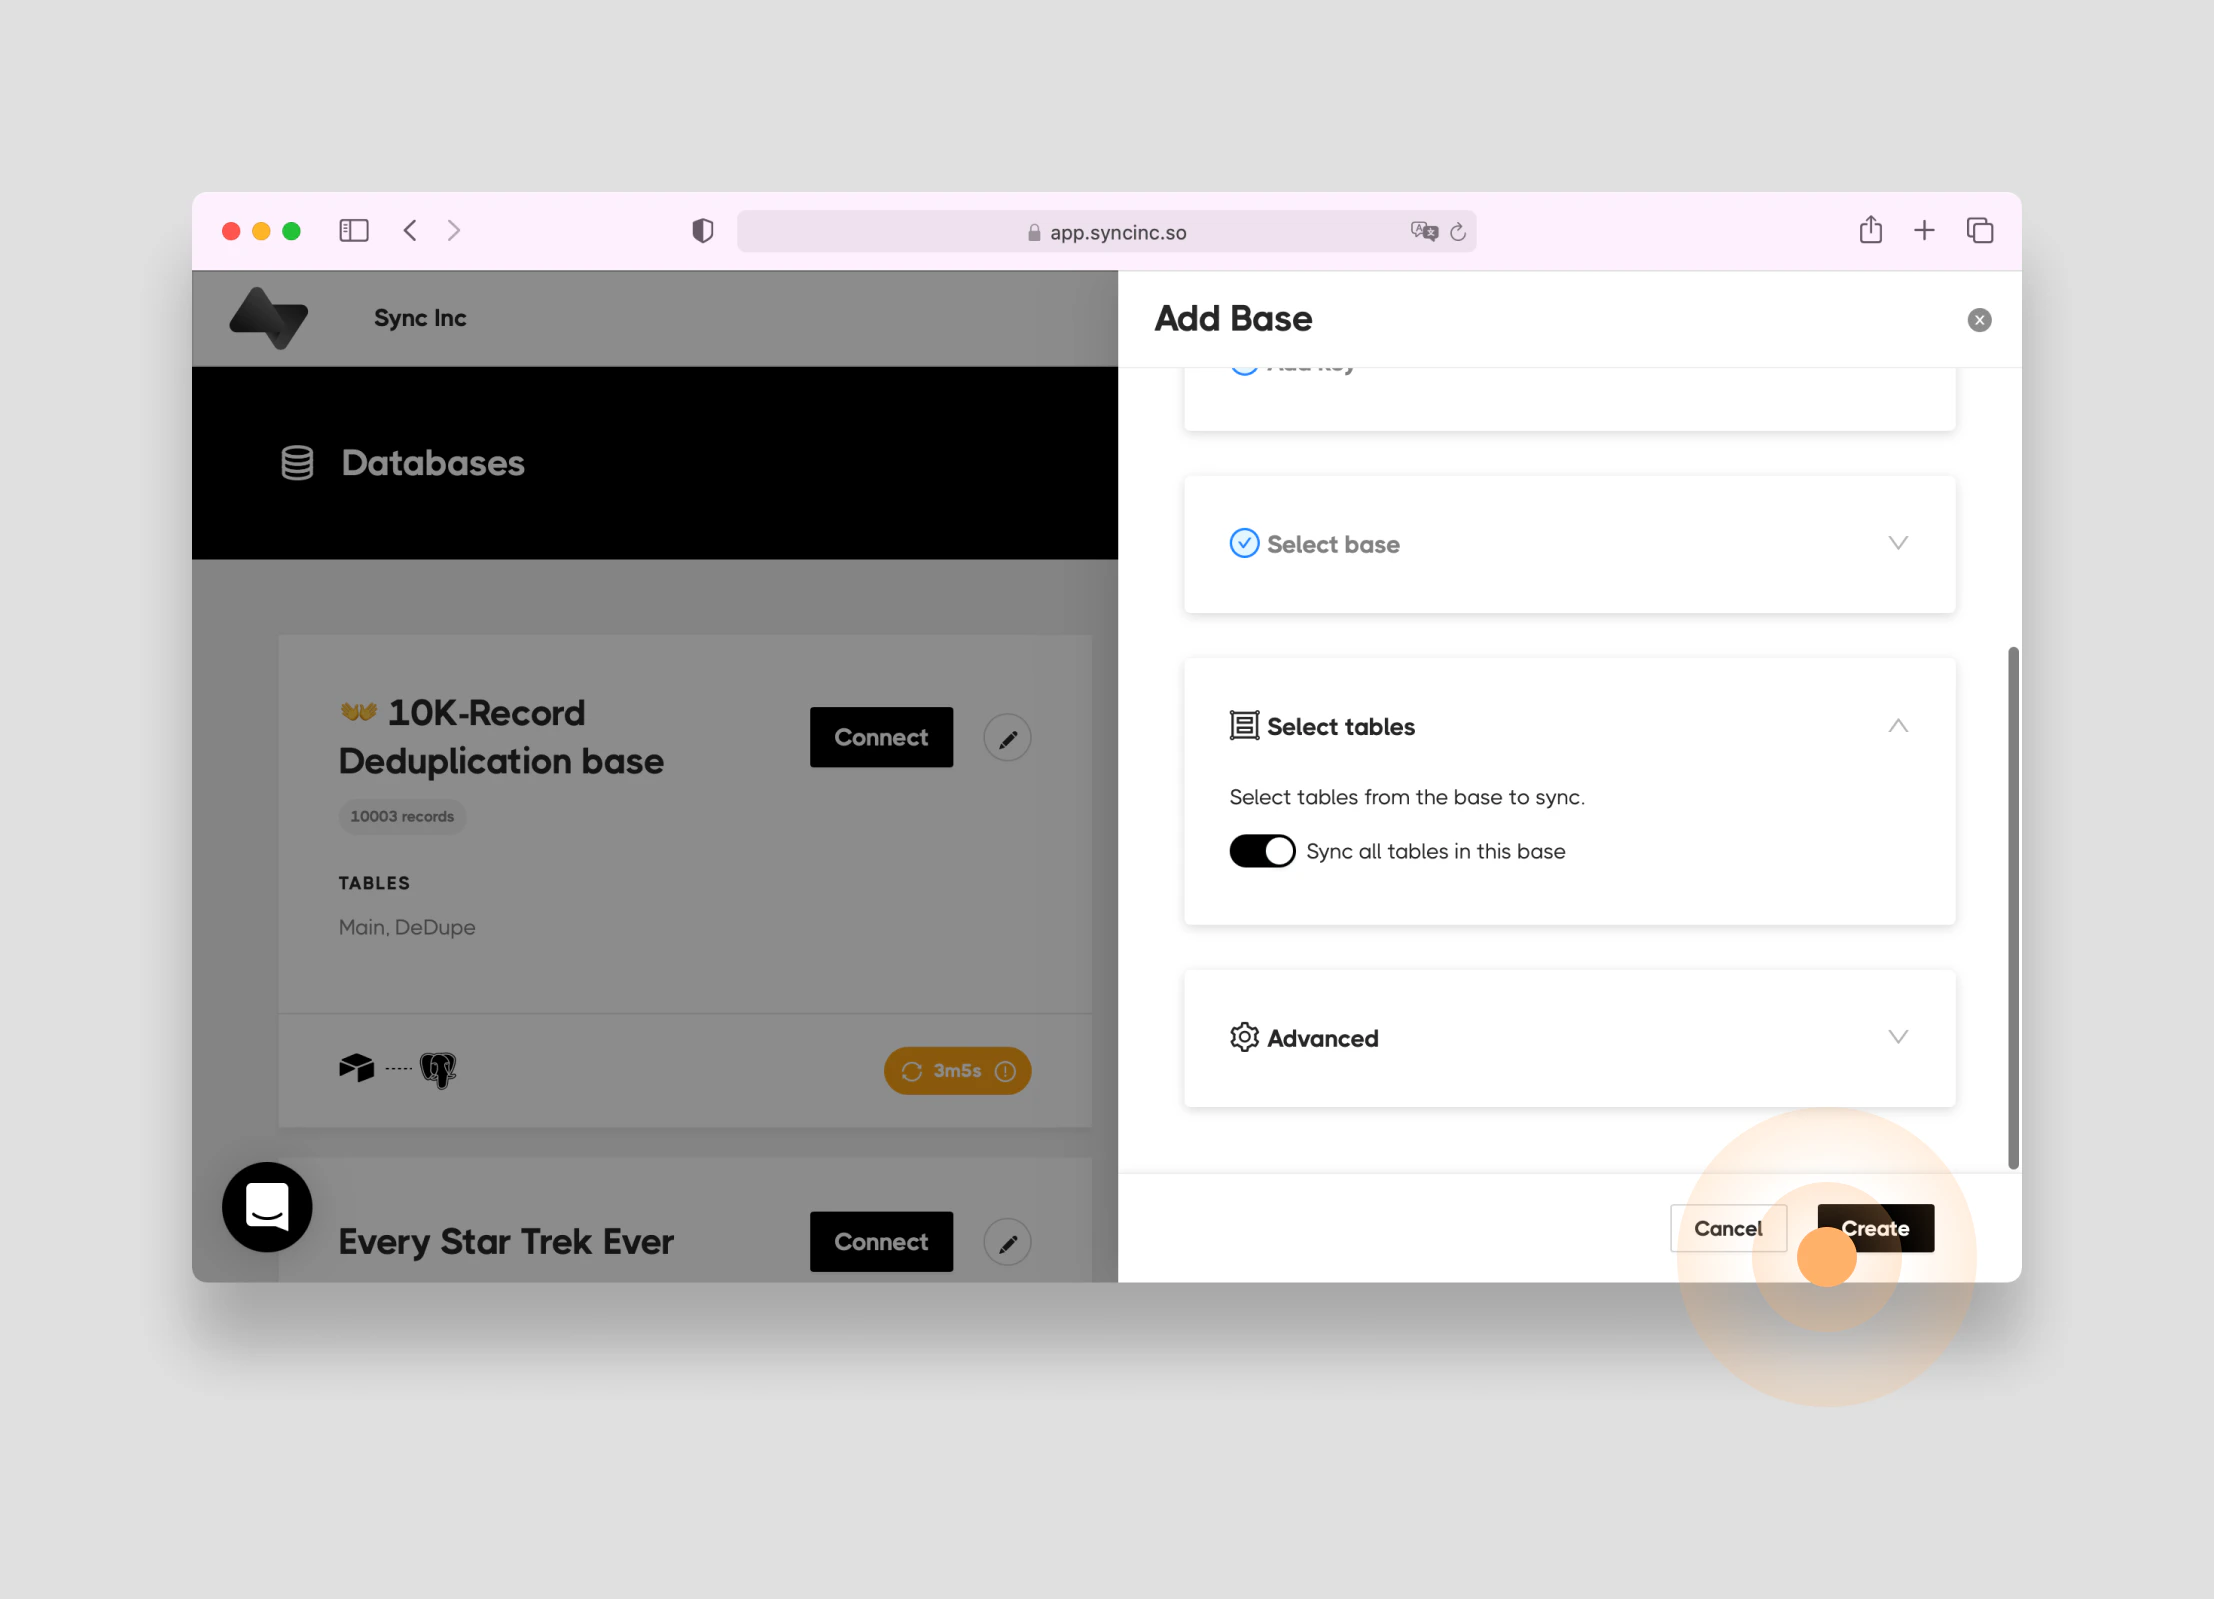
- Connect your Airtable base by going through the tutorial or clicking the Add Base button.
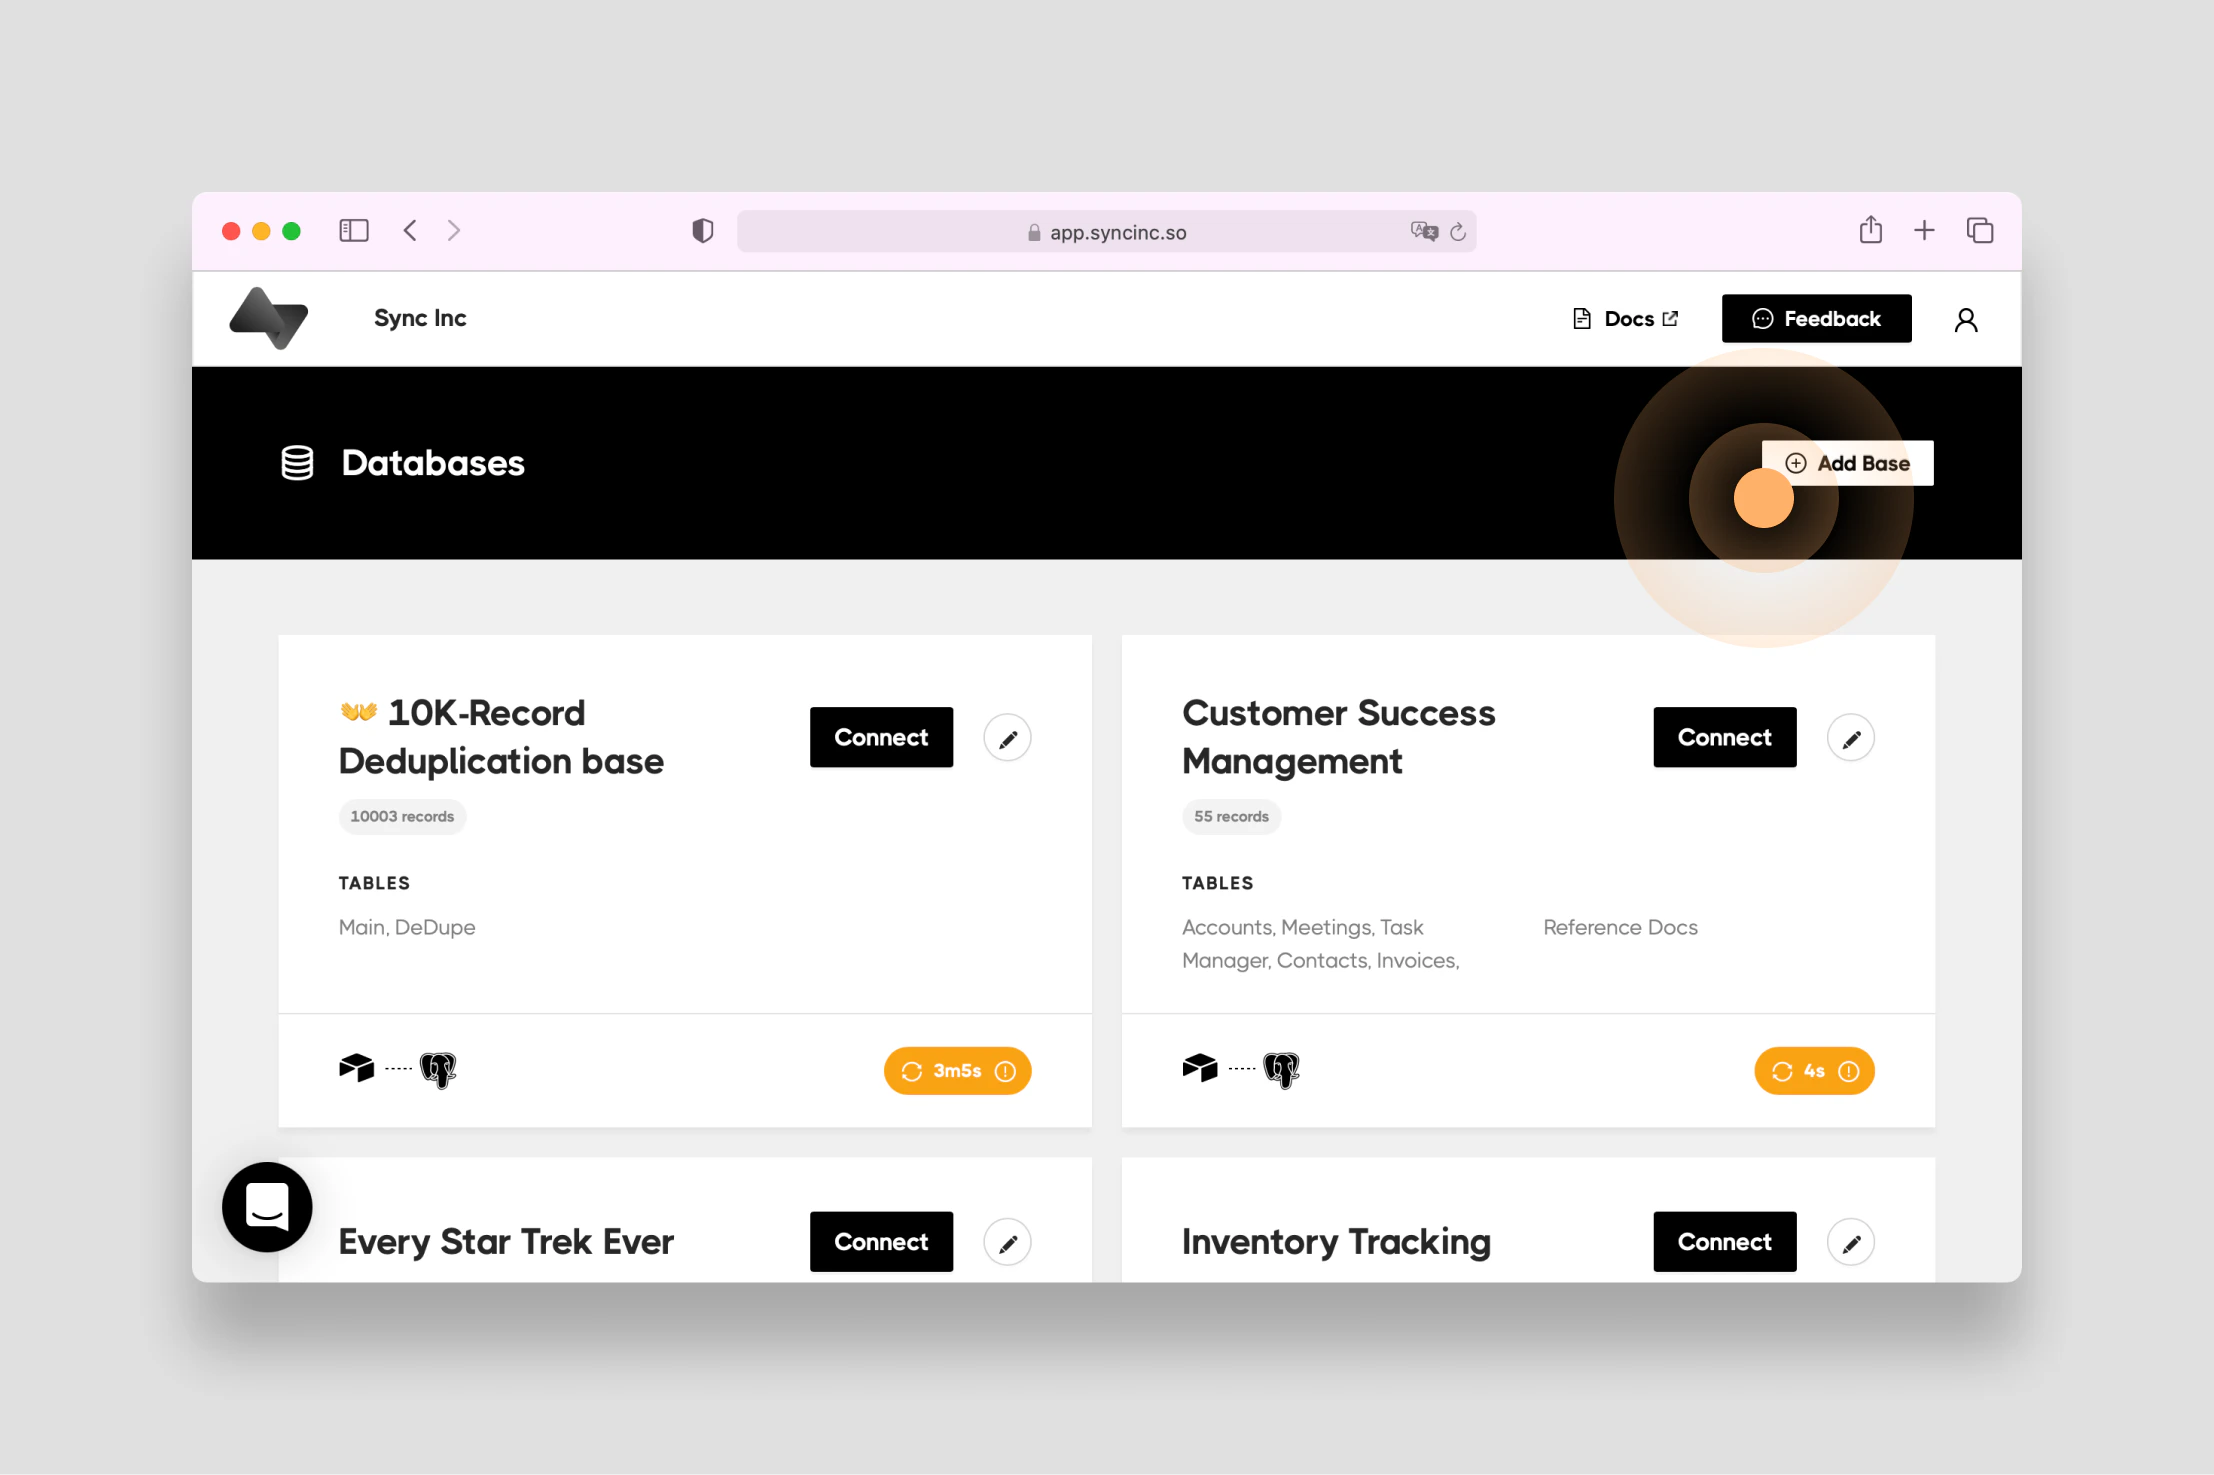
- You’ll be prompted to enter your Airtable API key. After that, select the Sales CRM base and all it’s tables. Then click Create.
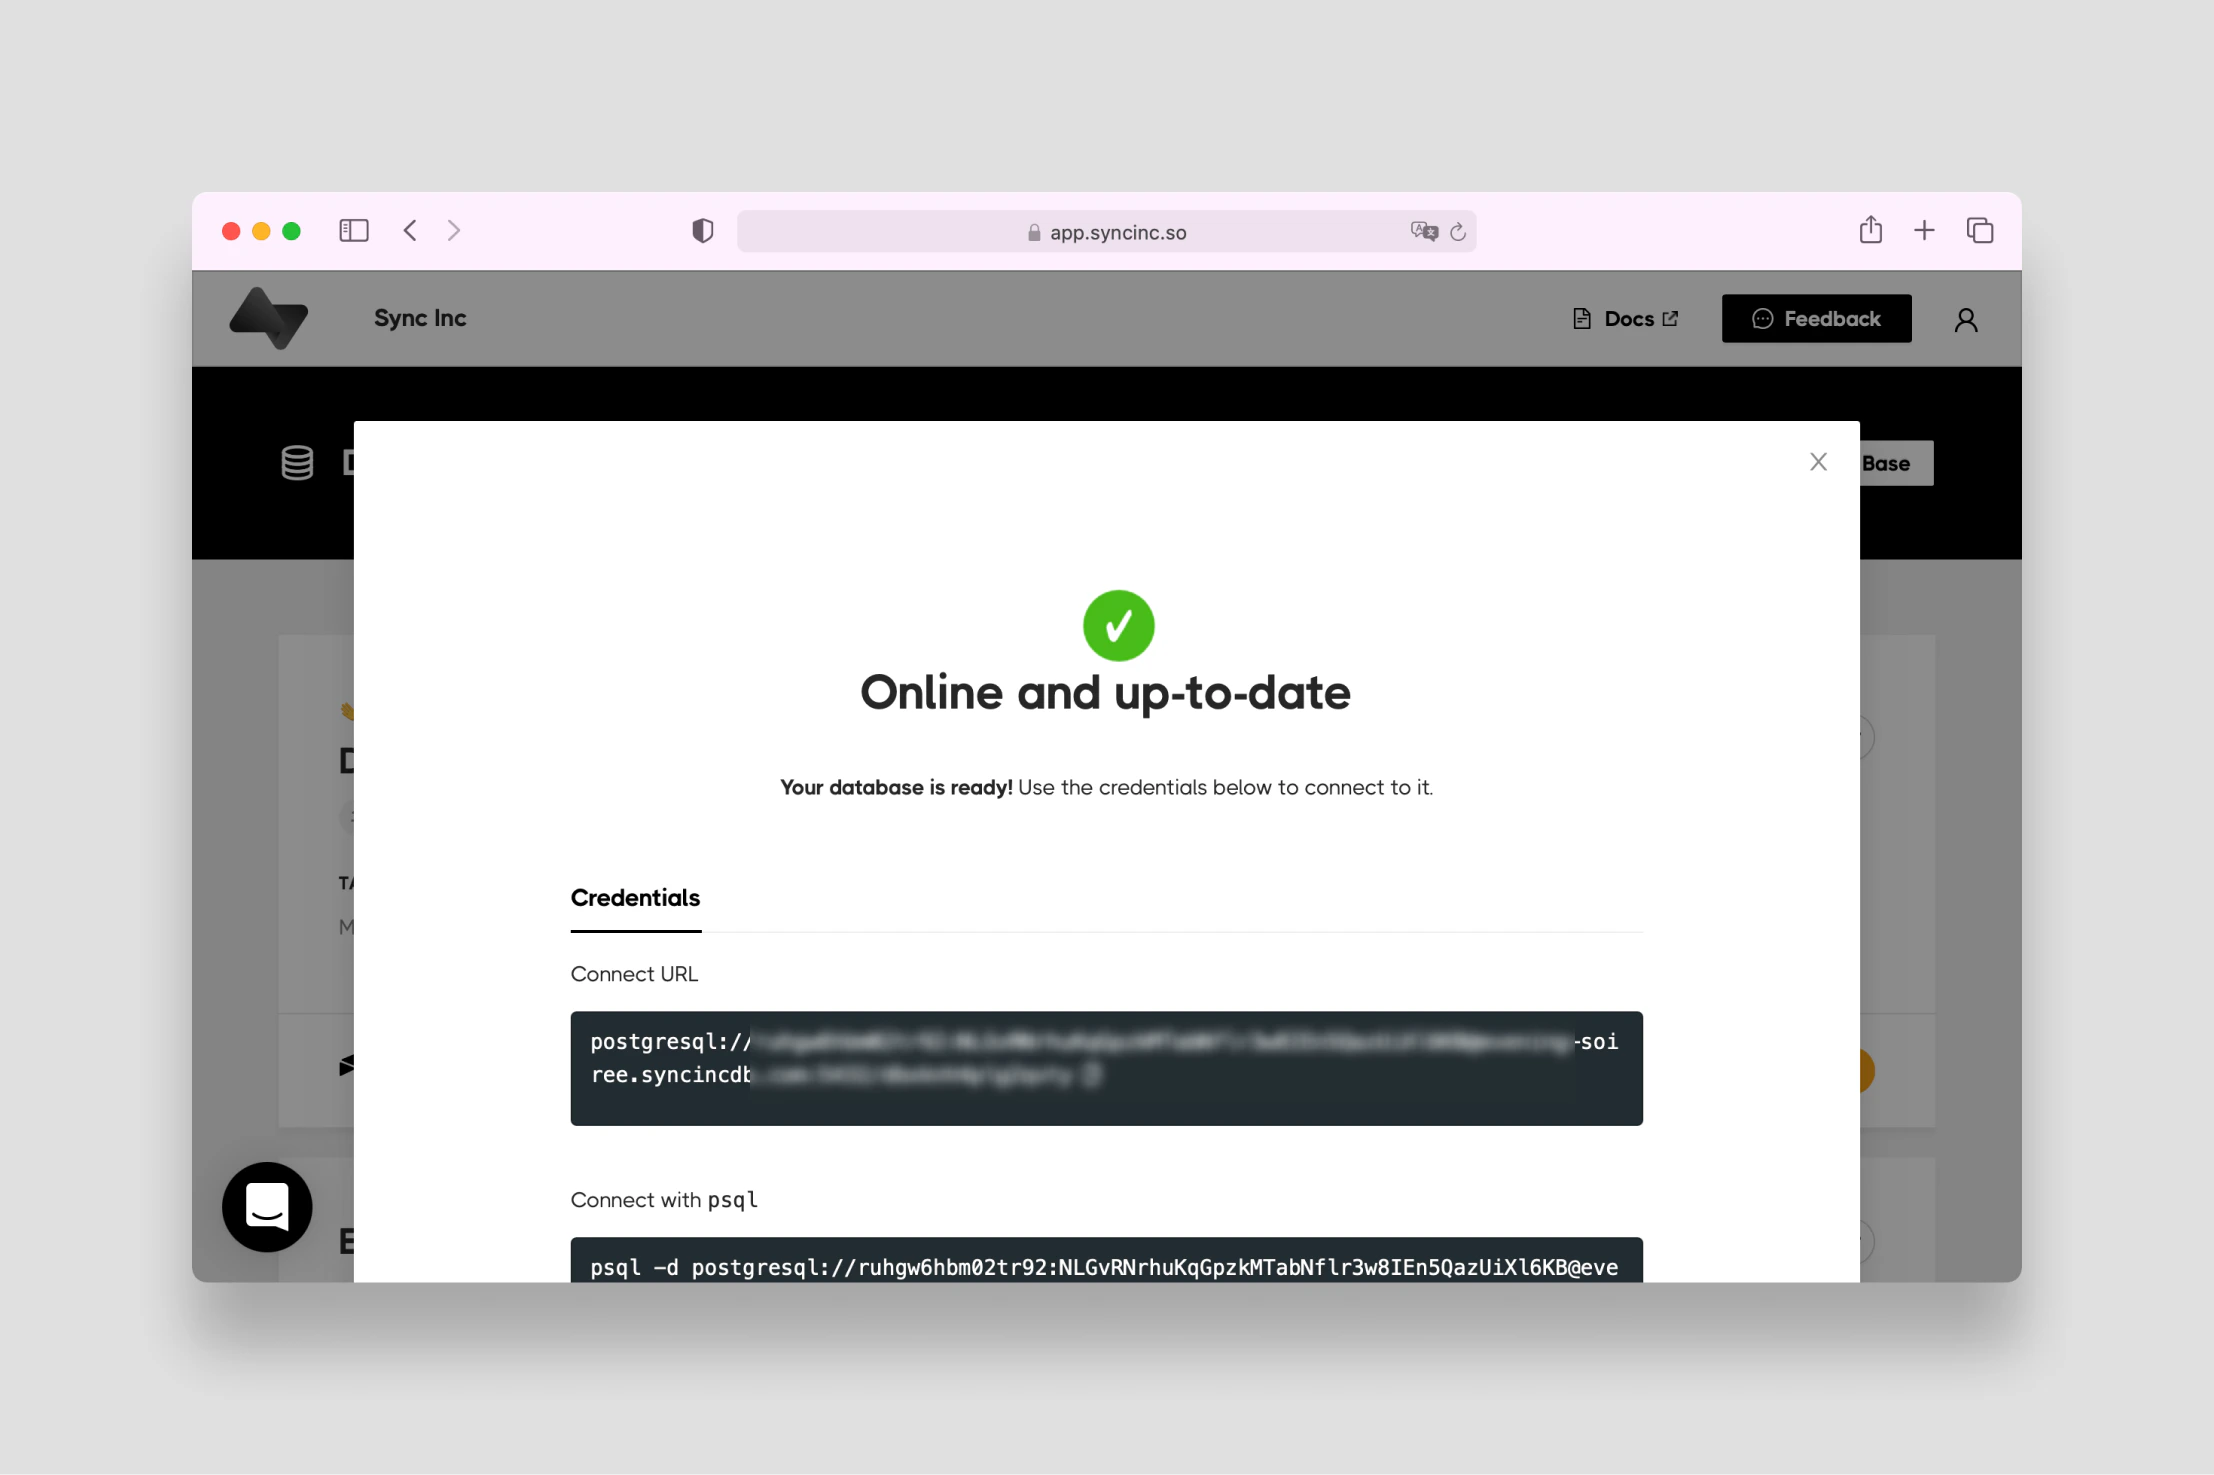
- Sequin will provision you a Postgres database on AWS and begin syncing all the data in your Airtable base to it. You’ll be provided with credentials for you new database. Keep these handy as you’ll use them to connect your Sequin database to your Lambda function.
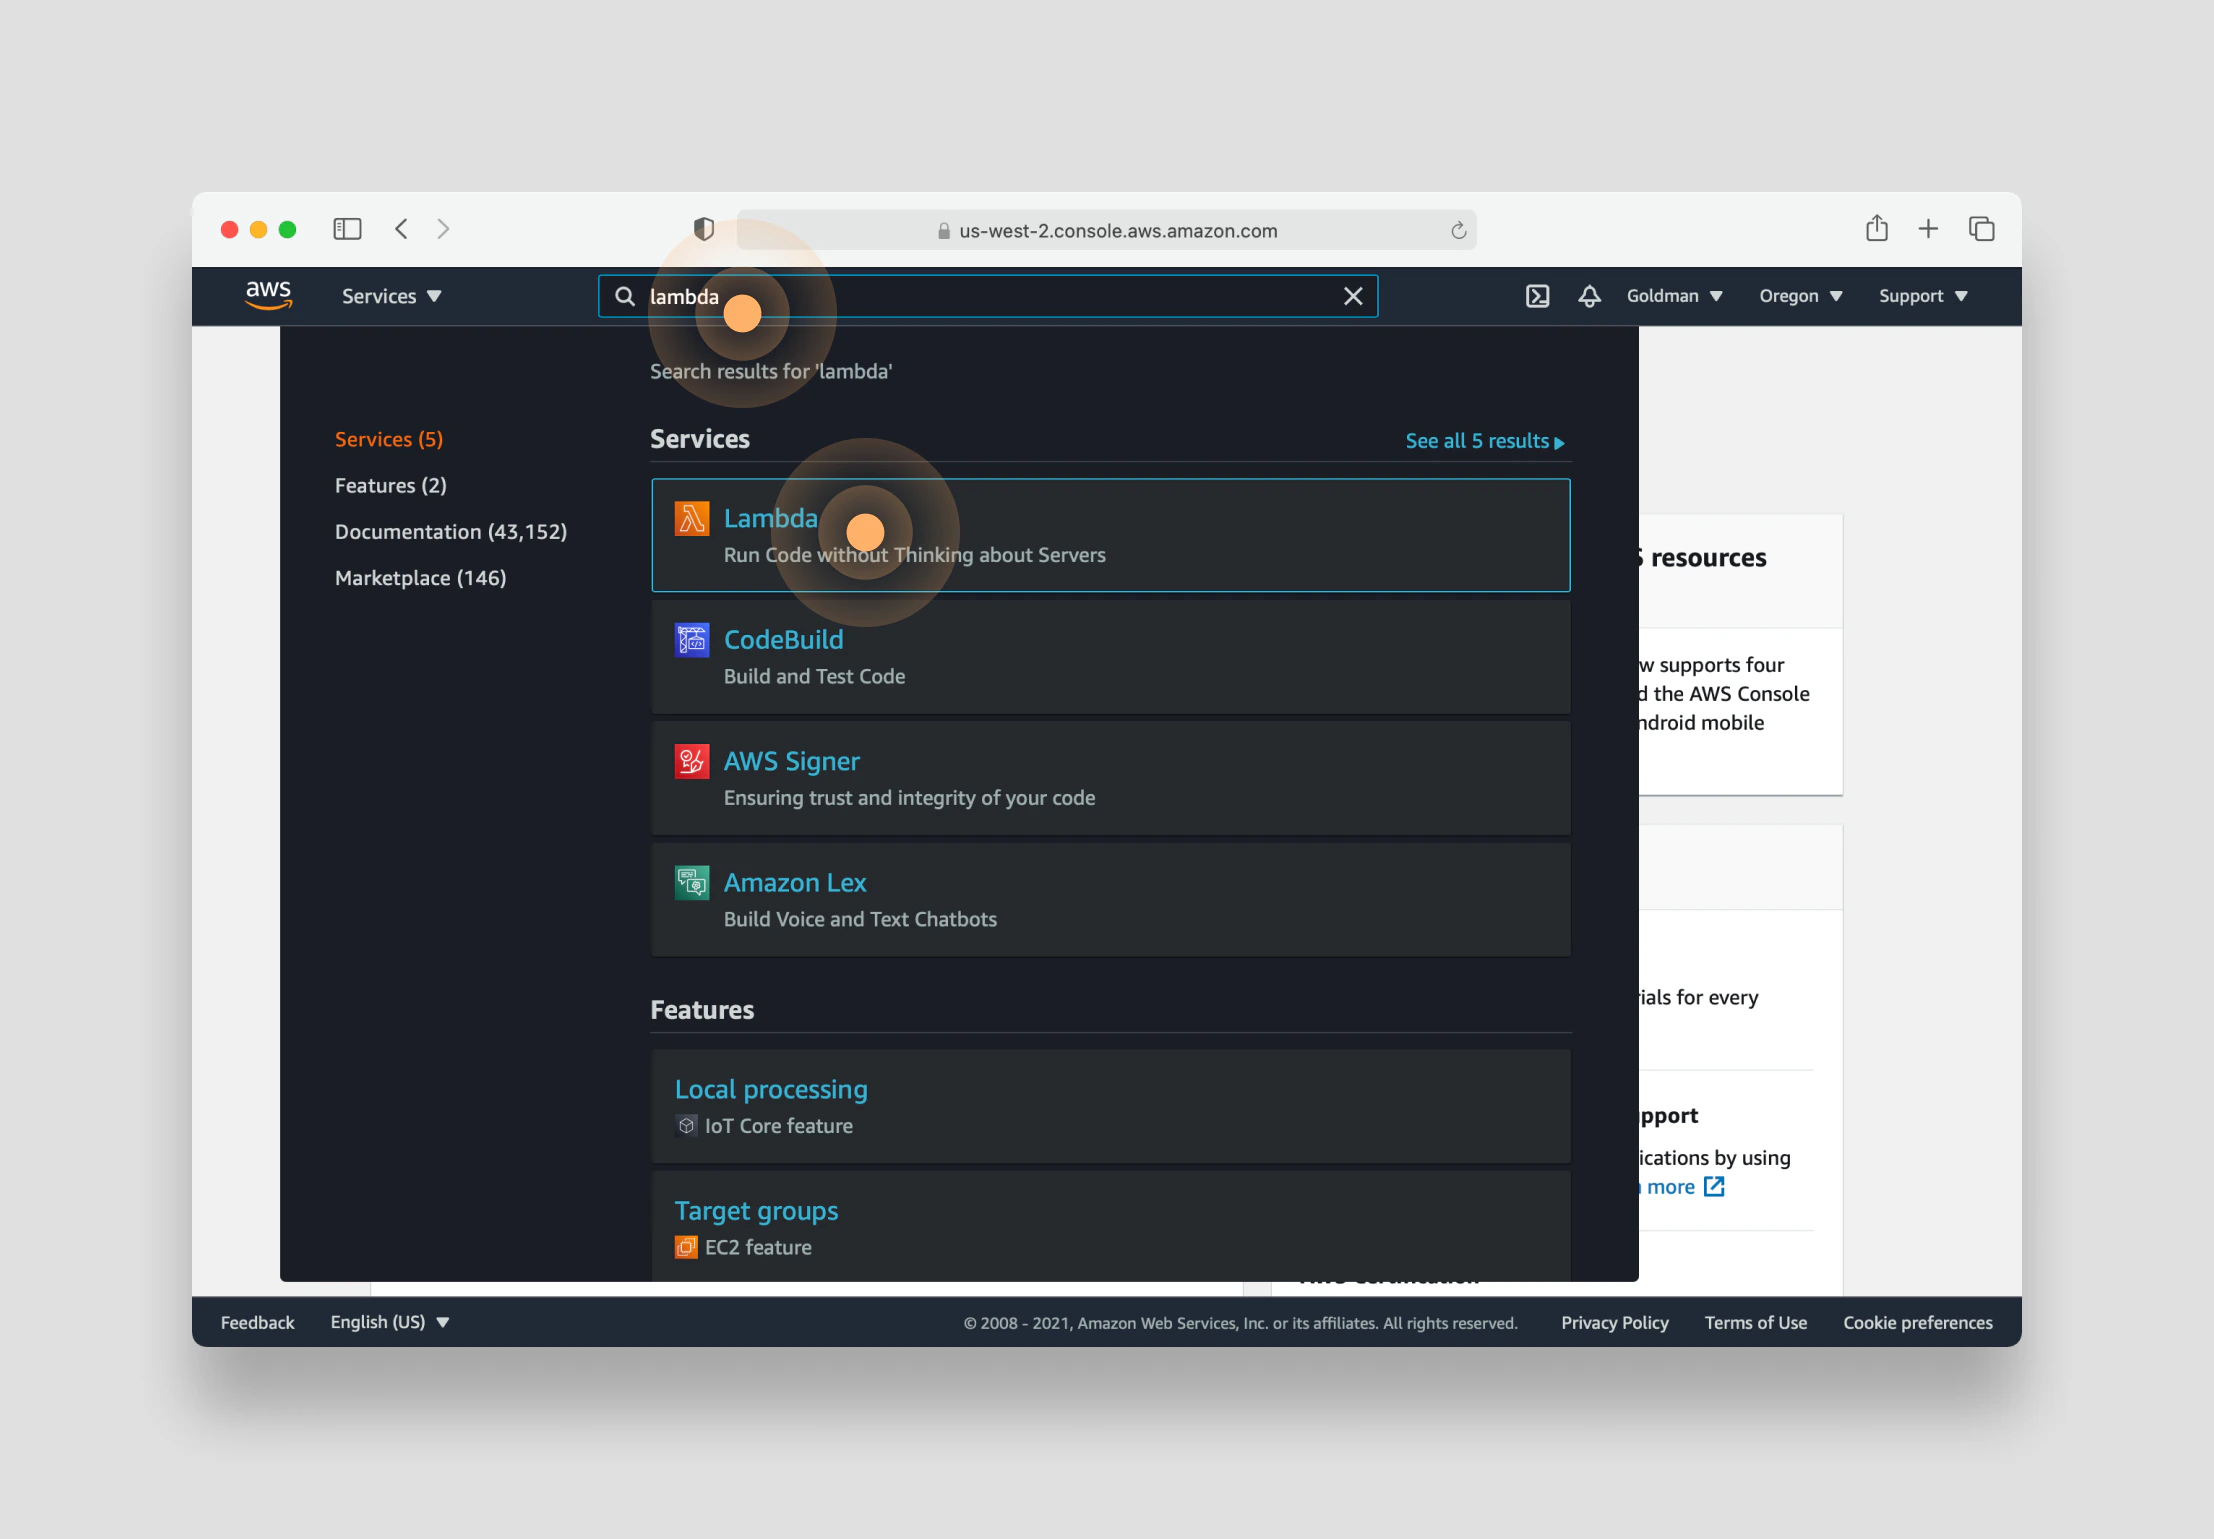
AWS Setup
You’ll need an Amazon Web Services account to use AWS Lambda. This AWS help article will walk you through the steps of creating you account. For this tutorial, I recommend using a personal account that you feel comfortable experimenting with. To do so:- Create your account by entering an email, password, and account name.
- When prompted, choose to create a Personal account.
- Add a payment method (while a credit card is necessary to create an account, AWS comes with a generous free tier)
- Enter and verify your personal phone number.
- Choose the Developer support plan for now.
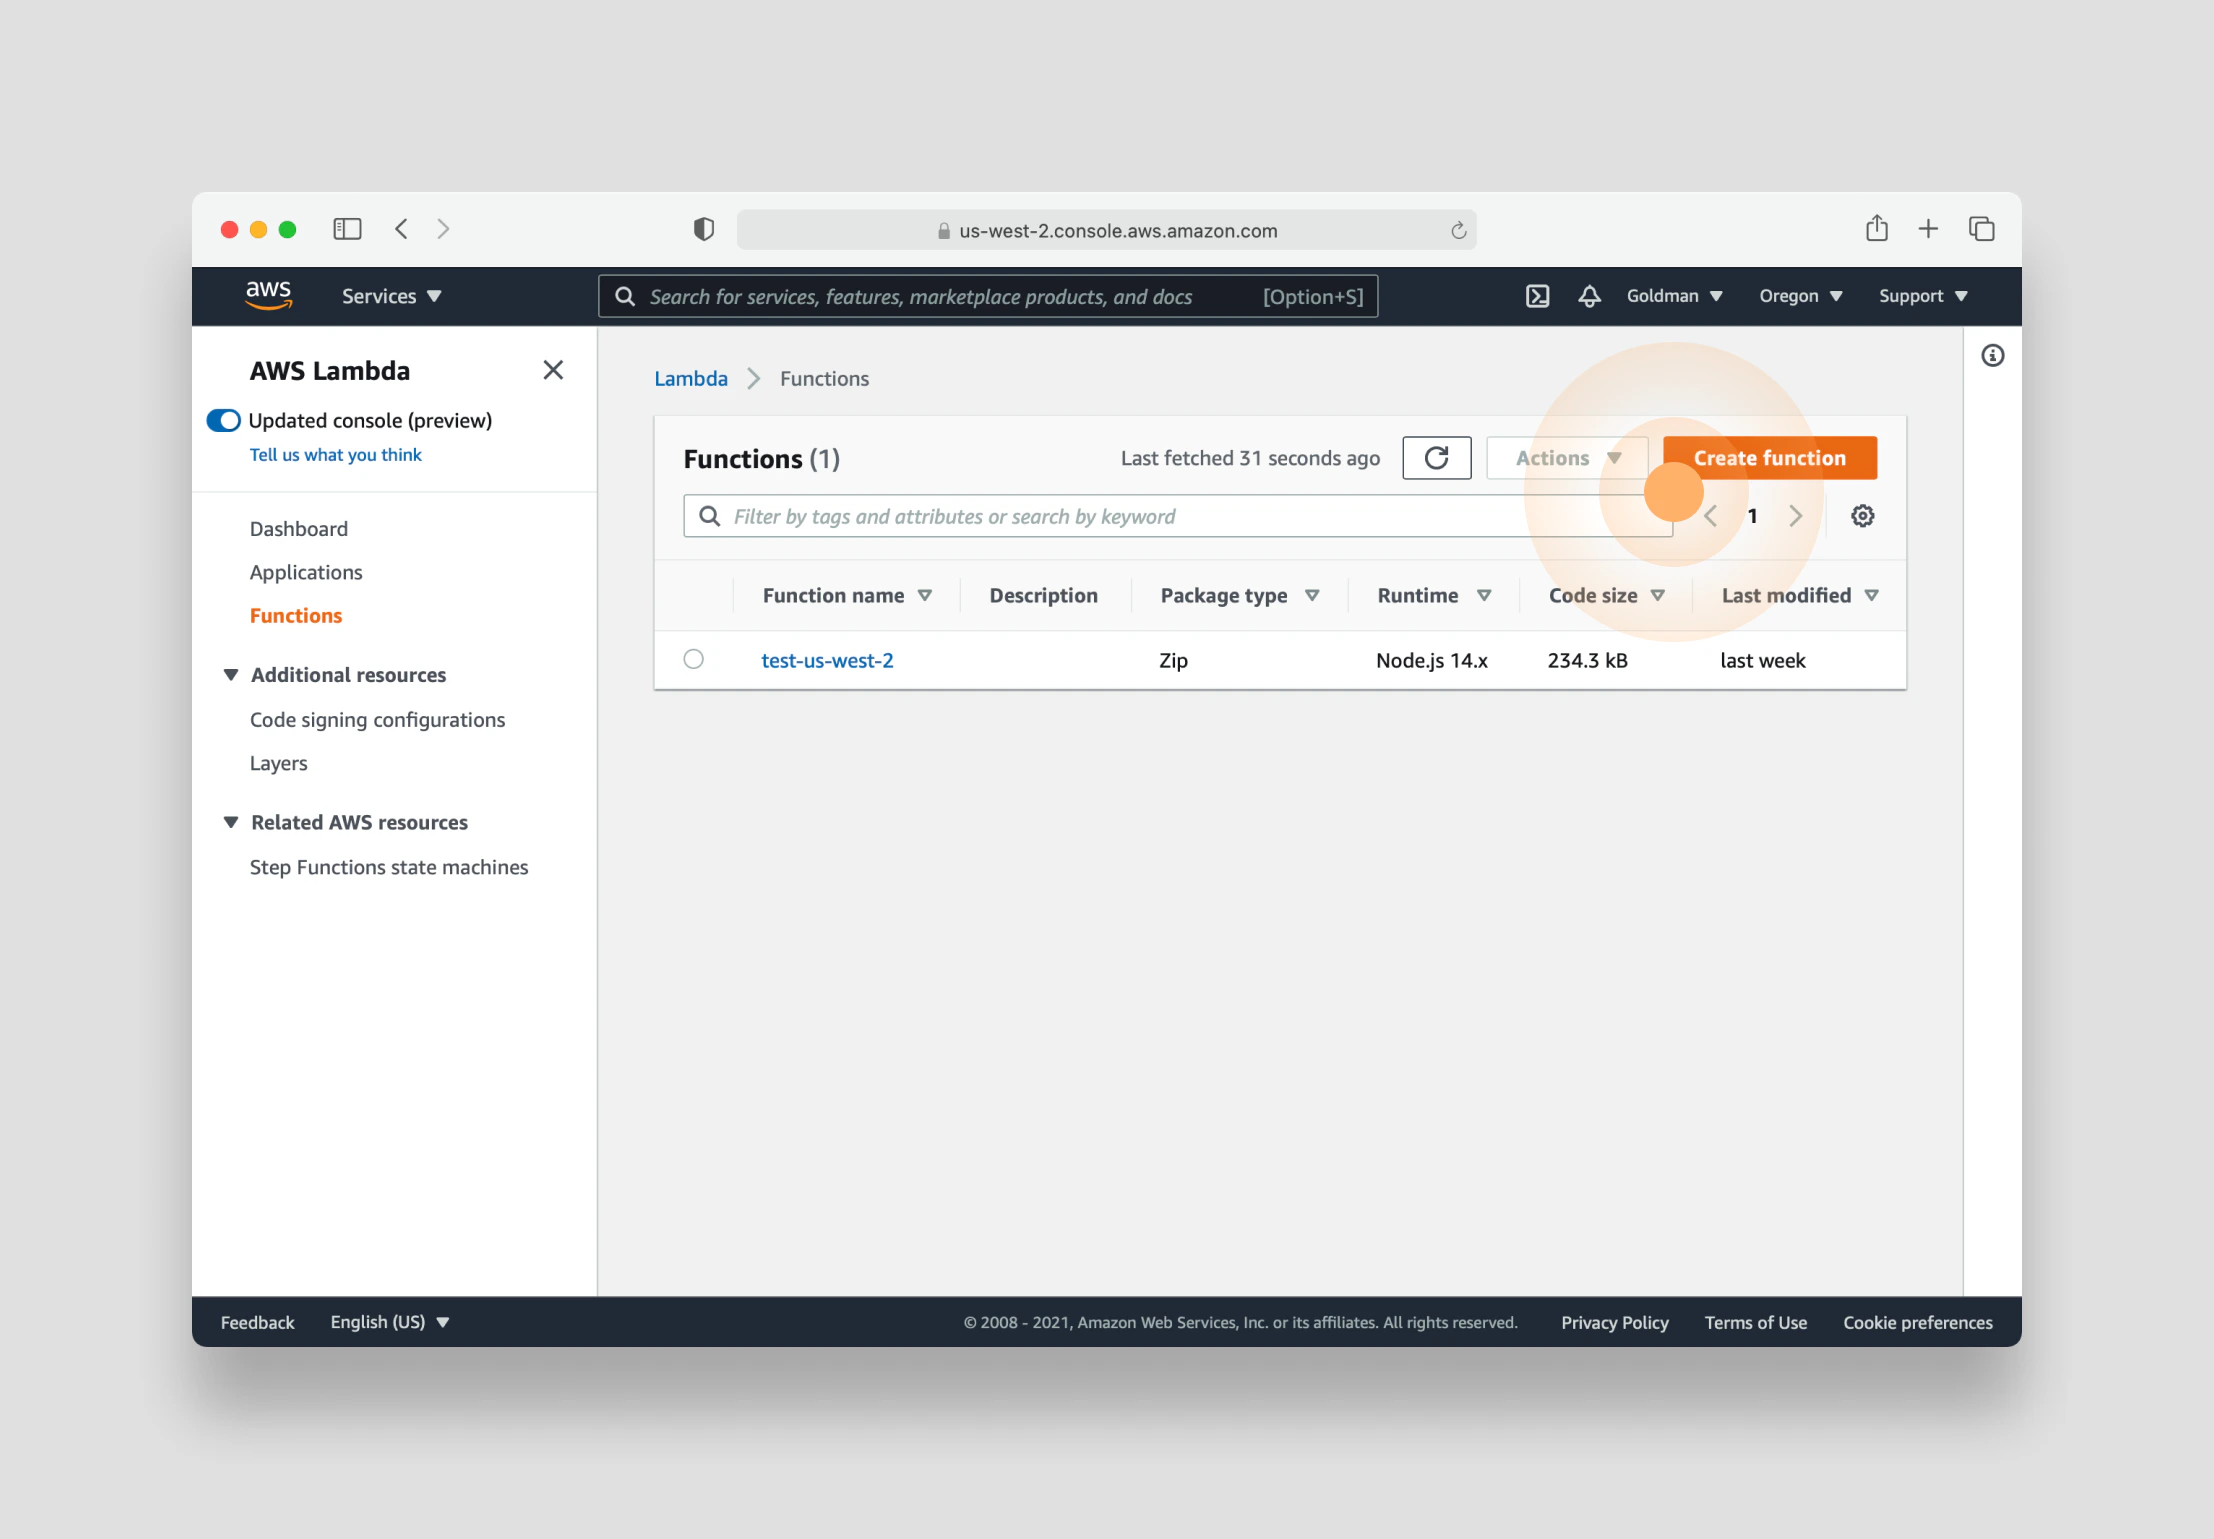
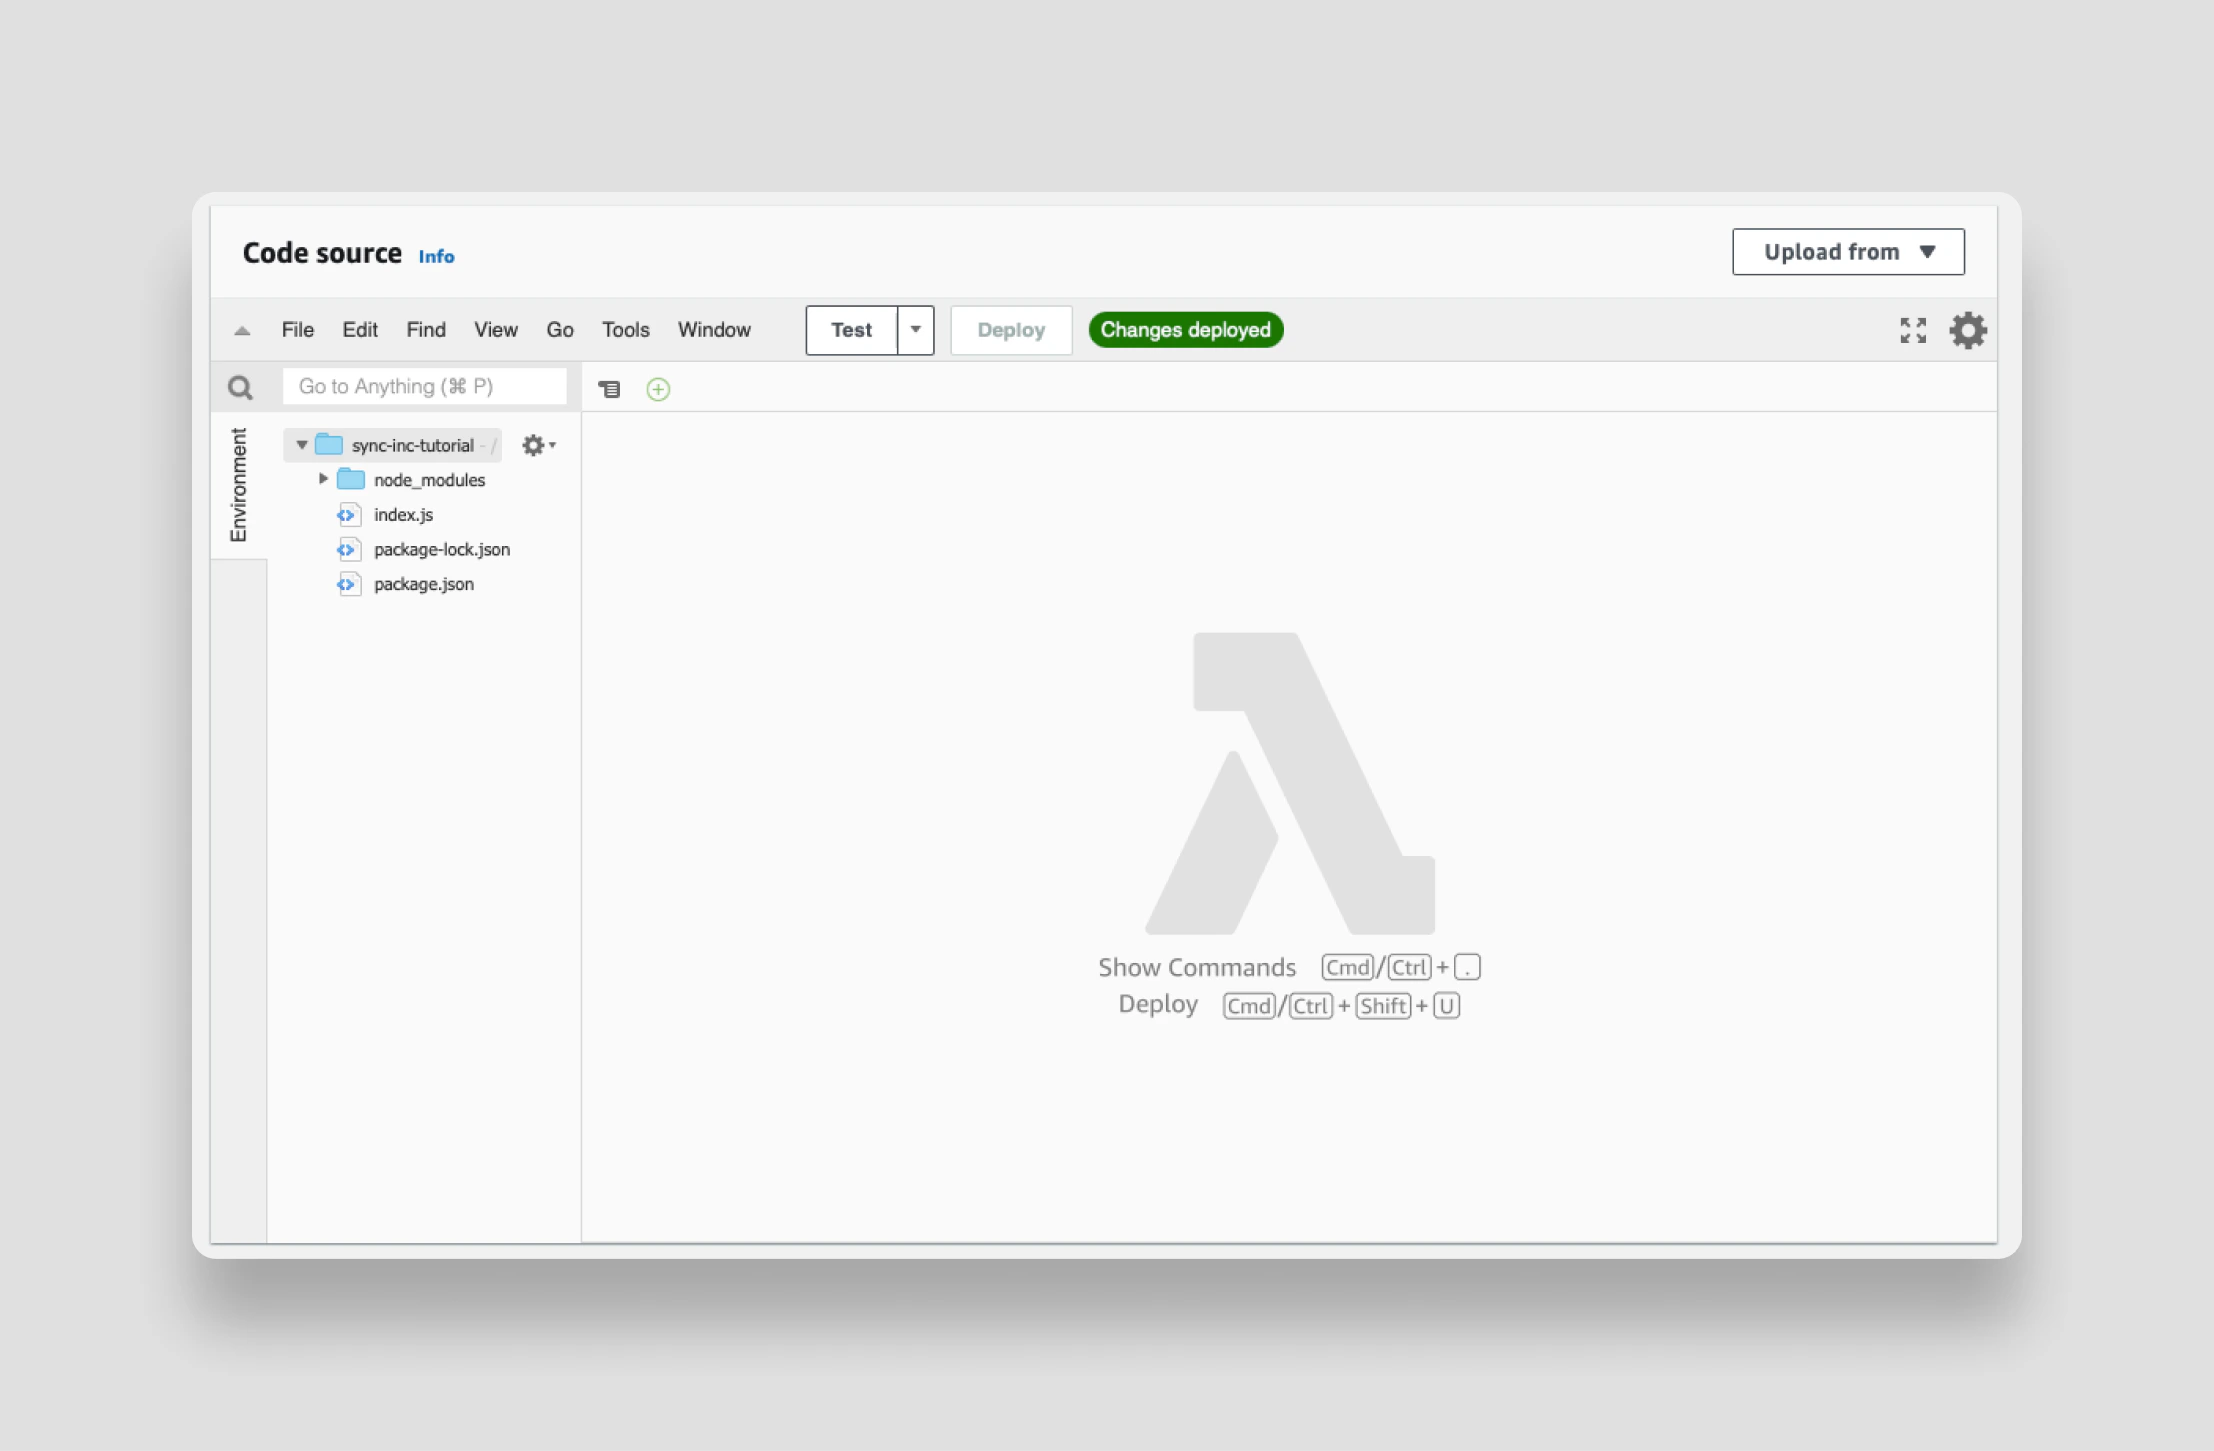
Initialize your Airtable Lambda
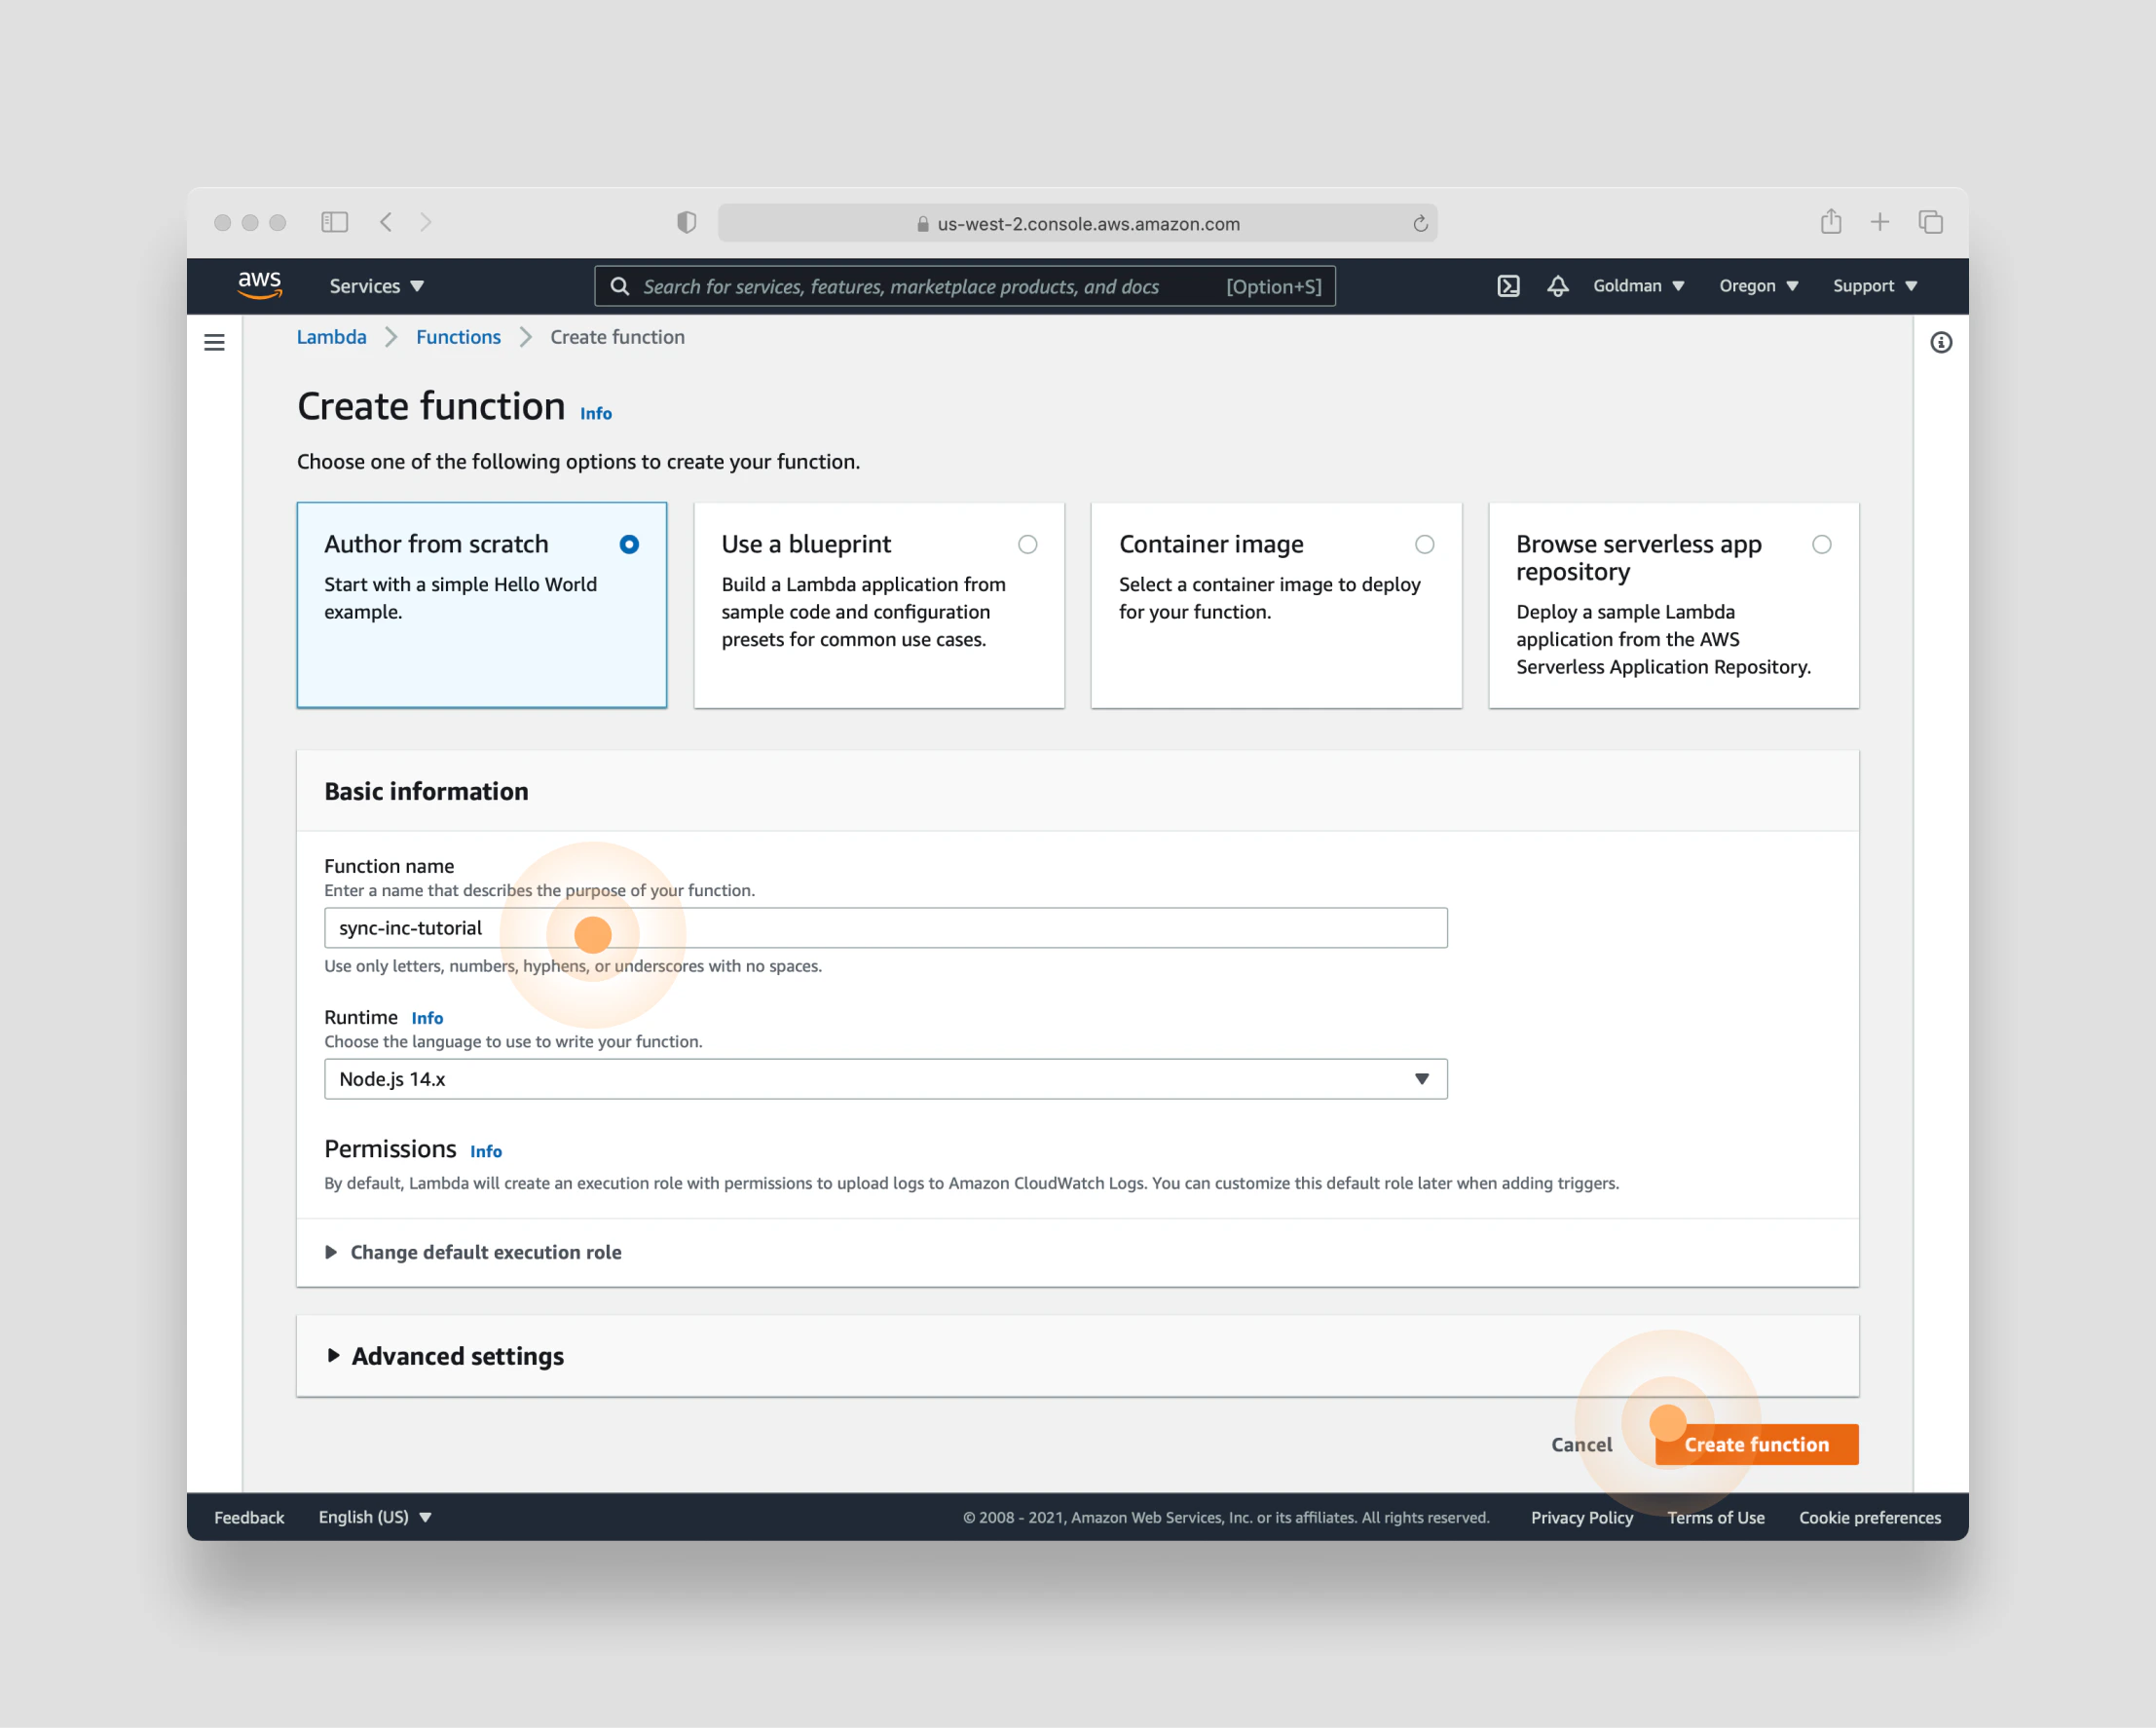
With Airtable, Sequin, and AWS all set up you are now ready to create the actual Lambda function. For this tutorial, you’ll write a Node.js Lambda function. Because this function needs to access the Sequin Postgres database you created earlier, you’ll install the node-postgres library using npm. To use an npm package in a Lambda, it’s easiest to initialize the function on your computer, zip it up, and then upload it to the AWS console.If you don’t have it already, install Node.js and npm on your computer.Create a new directory called
sync-inc-tutorial and run npm init -y to easily add a package.json to your directory.
pg using npm:
index.js to your directory:
zipinstructs your computer to create a zipped file-rinstructs thezipcommand to do it’s job by recursively compressing files and directoriesfunction.zipis the name of the zipped file that will be created in the process.index.js node_modules package-lock.json package.jsonis the list of all the files and directories that need to be compressed.
sync-inc-tutorial. You can leave everything else in the default state (including the runtime of Node.js). Then click the orange Create function button:
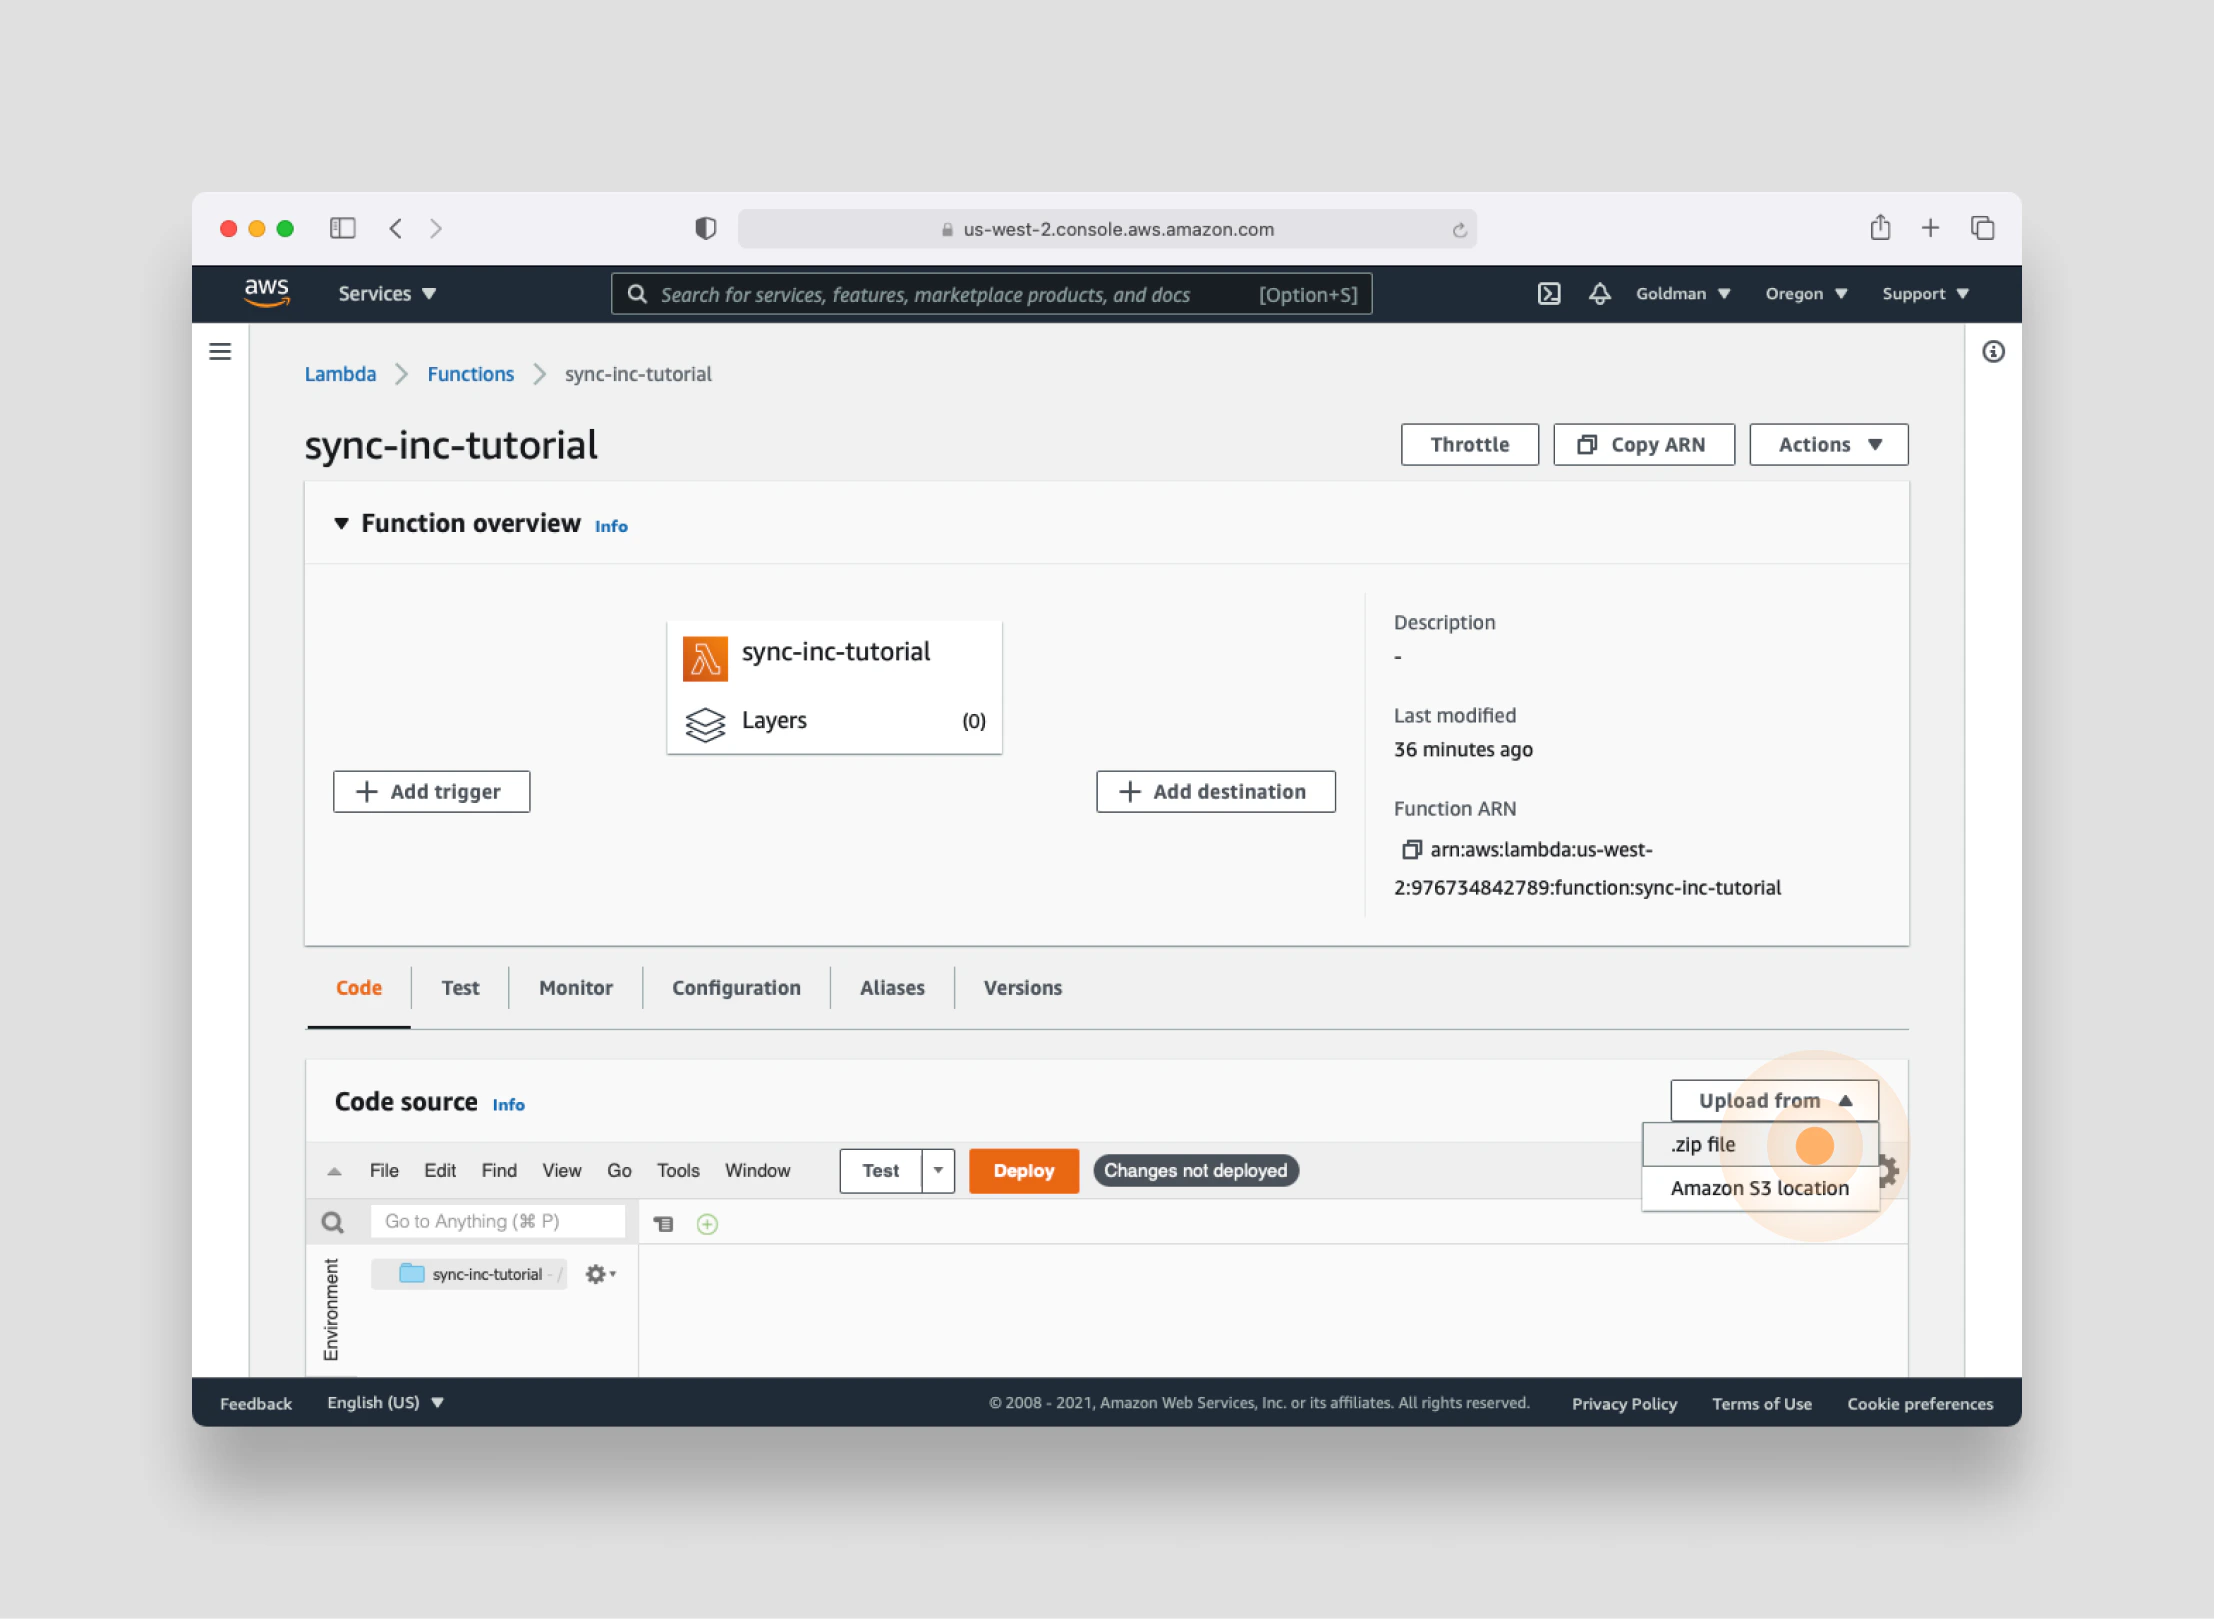
function.zip, you’ll see that your function is not only ready to be built upon - but it’s already been deployed:
Build the Airtable Lambda function
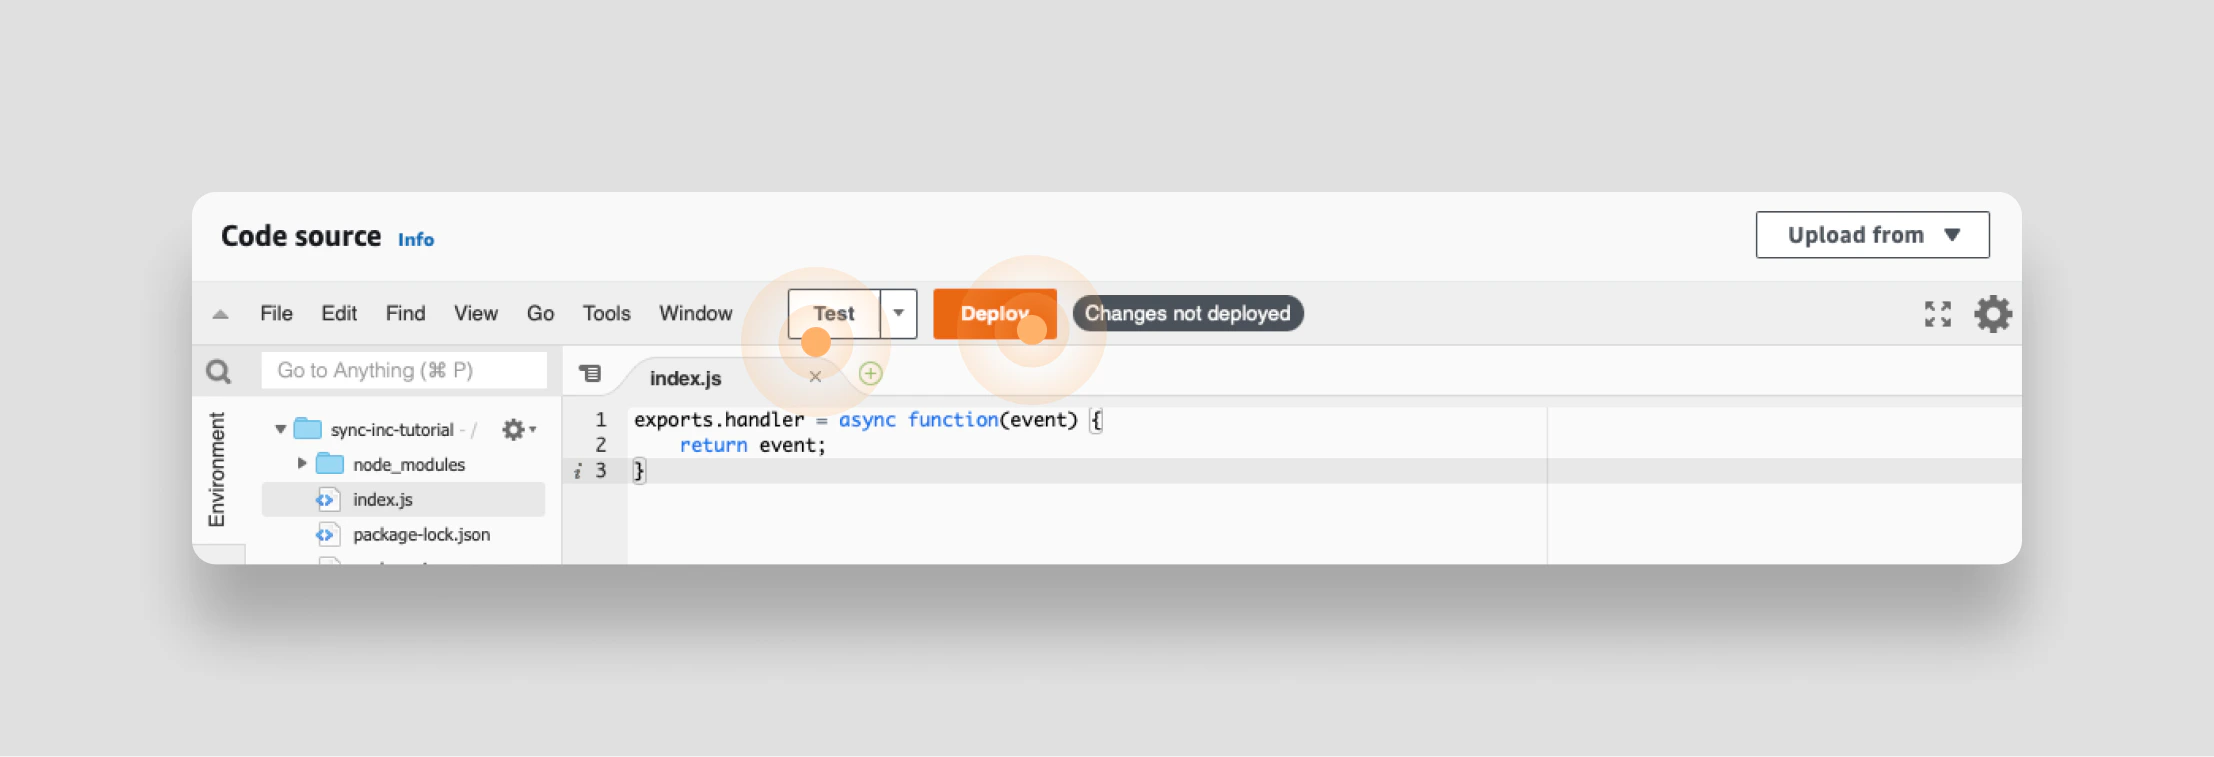
As you have learned, a Lambda is simply a function that runs in the cloud. Now, you are ready to write that function. To get your bearings, you’ll start with a very simple Lambda function and run a test to see how things work end-to-end.Export a handler function
The first step in writing your Lambda is to tell AWS which function to run when the Lambda is triggered by an event. This function is called thehandler function. You’ll note partway down the page where you can define the handler:
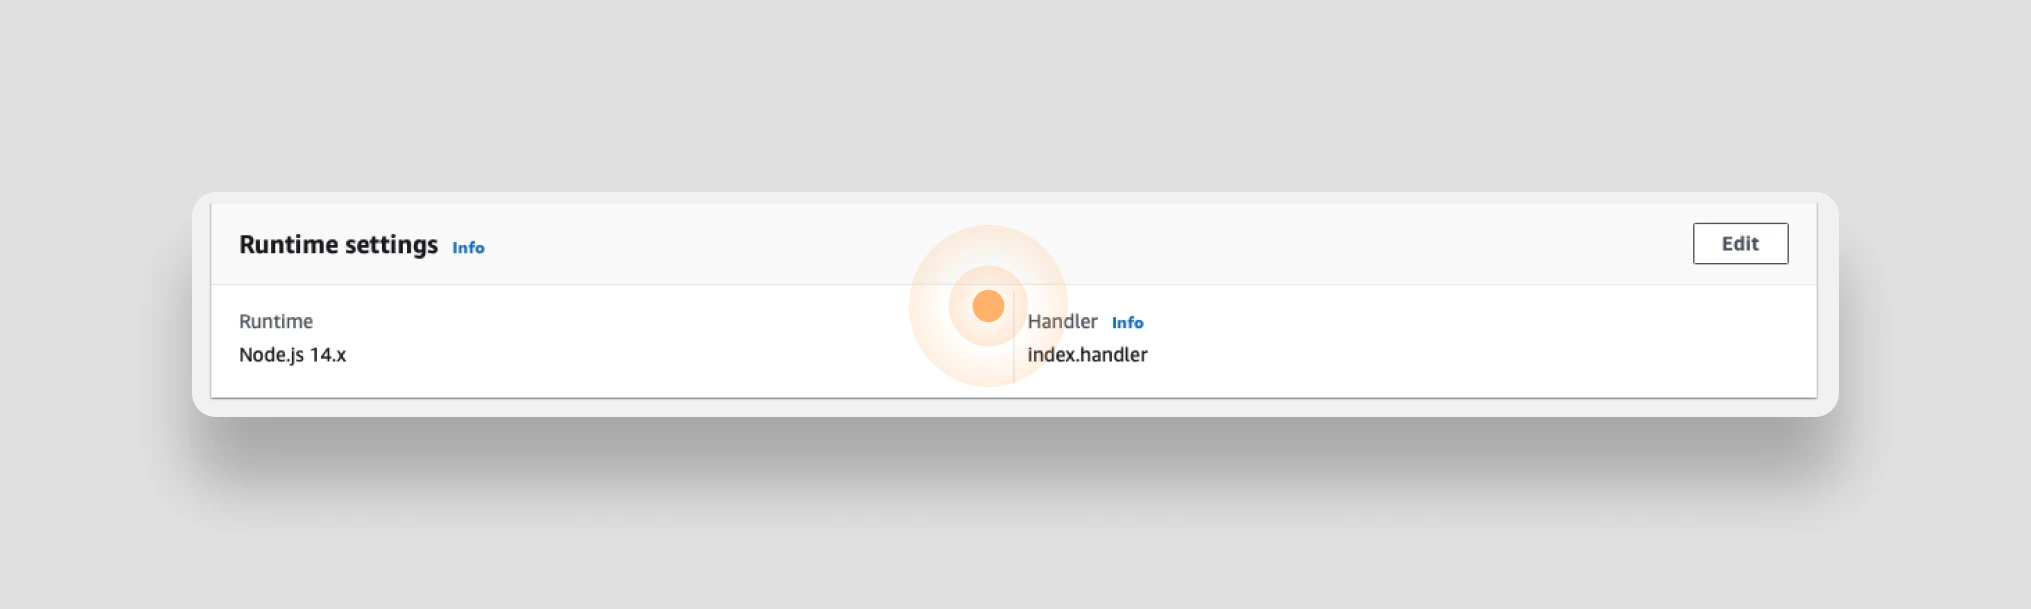
index.handler where index is the name of the file and handler is the name of the function being exported from that file.
For this tutorial, there is no reason to deviate from the default - so edit the index.js file to export a function called handler which takes in an event as a argument and simply returns the event:
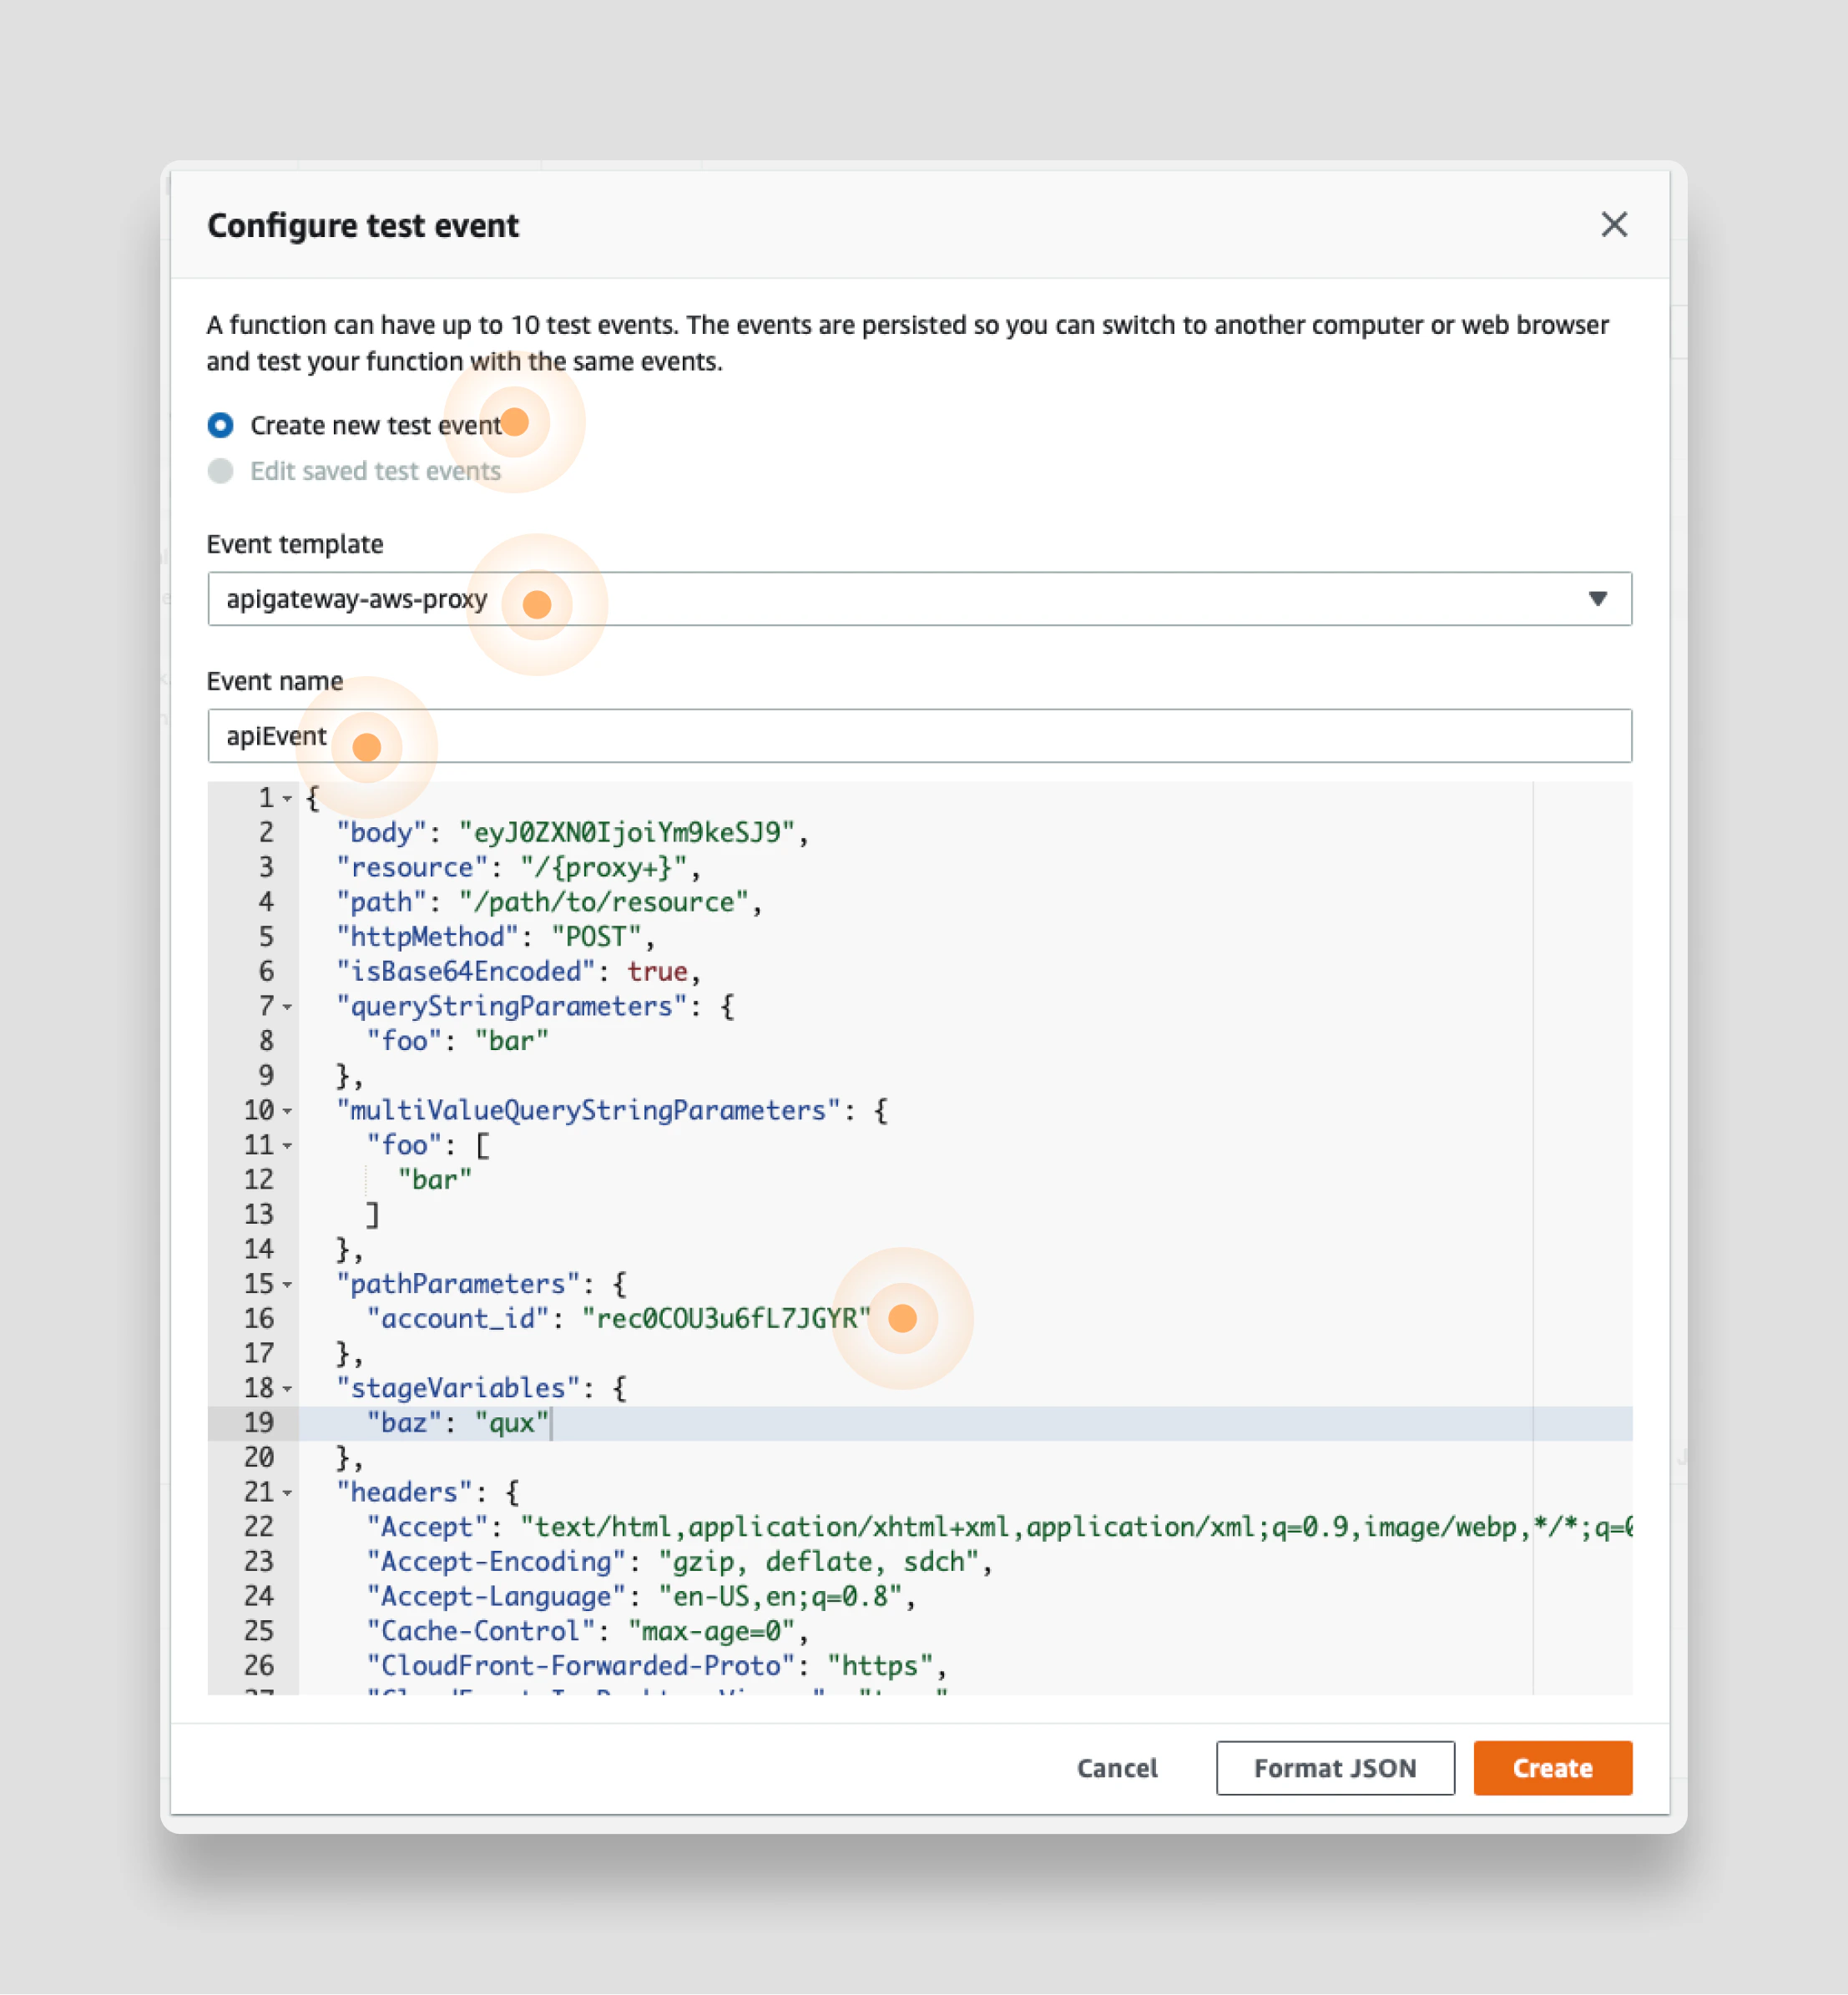
Setup a test event
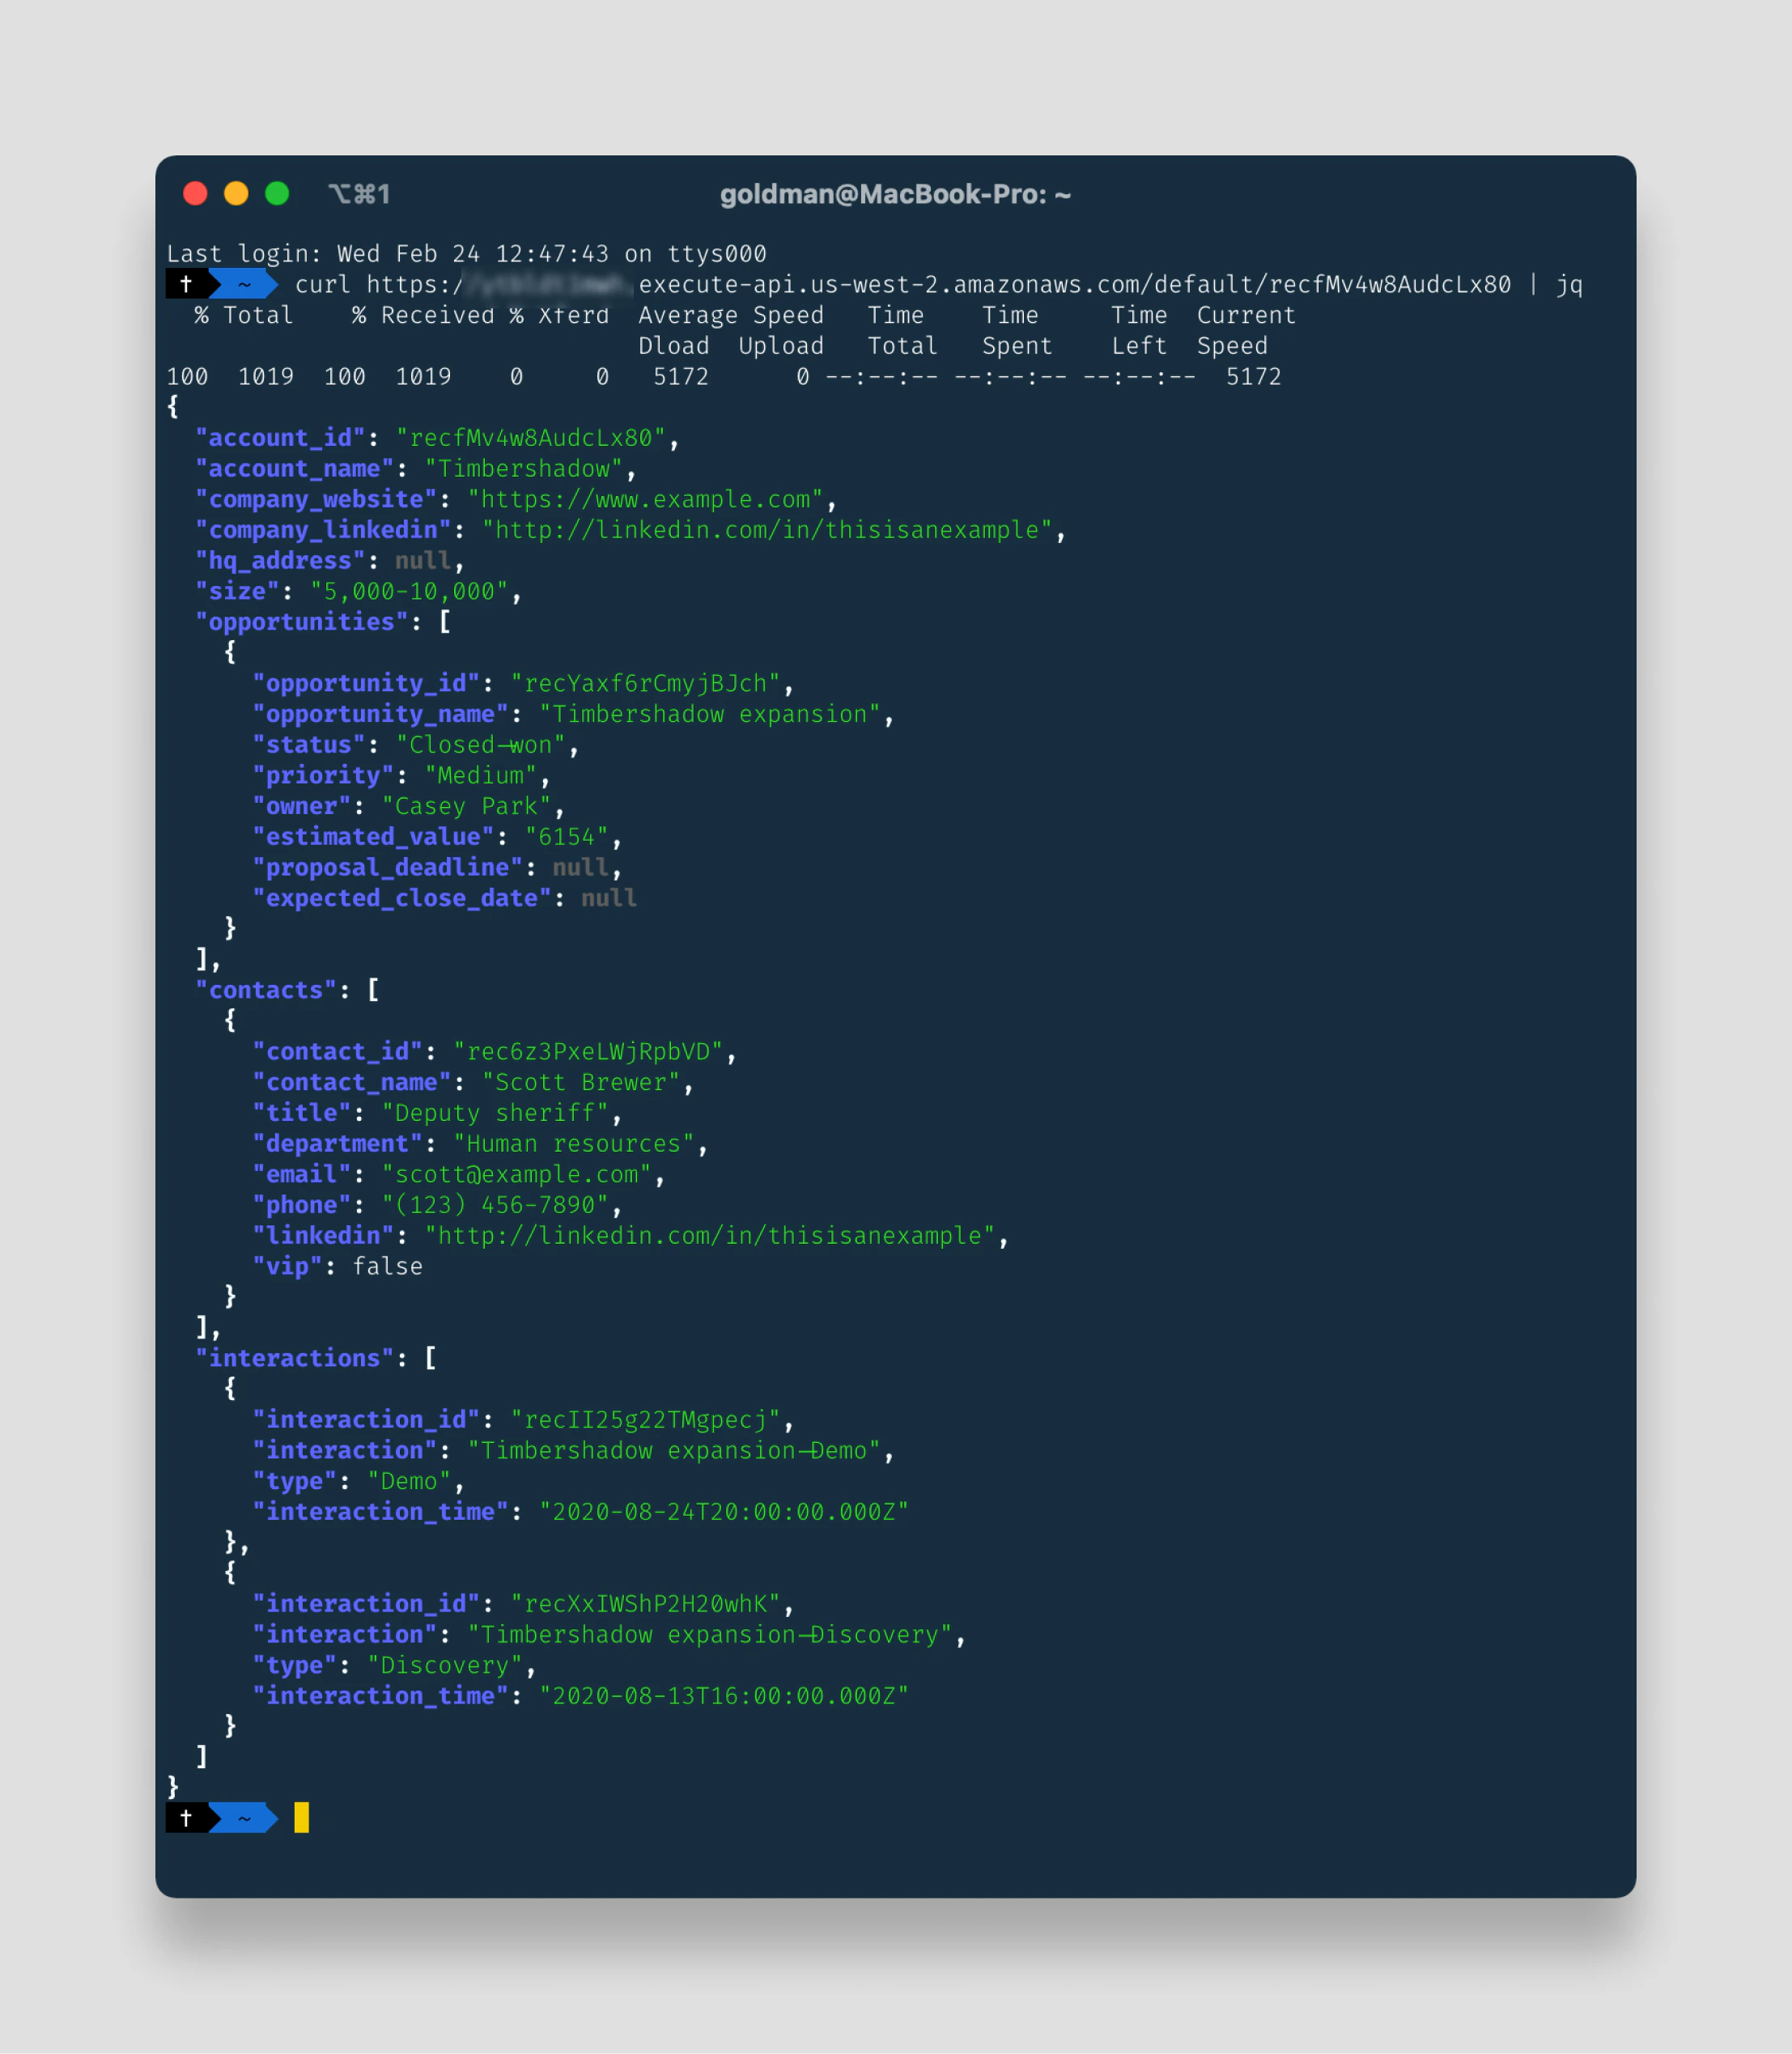
To test the simple Lambda function you just wrote, you’ll create a test event the replicates the real world event you expect to trigger your Lambda. As you’ll recall, you are going to trigger your Lambda with an API call, or more specifically an AWS API Gateway event. The event is going to include anaccount_id, the id of an account in your Airtable CRM:
account_id and return all the details of the account including the associated contacts, opportunities, and interactions.
So let’s test your Lambda function by passing in an API Gateway test event that includes the account_id as a parameter.
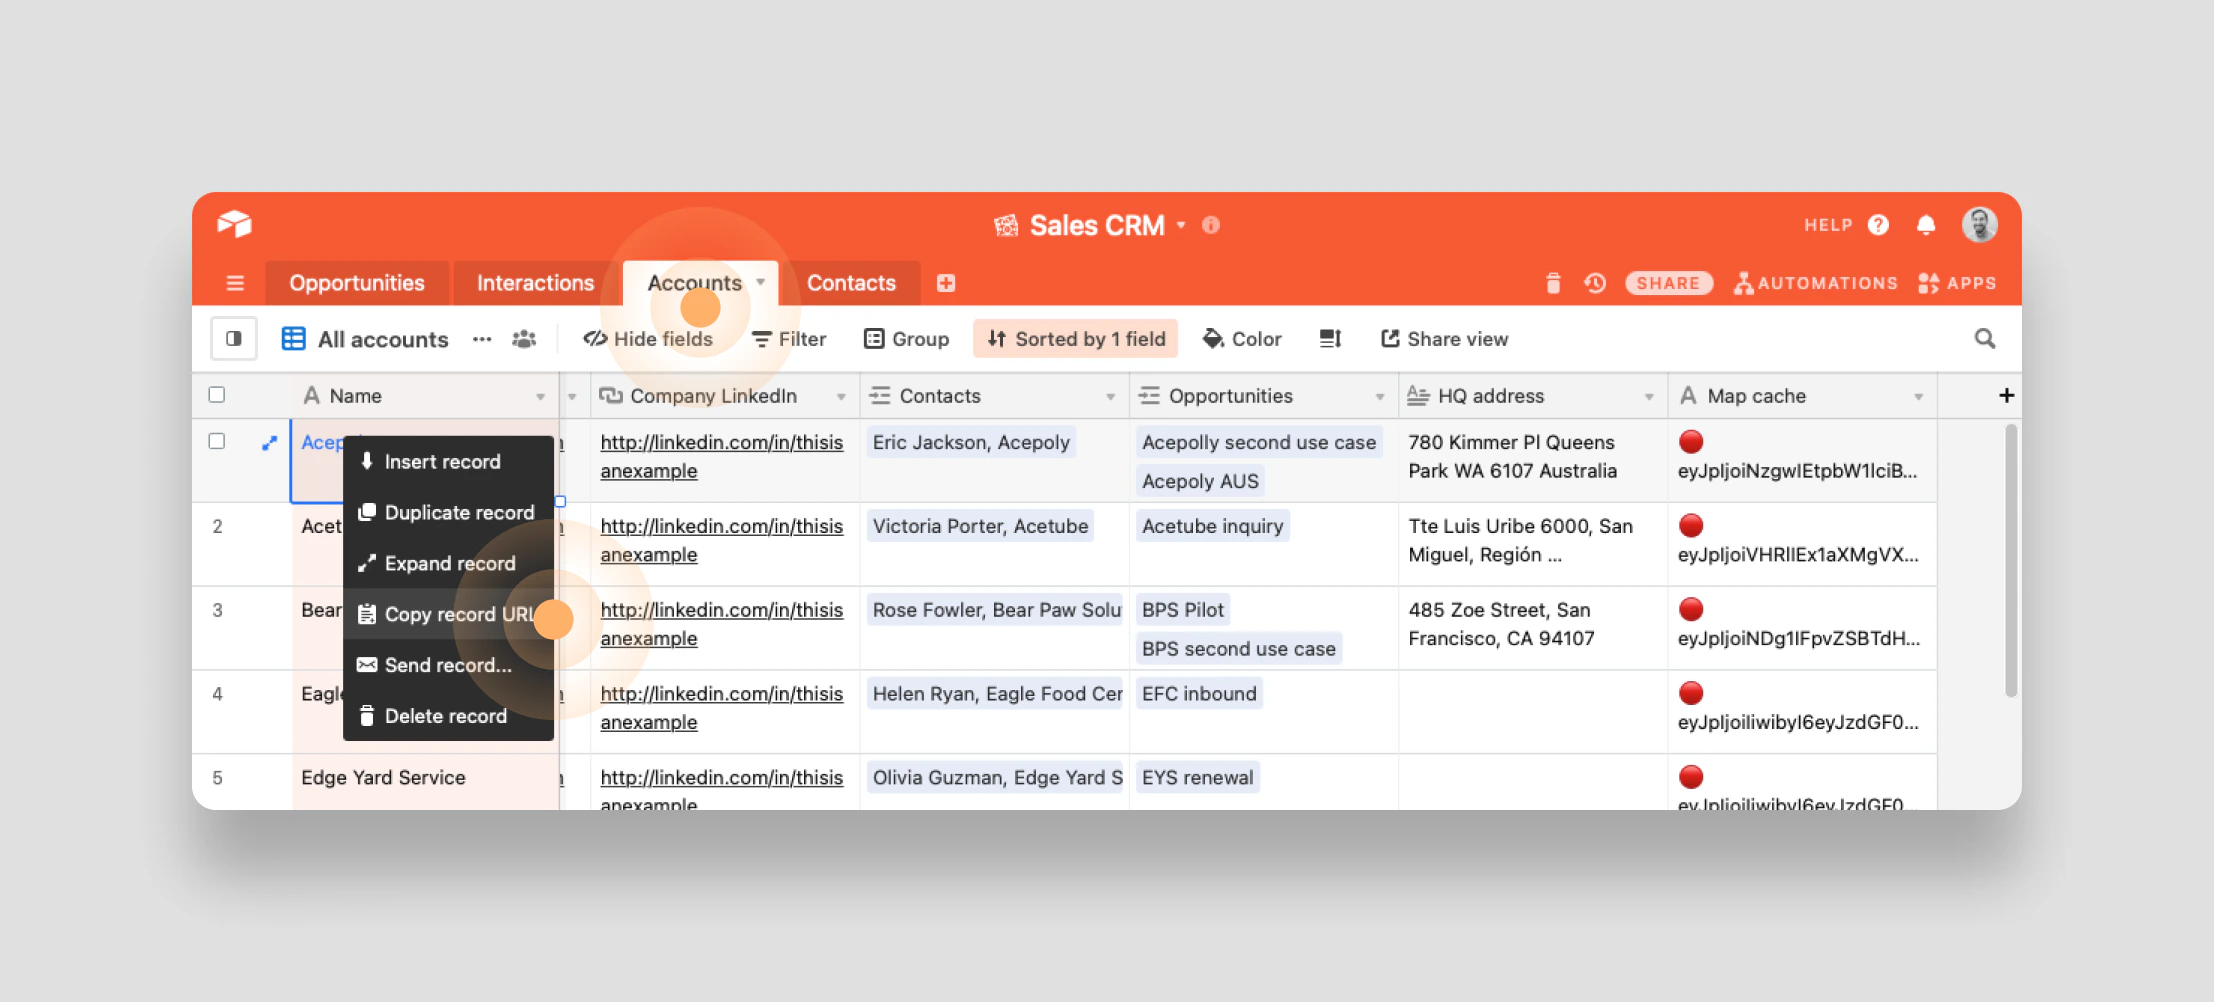
As a first step, you need a real account_id from your Airtable CRM.
To get one, open up your Airtable CRM in a new tab, select the Accounts table, right click on an account and select Copy record URL:
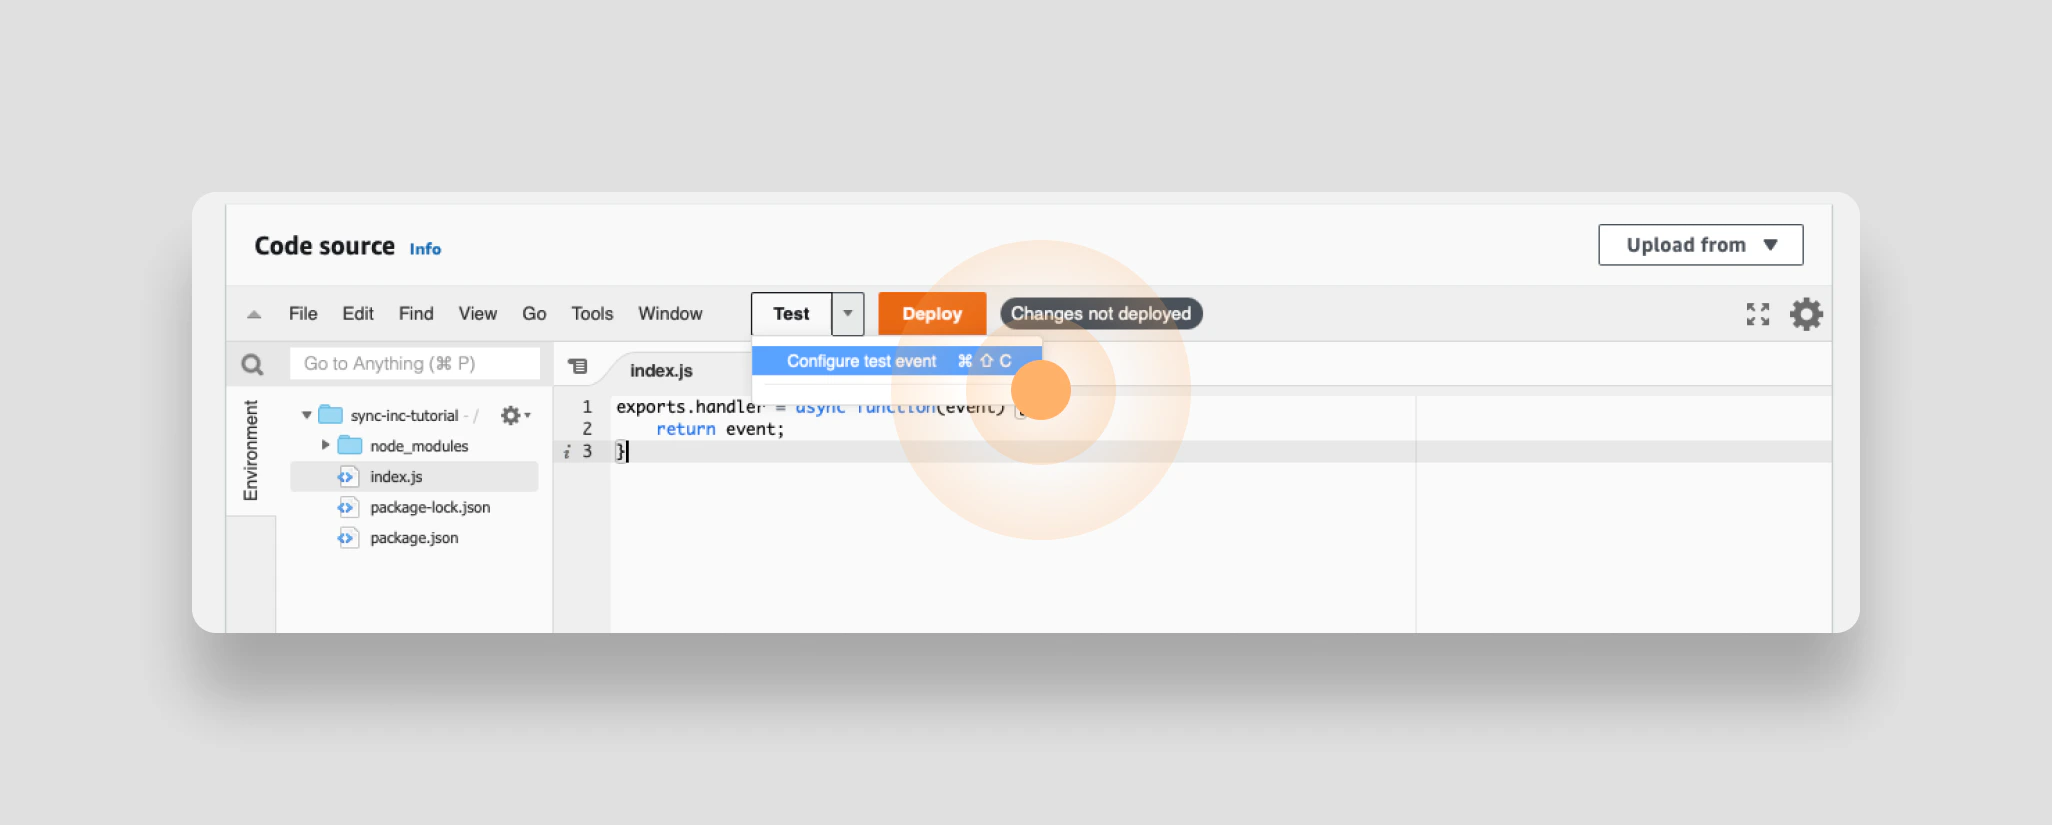
apiEvent.
Customize the event to include an account_id as a parameter. You’ll see that on line 15 you can edit the pathParameters object to include the key account_id. For the value - paste the URL you retrieved from Airtable and delete everything but the record_id (which starts with rec).
Your test event should look like this:
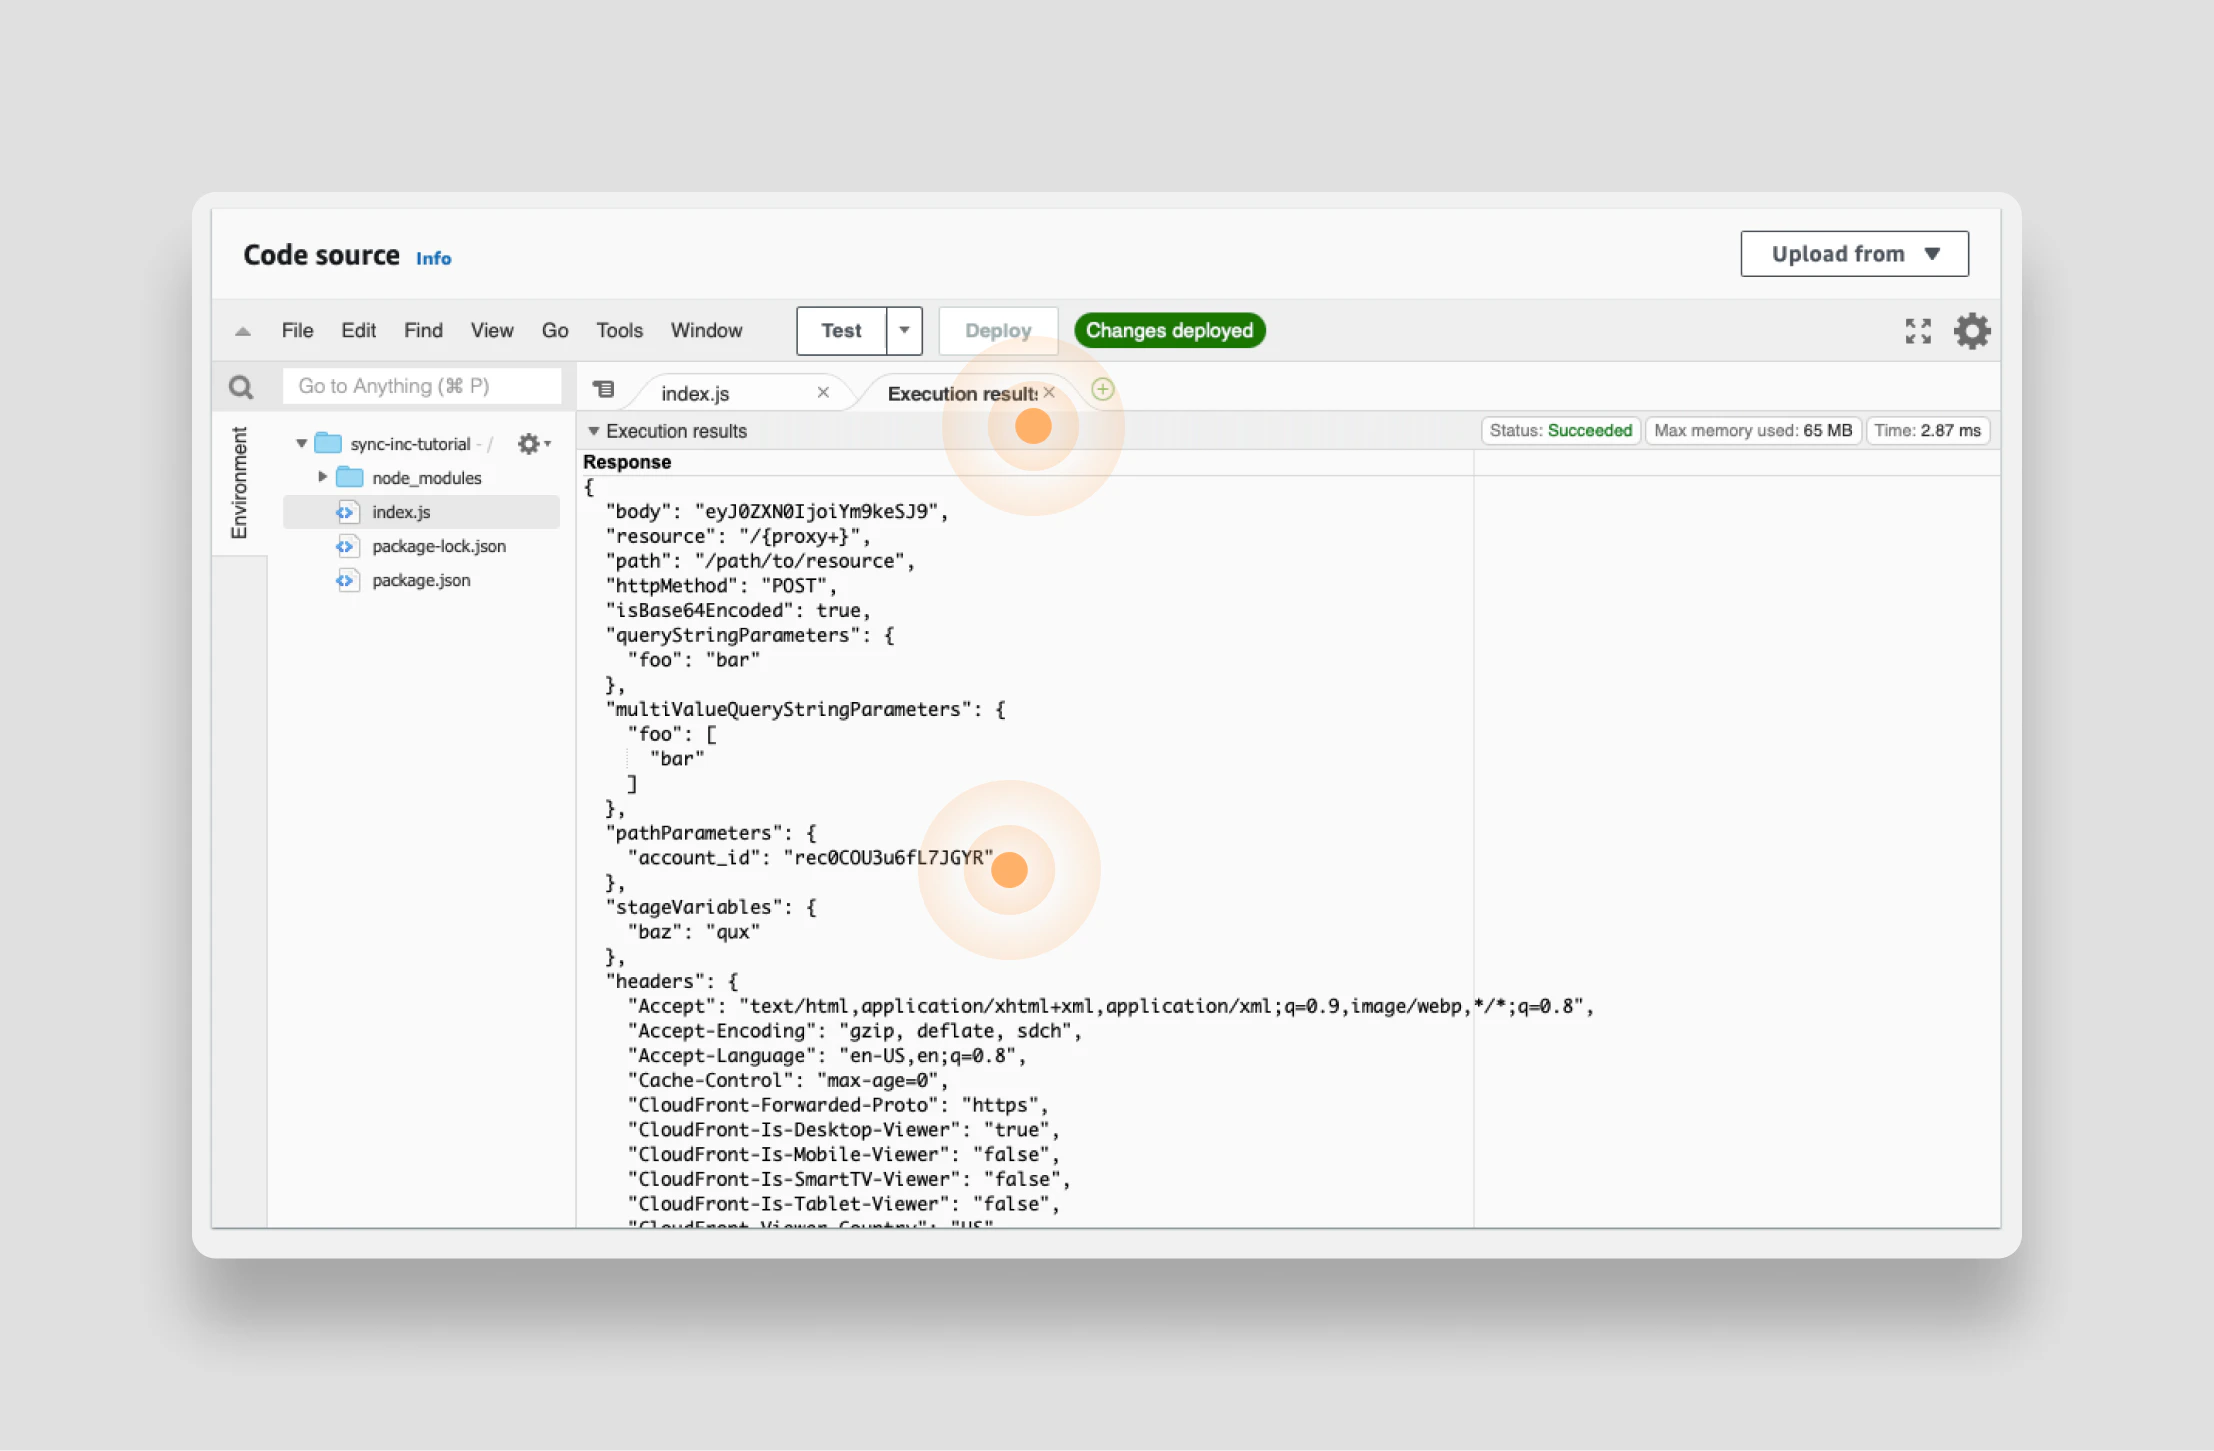
Execution Result tab. If everything is working properly, you should see your test account_id comes right through:
It’s worth noting, when you develop a Lambda function in the AWS console as you are doing here, there is no “dev” environment built in. To test your code you need to deploy it straight to production - so bear this in mind when making edits to existing Lambda functions.
Connect to your Sequin database
You now know how a simplistic Lambda functions behaves end-to-end. You know the shape of the event object that will trigger your function and how it passes through your function. It’s time to make your Lambda function do some work for you. To do so, you need to extract theaccount_id from the event trigger and retrieve the details of the account from Airtable. As a first step, you’ll setup the connection to your Sequin database, which contains all this information.
You’ll connect to your Sequin database using the node-postgres library you added to your function before you uploaded it to AWS.
Before the handler function, require pg, define a new client, and open up a connection:
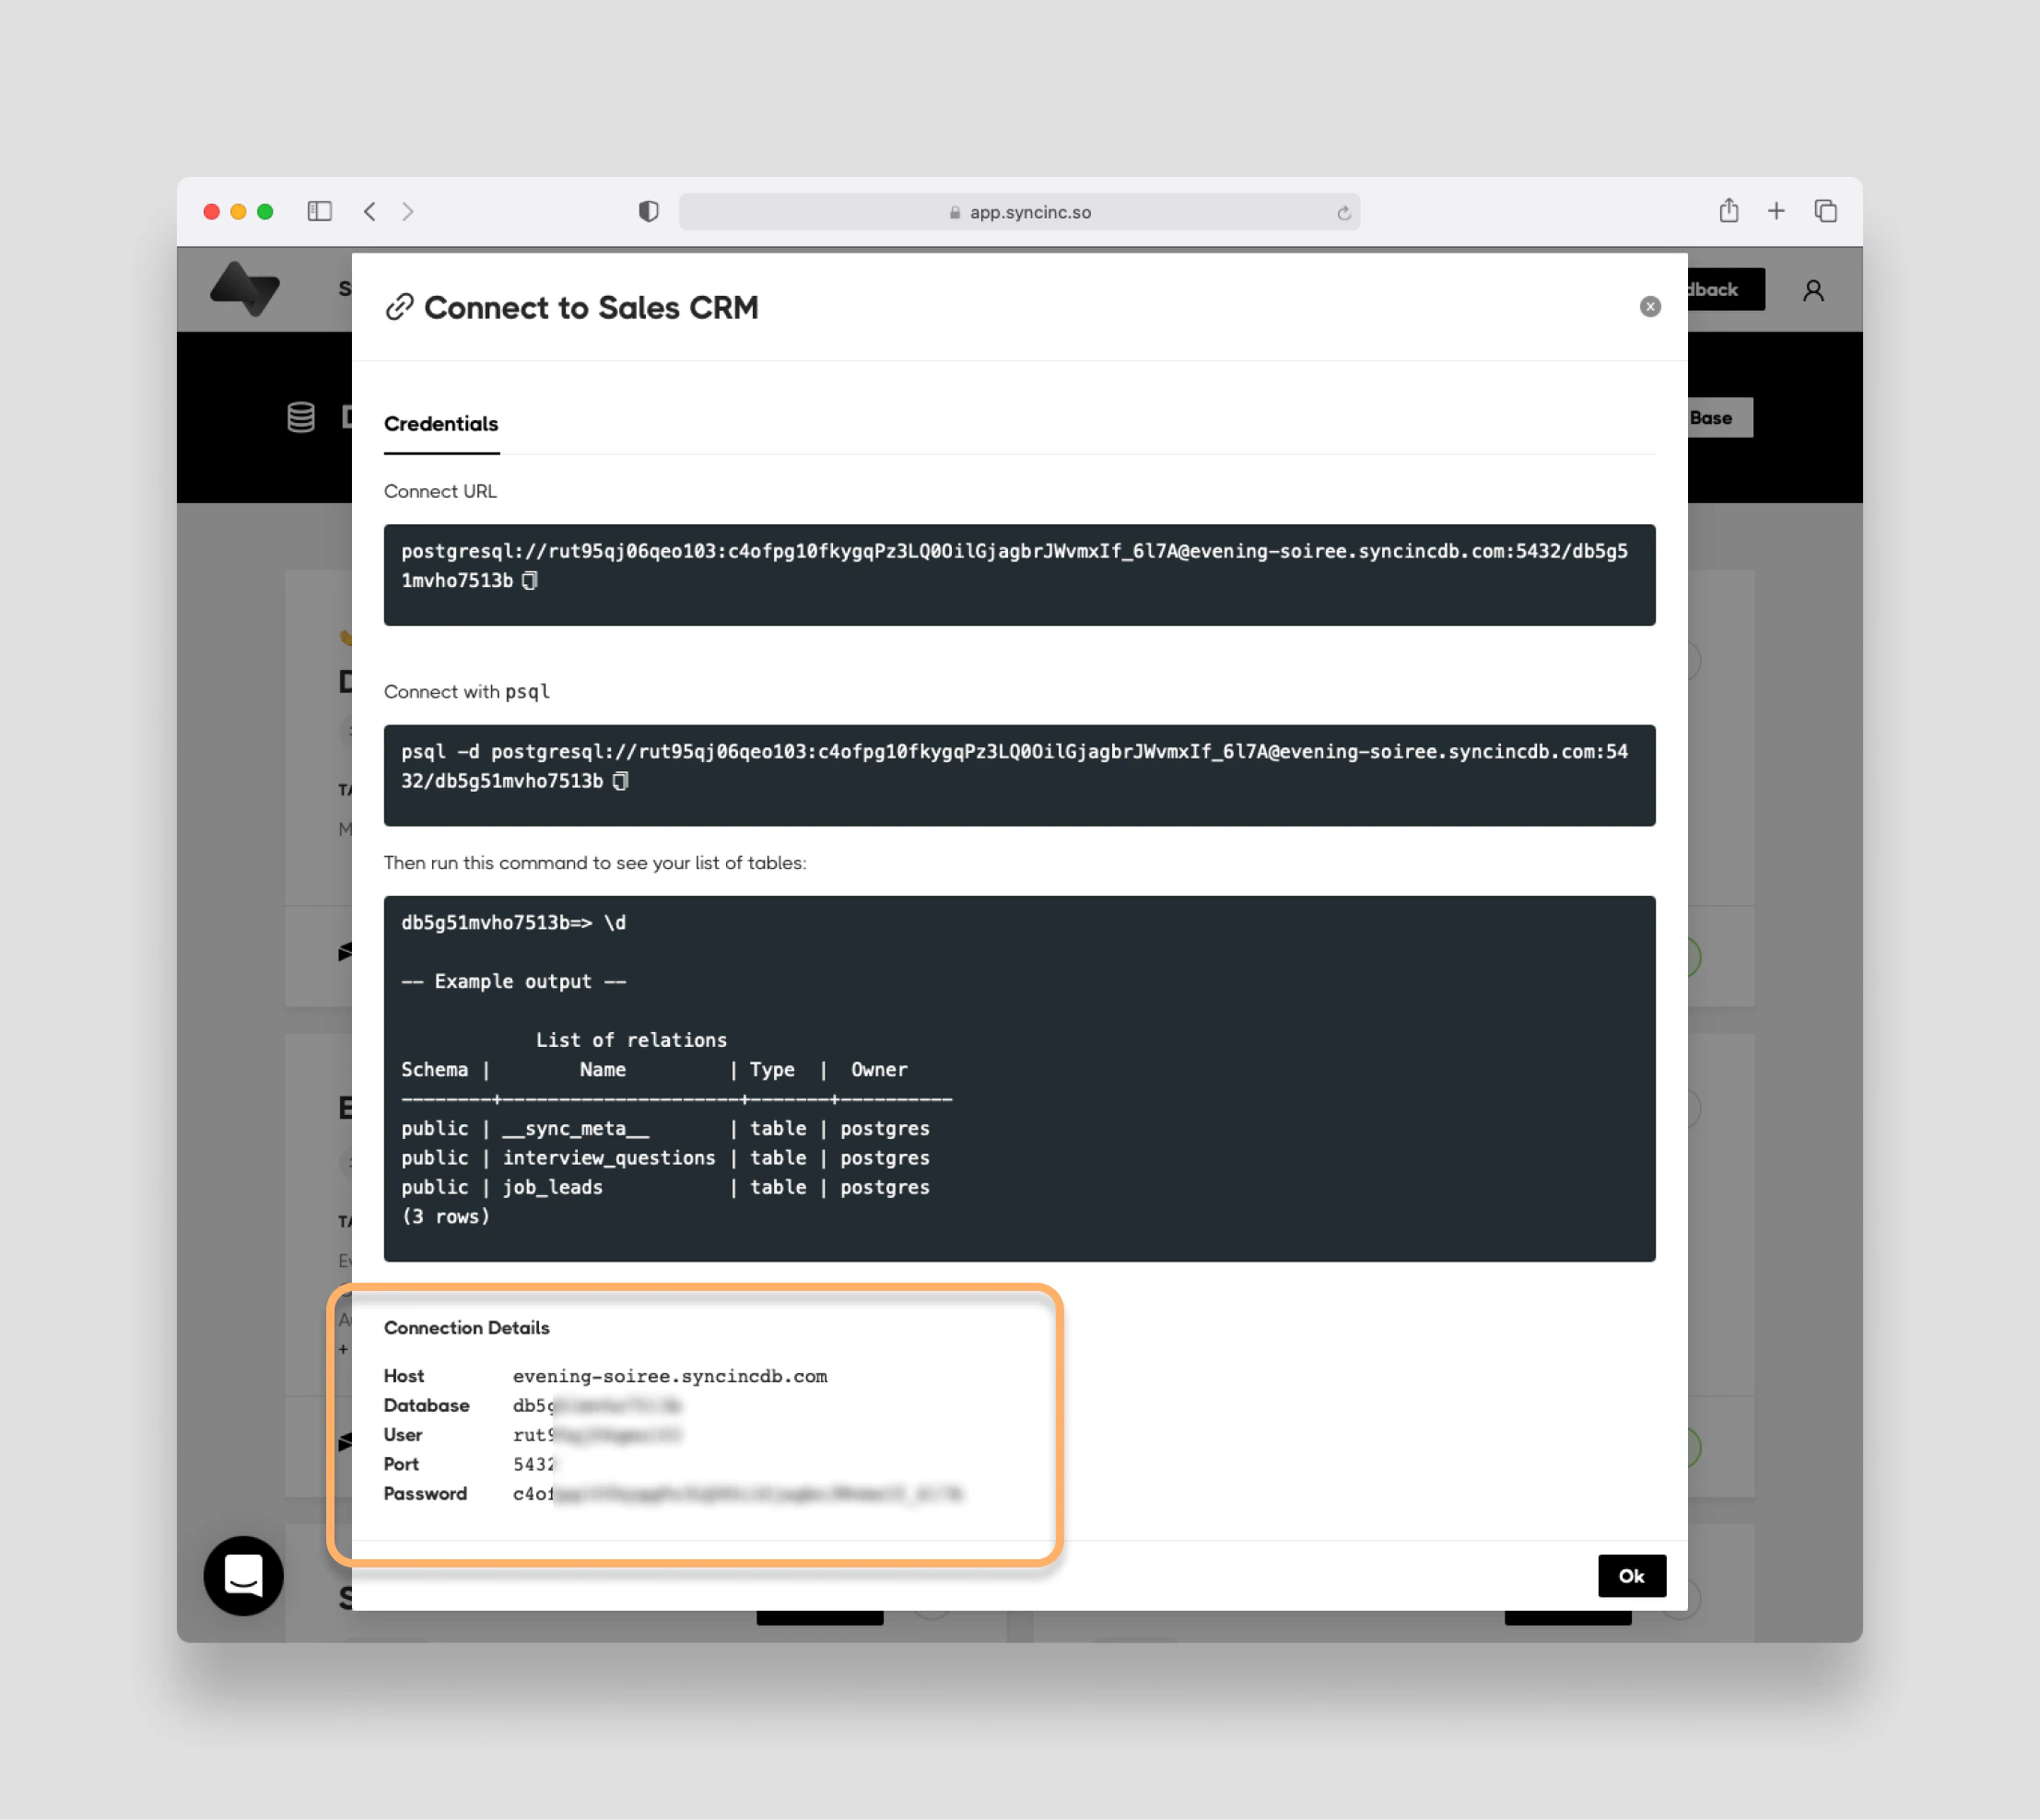
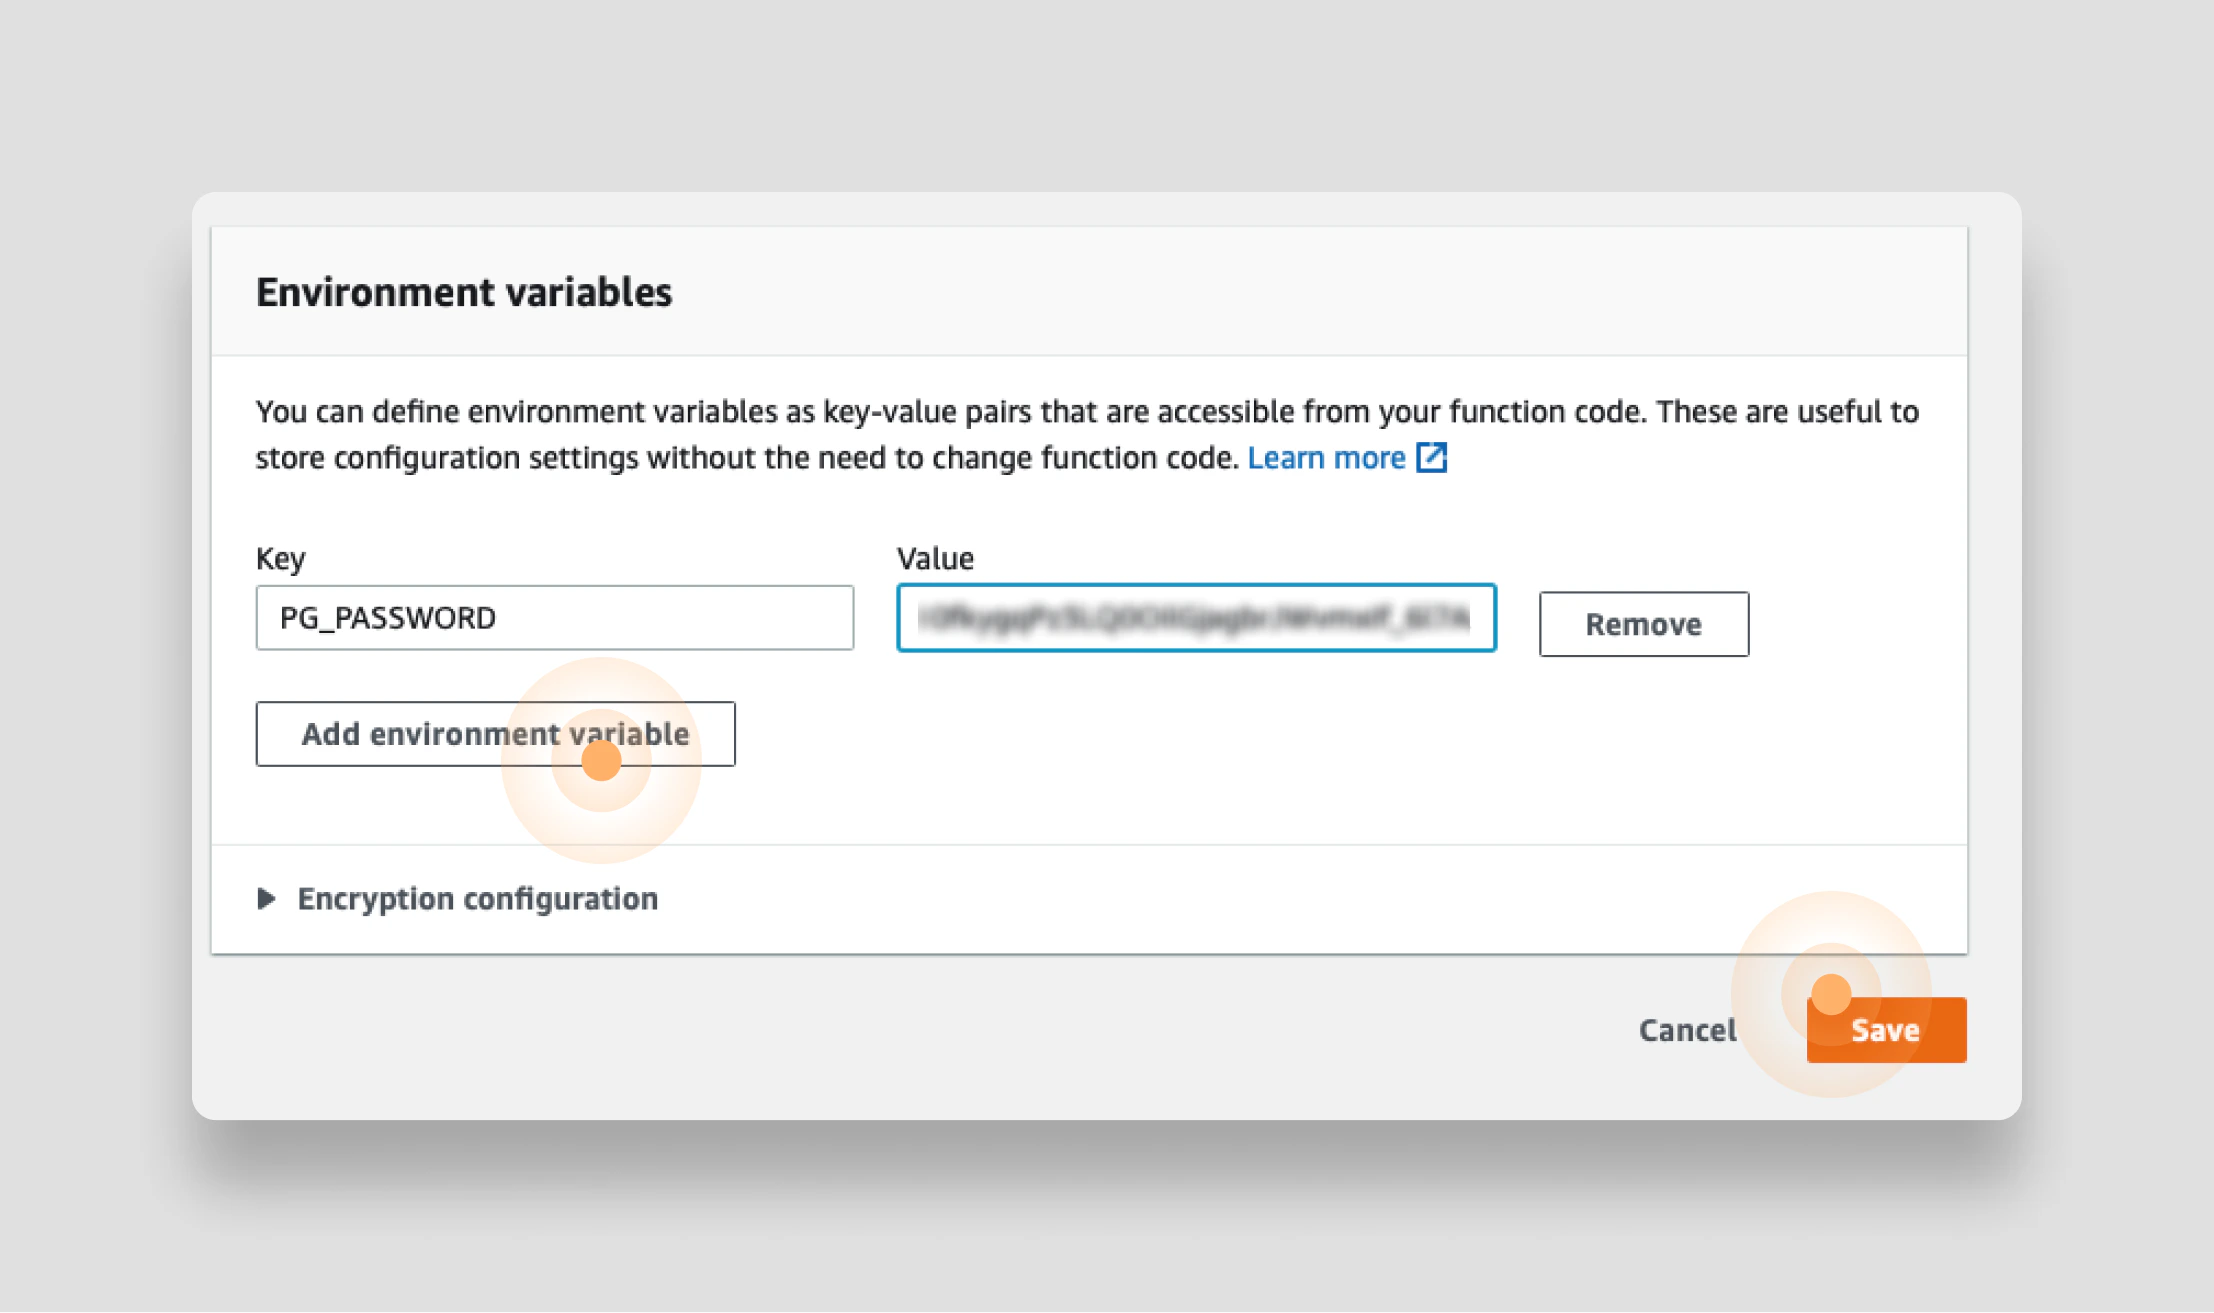
process.env.PG_PASSWORD ) to store your database password. This keeps the password out of the code, which you might one day commit to version control (eg git). To set the environment variable in AWS Lambda click on the Configuration tab and then select Environment variables followed by Edit:

PG_PASSWORD), and then enter the database password you retrieved from Sequin. Click Save:

Query your Airtable data using SQL
With the database connection in place, you’re ready to access your Airtable CRM data using SQL. As another refresher, you want to show your support agents all the details of an account, including an account’s associated contacts, opportunities, and interactions. You’ll need to write a SQL query to extract all this information by joining all the tables in the CRM. Here’s what that will look like:JOIN across four tables with three noteworthy Postgres flourishes:
opportunities."owner" ->> 'name' AS "owner": Theopportunitiescolumn is a Collaborator field type over on Airtable. The Collaborator type lets you choose from a list of collaborators on a given base. This type is represented as ajsonbcolumn in your Postgres database that includes information about the collaborator like theirnameandemail. The->>is how we access properties inside of ajsonbcolumn in Postgres.interactions.status[1]: Thestatuscolumn is a “Select” field type over on Airtable. These are represented astext[](text array) columns in Postgres, as they can contain multiple values. Here, this query just grabs the first value from the array.ANY(): The Airtable CRM uses linked records to associate accounts, contacts, opportunities, and interactions to one another. In Postgres, these linked records are stored astext[](text array) because they can contain more than one value (i.e. an account can have many contacts). So to perform a completeJOINon an array, you useANY()to match each value of the array with the other table.
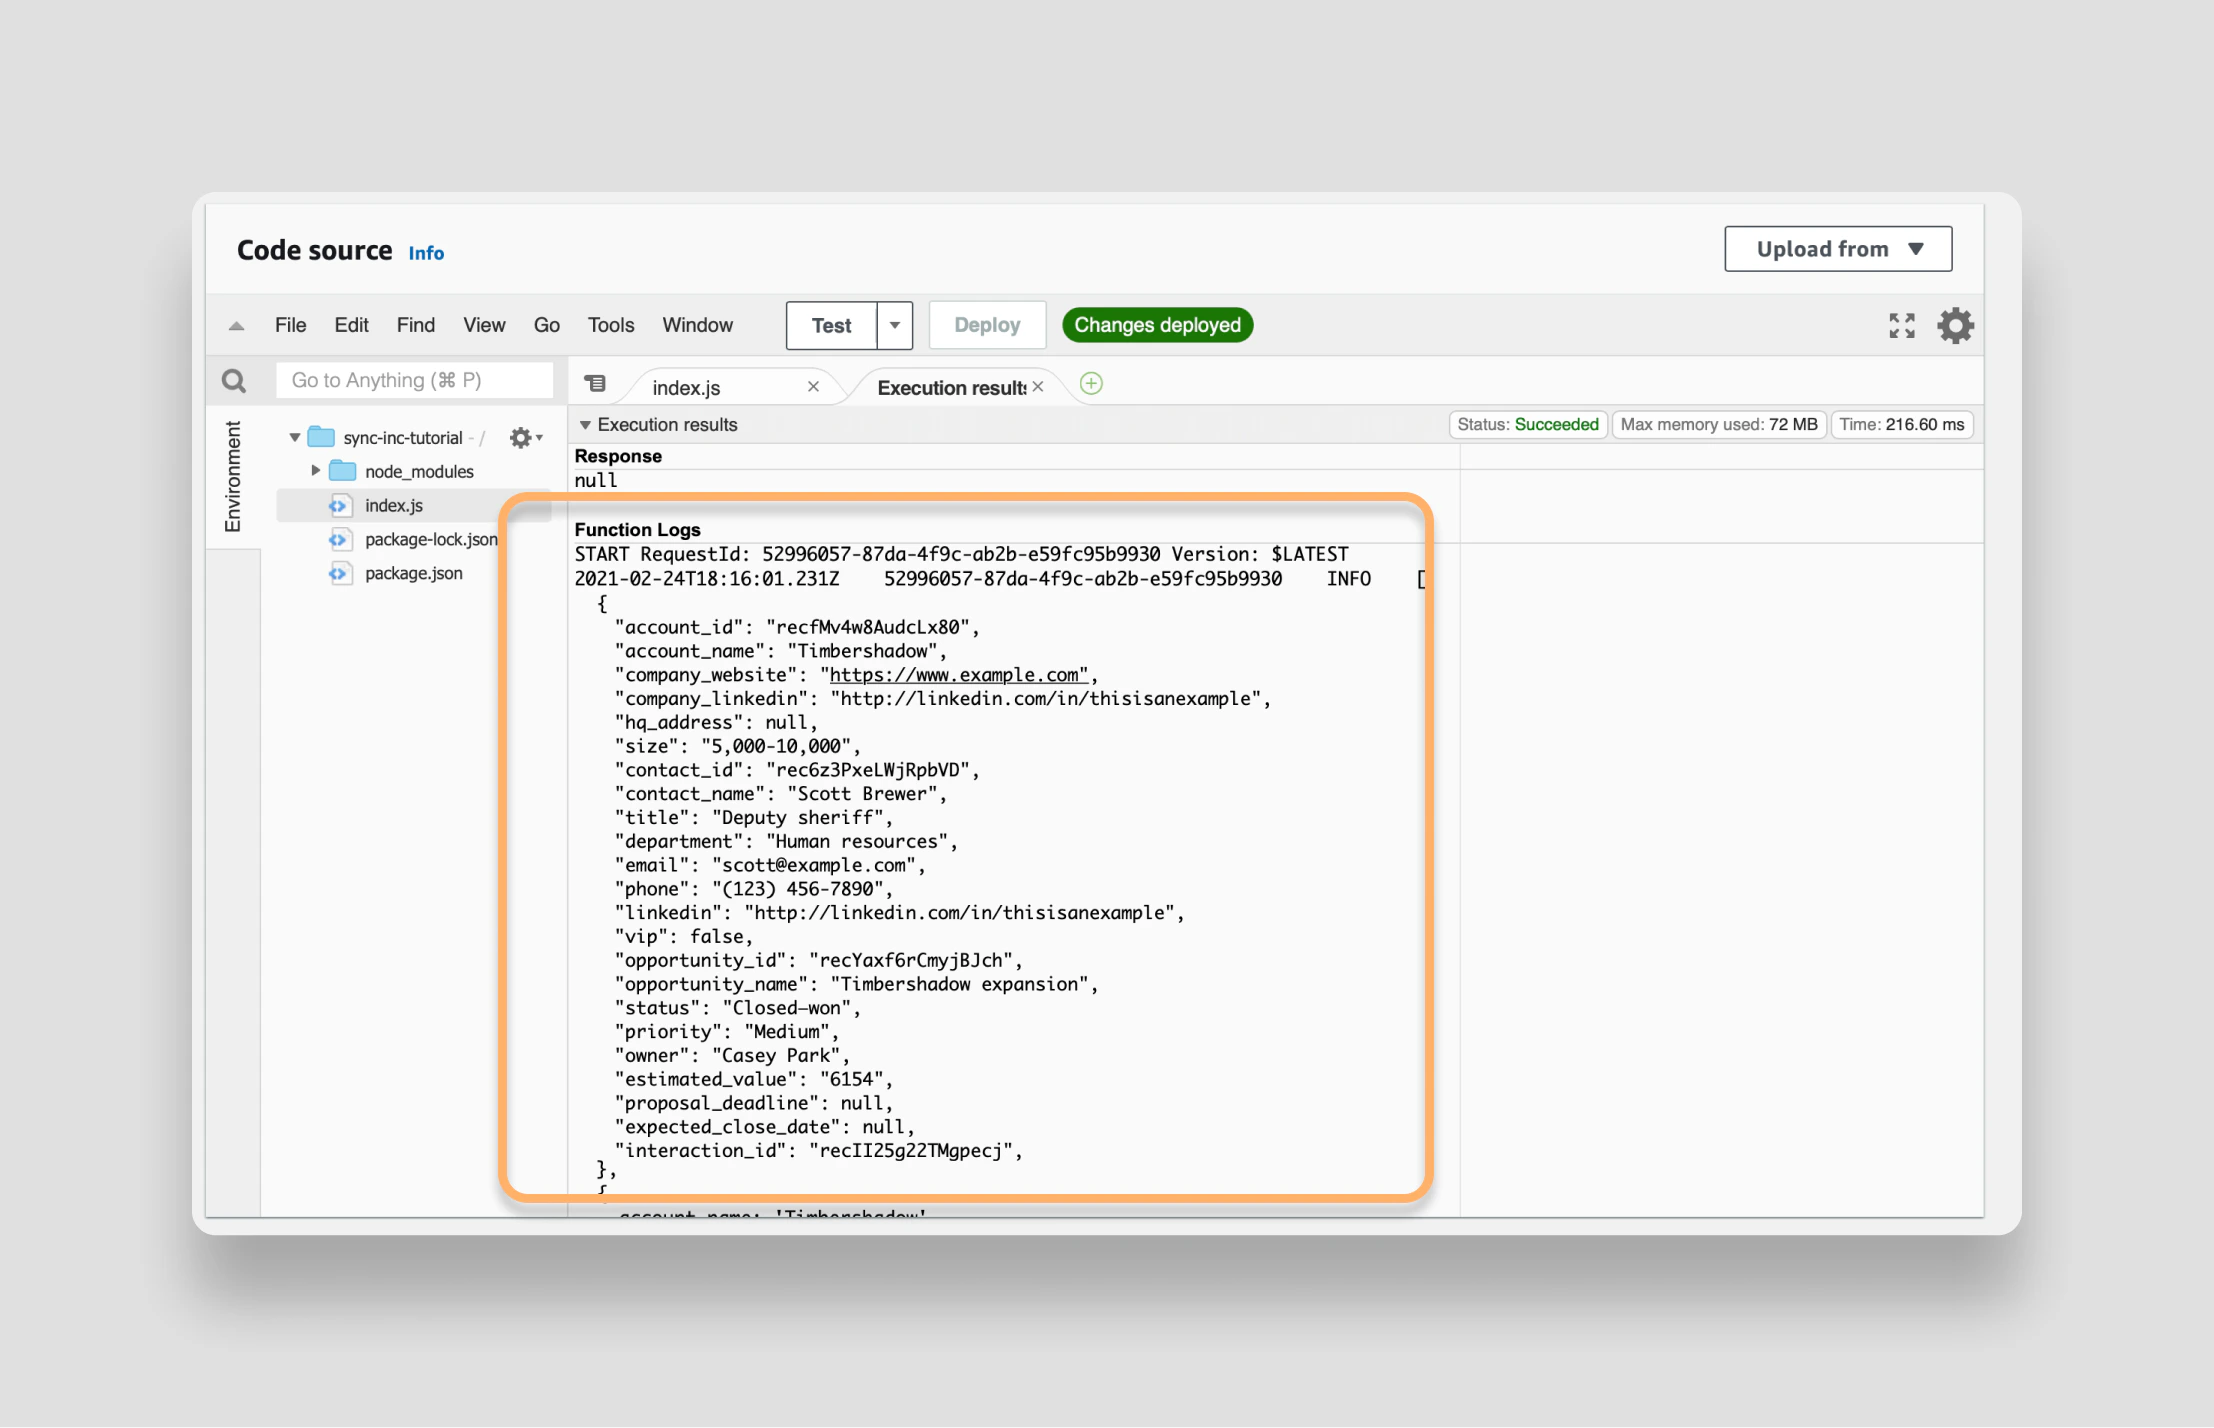
You can learn more about querying your Airtable base using SQL in the Sequin docs or in this helpful guide about Postgres Arrays.As another incremental step, run the SQL query above inside your Lambda function and print the results to see everything flowing together. Here’s the strategy you’ll use:
- First, extract the
account_idfrom the event that’s passed into thehandlerfunction. - Then, define your
queryusing the SQL query above. - Execute the query by passing in the
account_idas a variable. - Finally, for testing purposes, log the results.
handler() function should look like now:
Note that the only parameter in your SQL query isTest your function by first deploying your updates by clicking the orange Deploy button and then clicking the Test button. In the Execution Results tab you should see all the CRM data for your testaccount_id. The query string includes the placeholder$1, which is populated by the variableaccount_idin the second argument toquery().
account_id printed in the Function Logs:
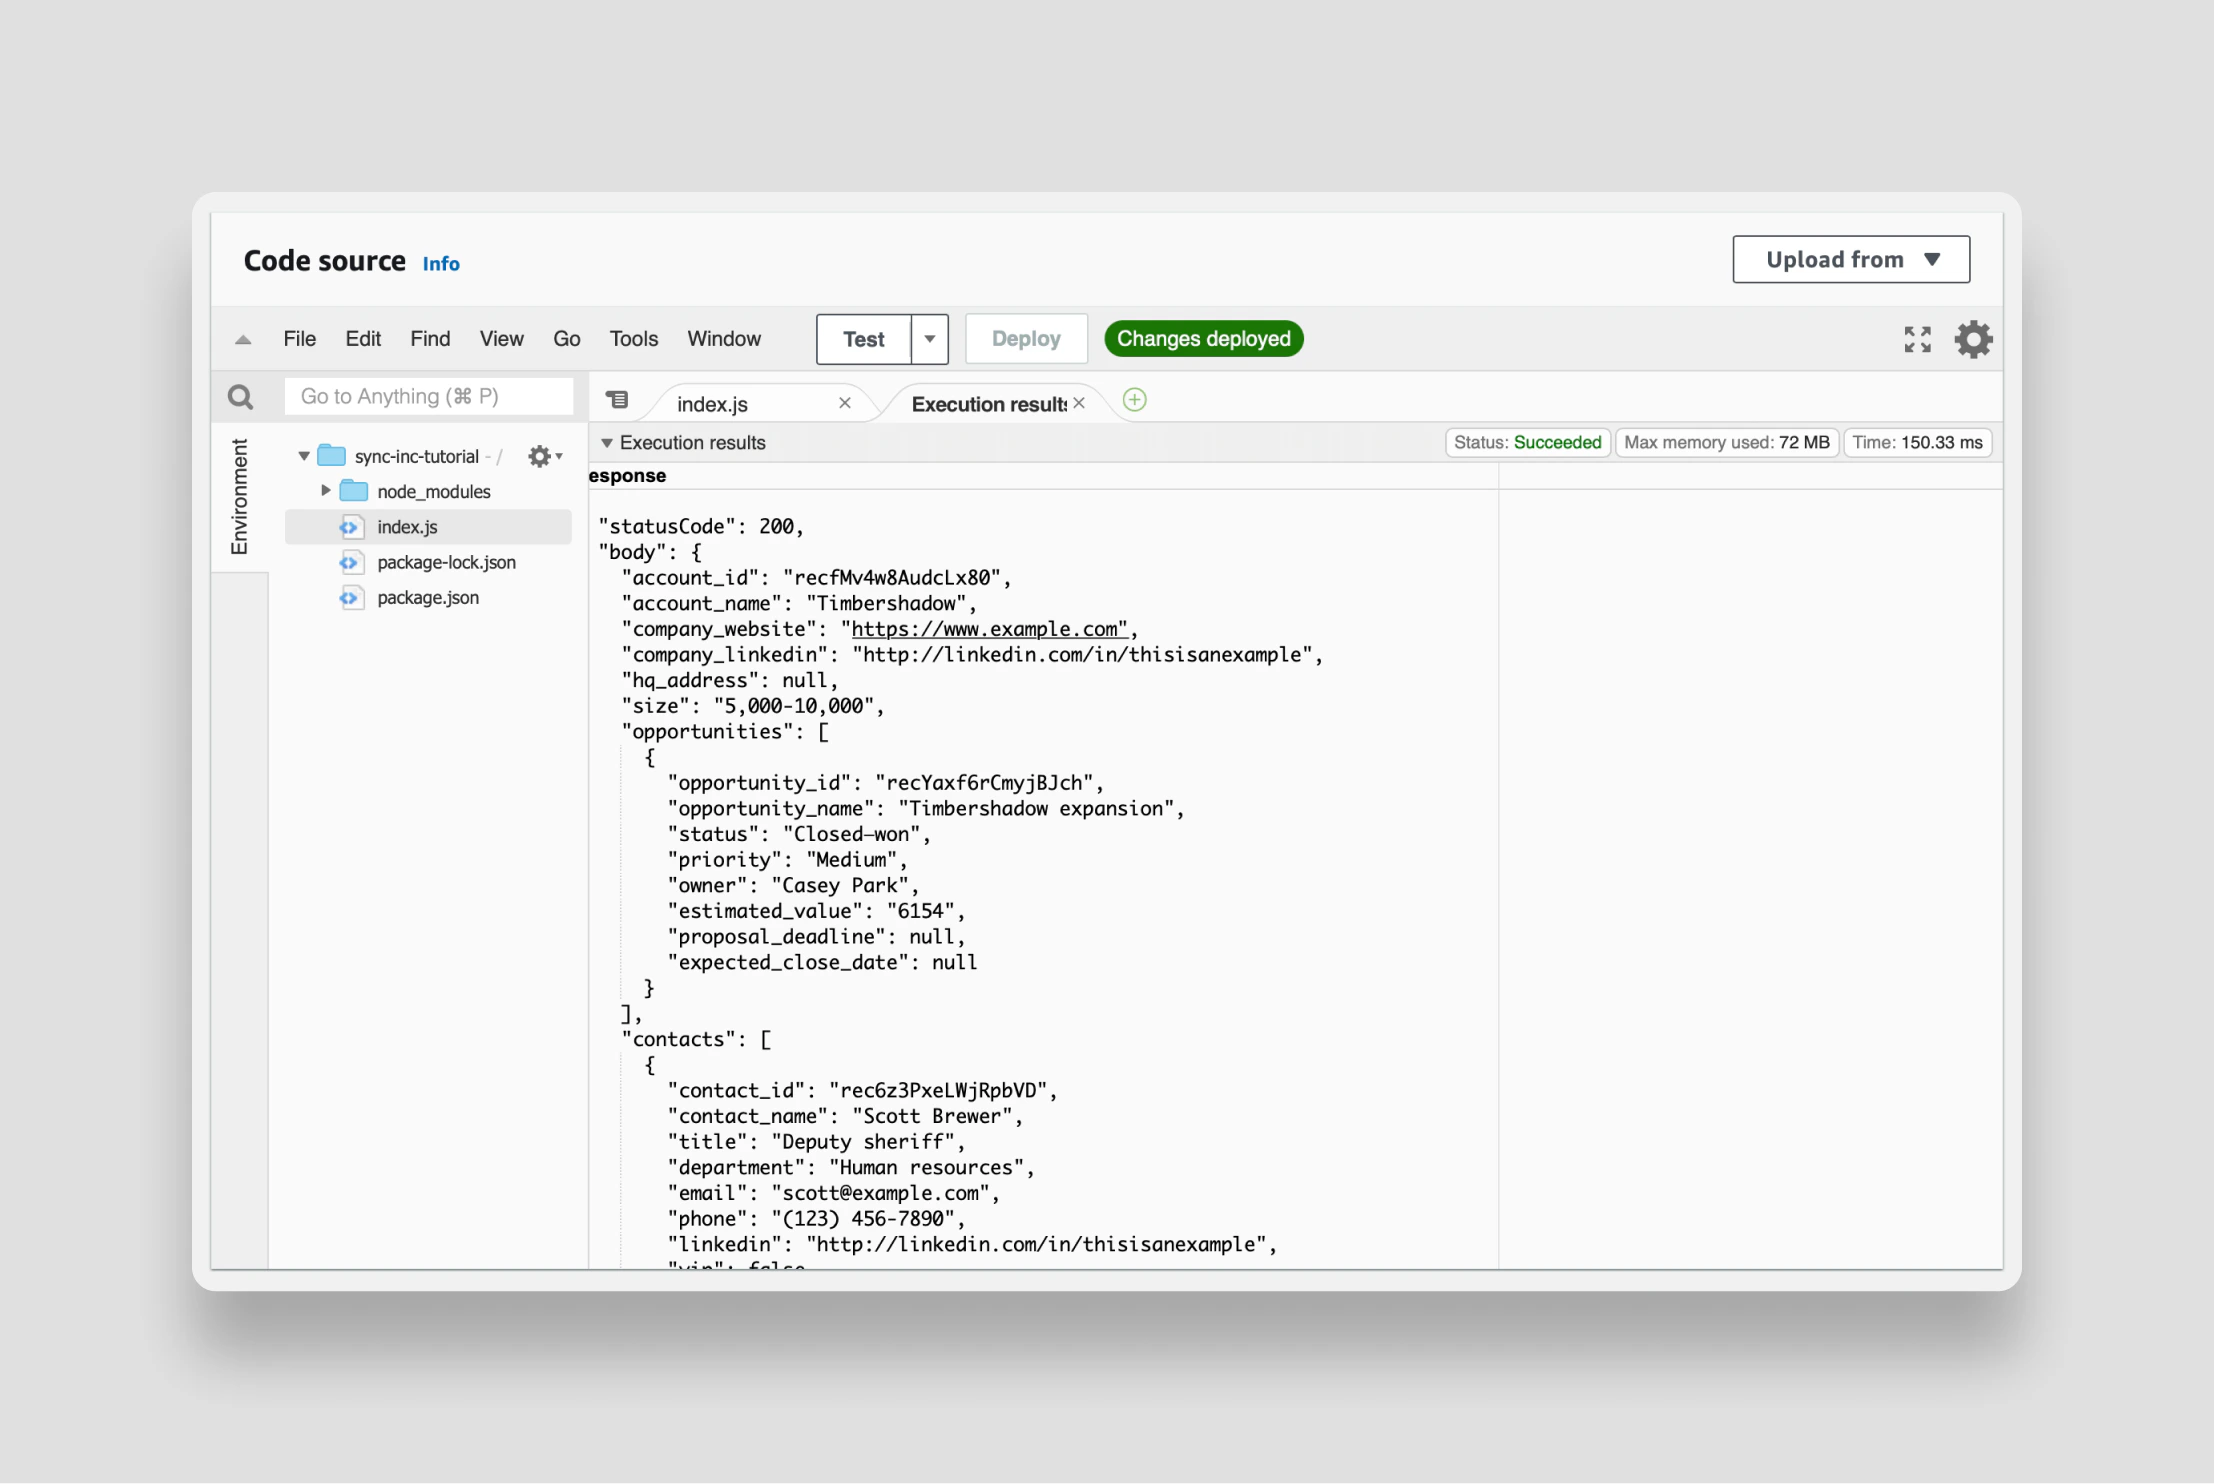
Format your result
Let’s add some logic to your Lambda function to handle errors and properly format your data. First, equip your function to handle some basic errors. If the event trigger doesn’t include anaccount_id you want to throw a 400. If an account_id is defined, you want to run the query. If the query succeeds you want to return a 200 with the results. And if the query returns an error you want to catch the error and throw a 500:
handler() function that will properly format all the data related to an account into one, clean object.
Below is the completed Lambda function that is cleaned up by pulling the query definition outside the Lambda function and appending the helper function to the end:
Connect the AWS API Gateway
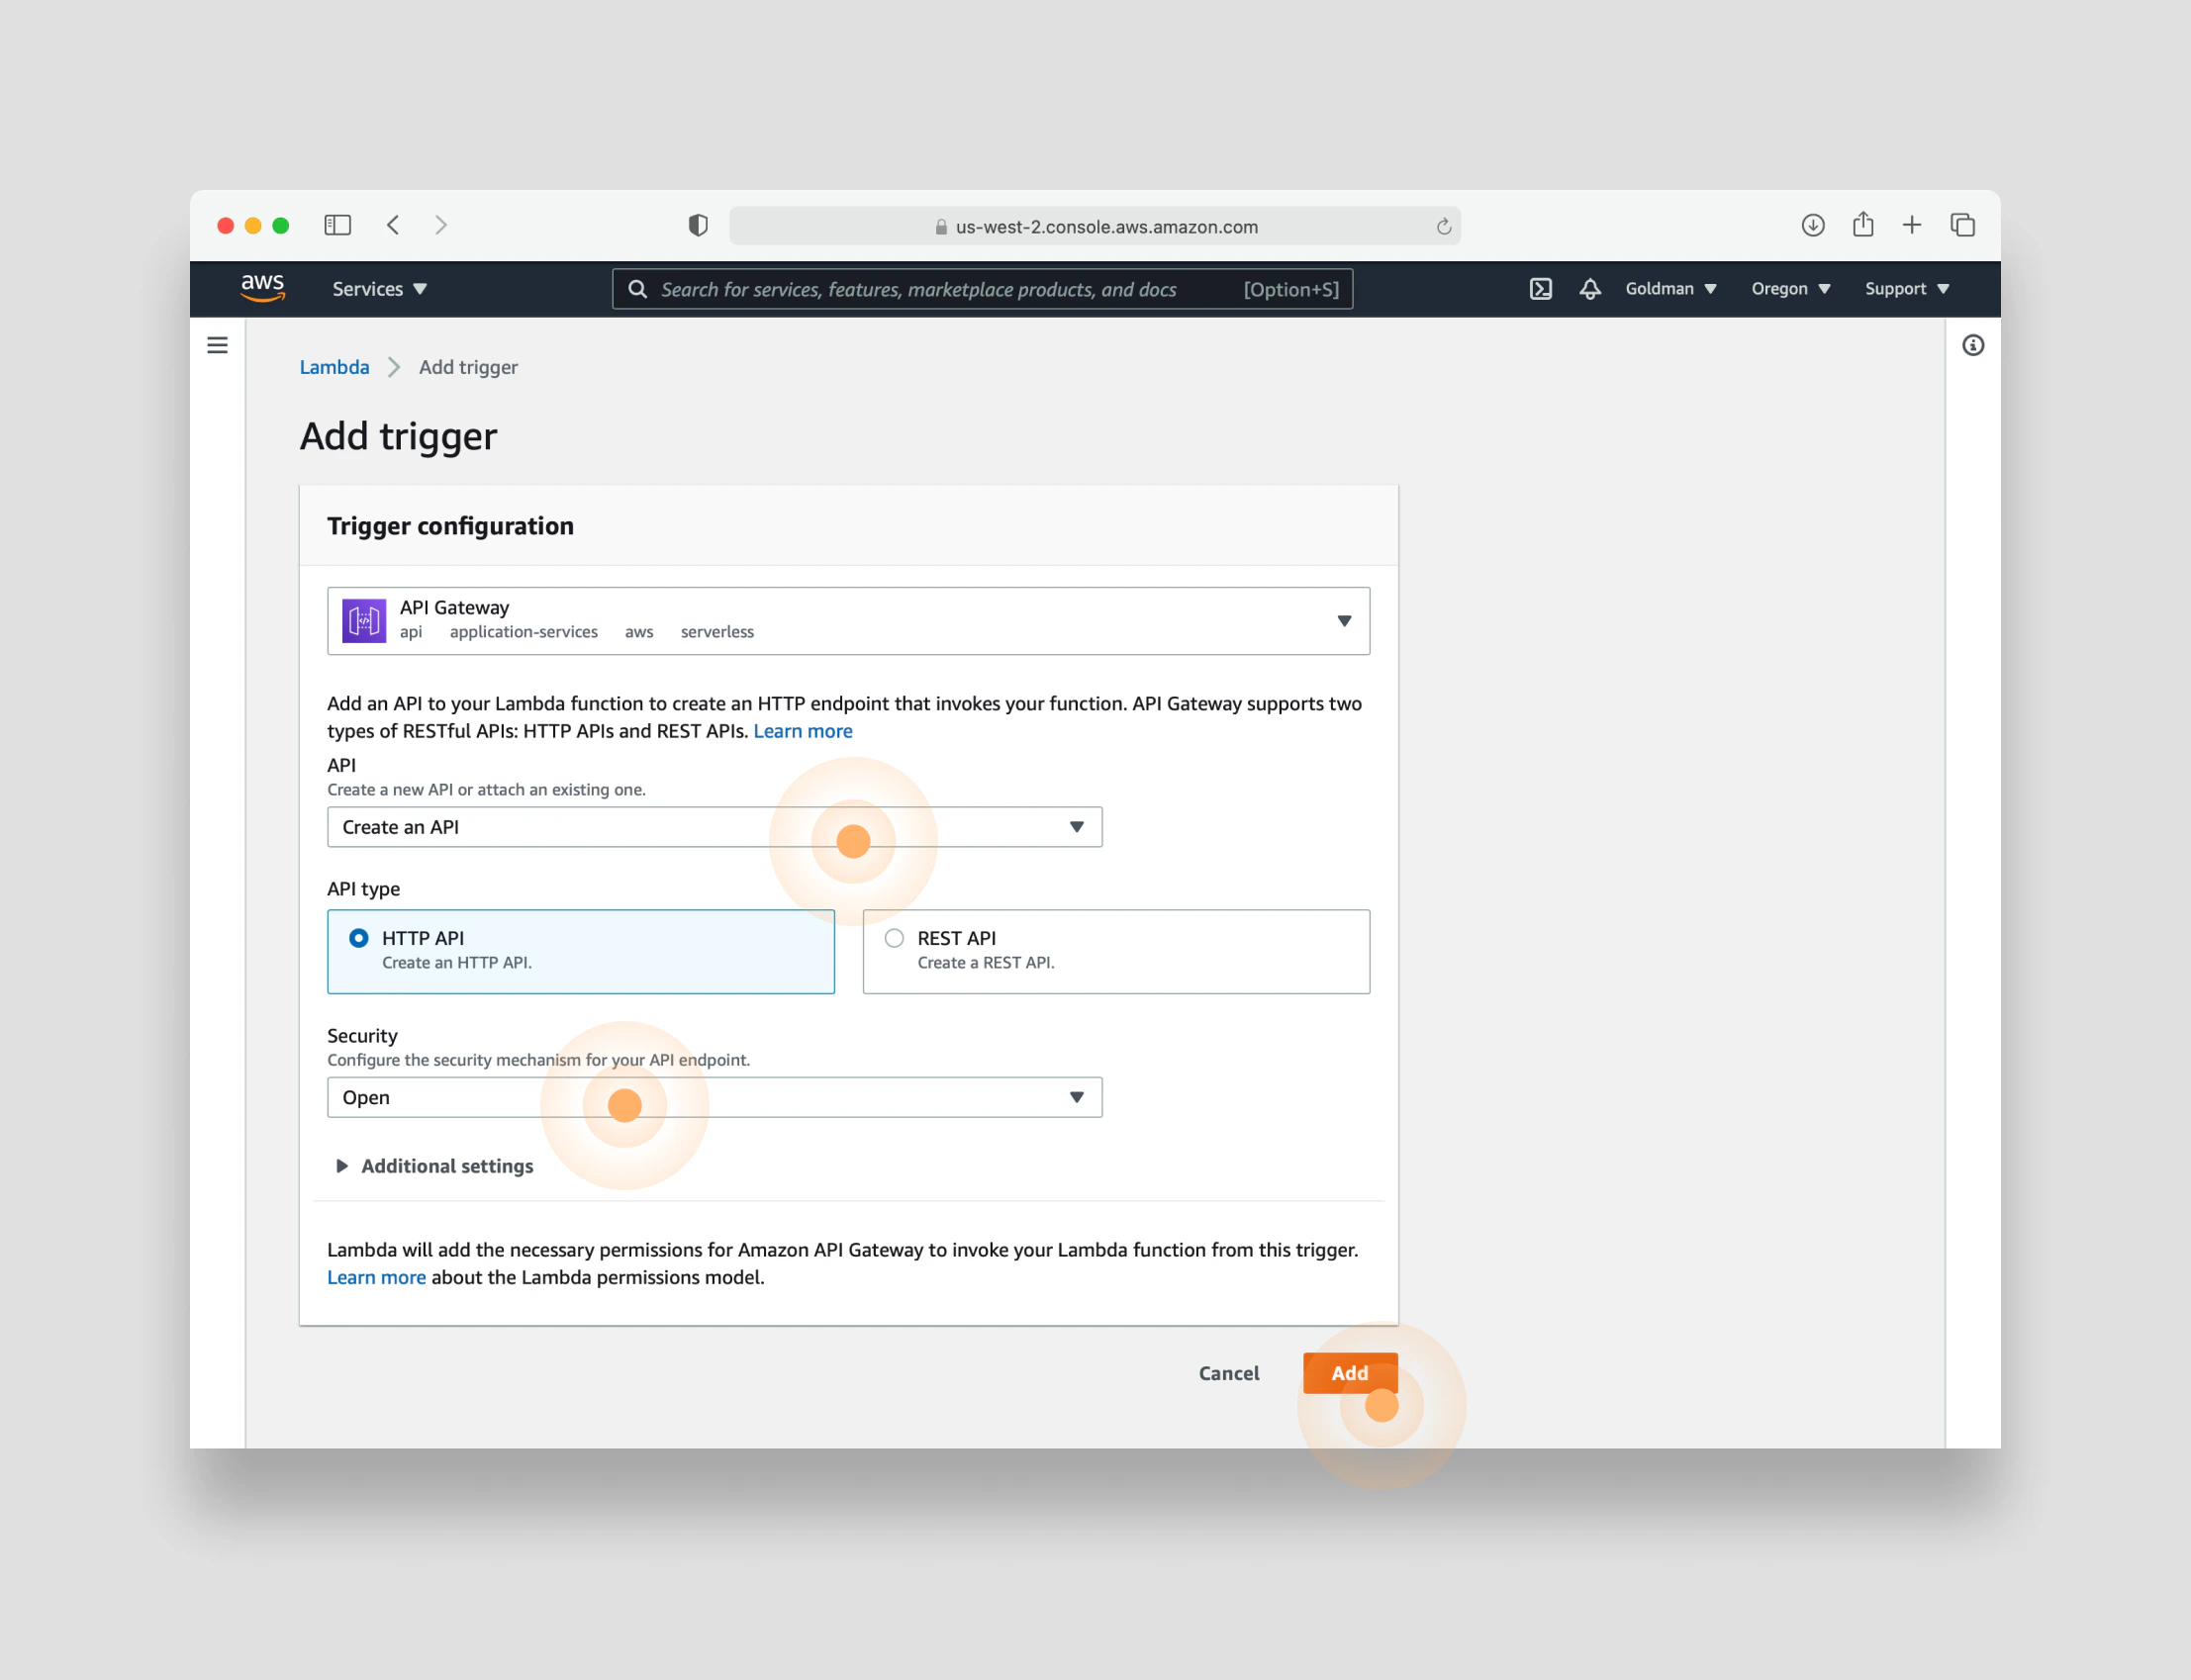
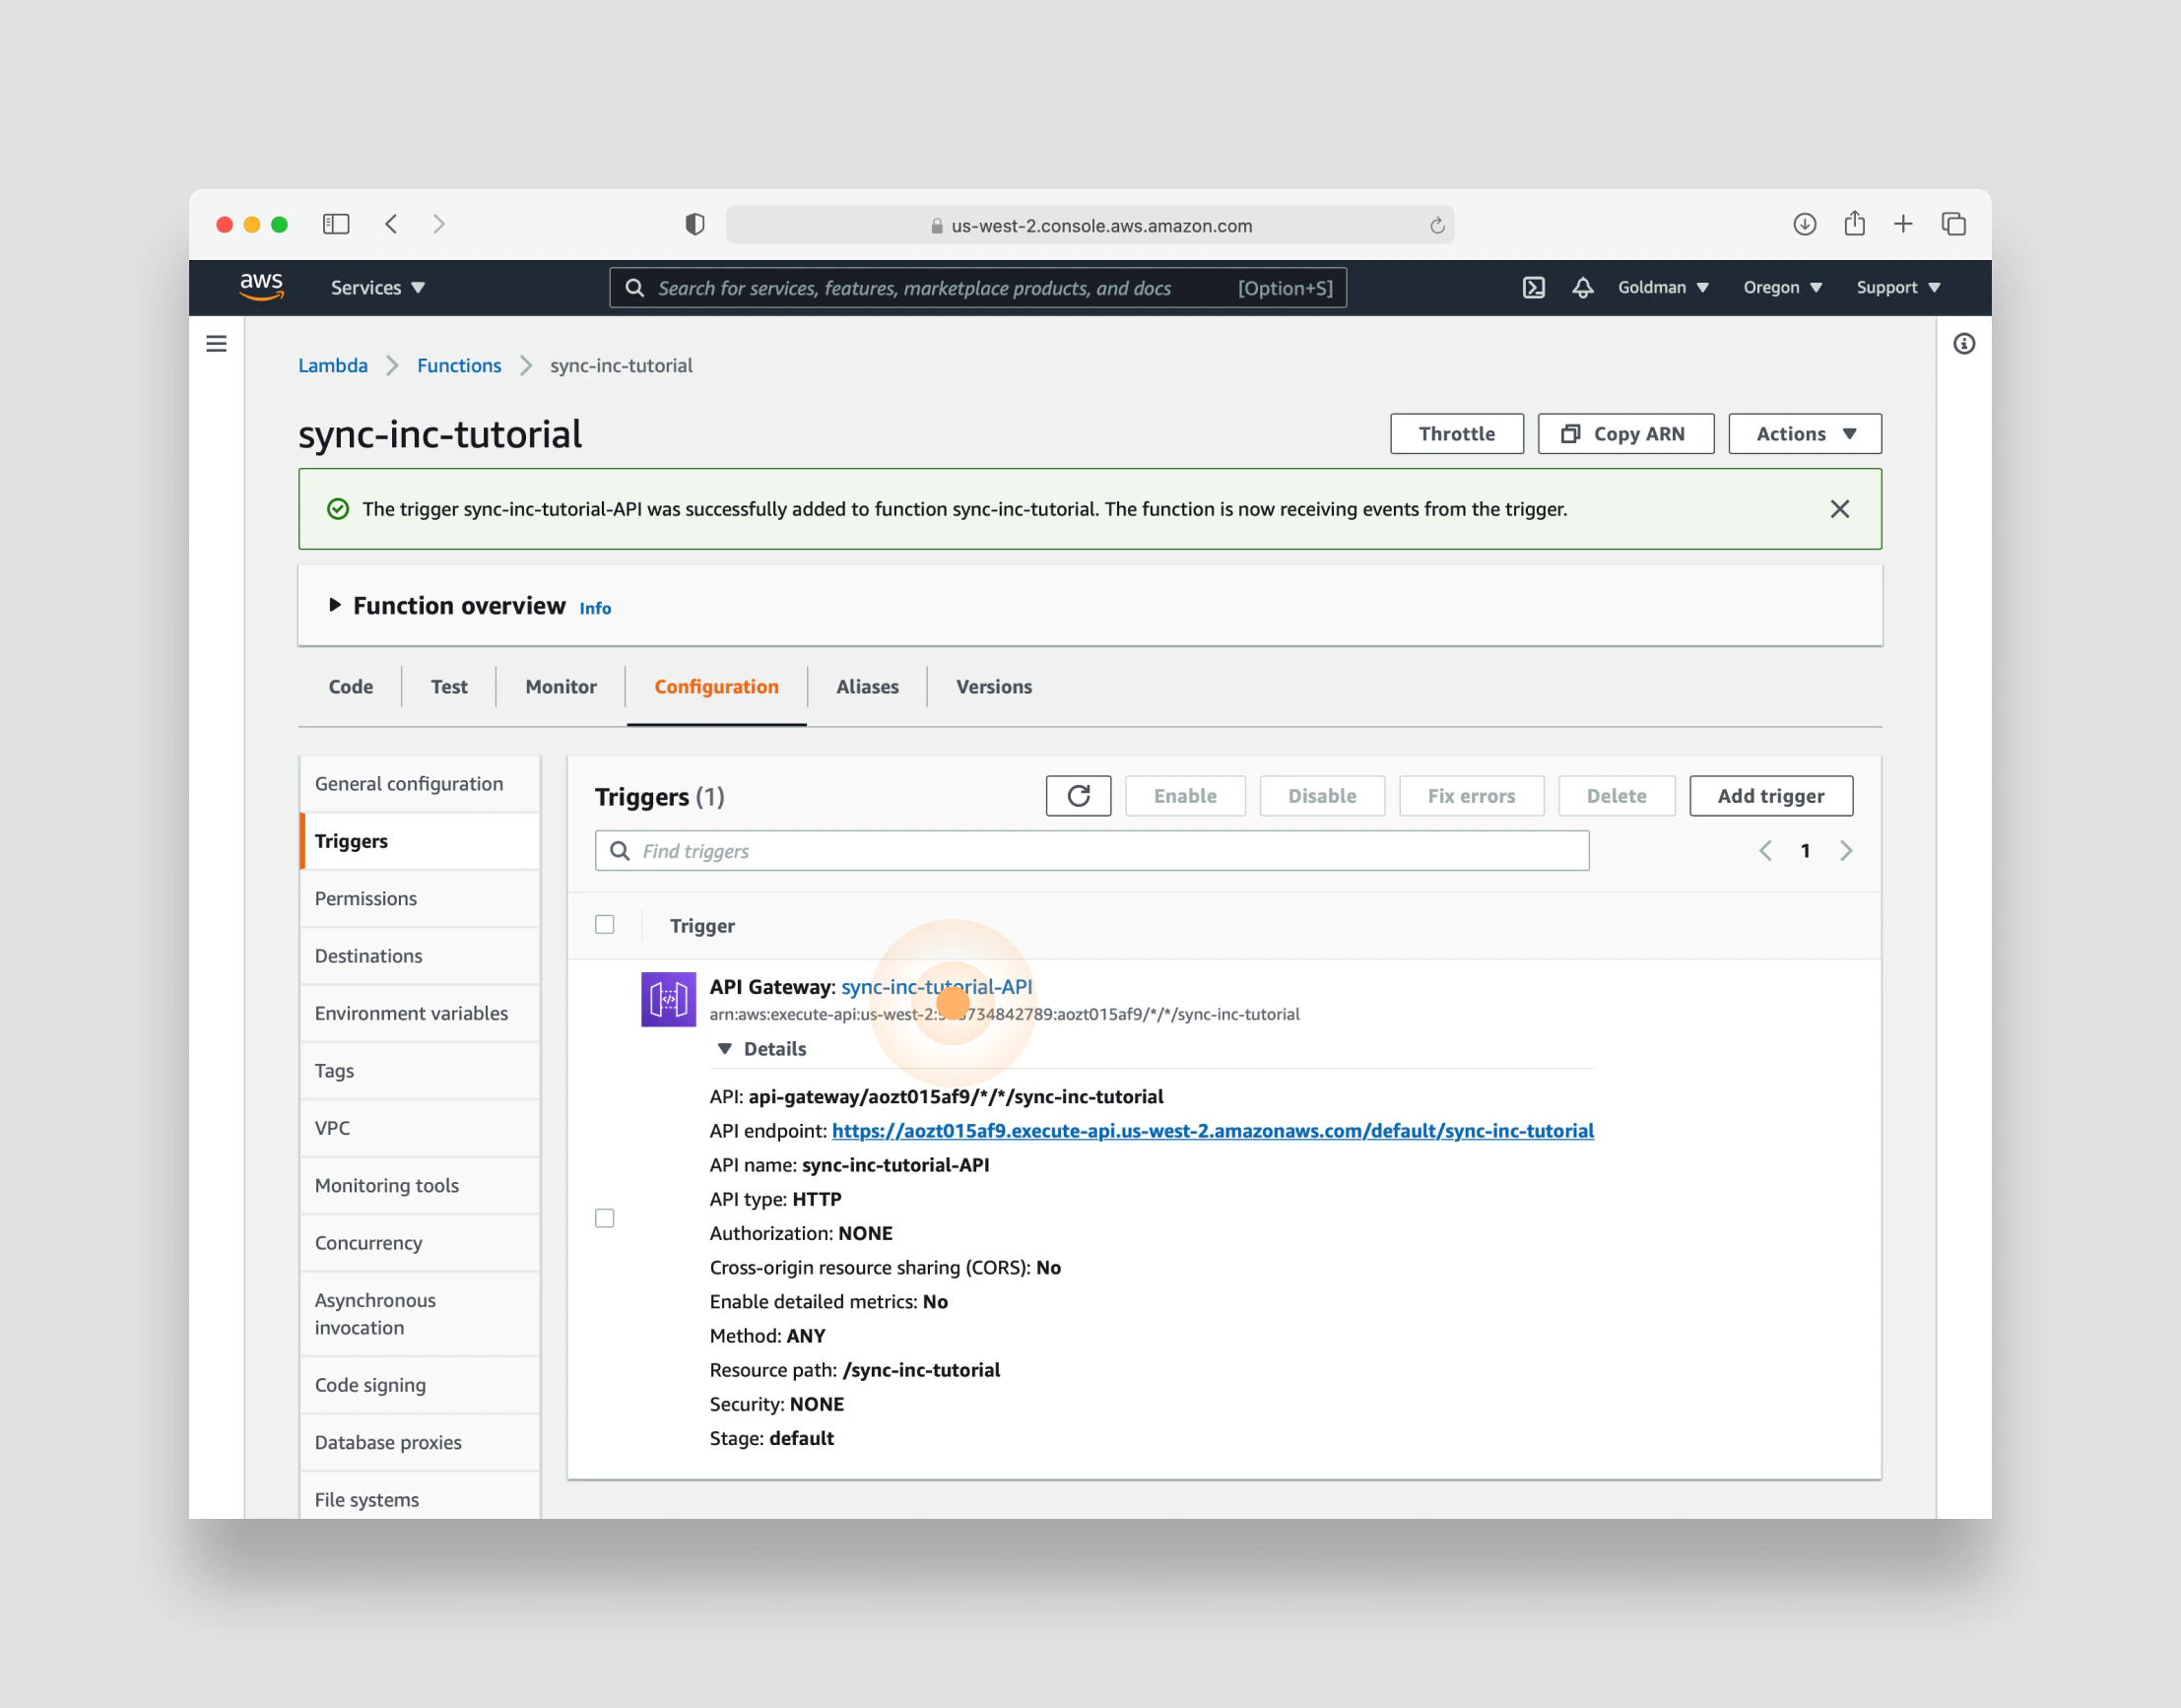
You’ve created a Lambda function that extracts and formats the data your customer support team needs. It is already deployed in the cloud and is ready to go. Now, you just need to wire it up to an API endpoint. The endpoint will be an API GET request via AWS’ API Gateway. It’s a speedy process that just requires some clicking (shout out to the amazing AWS UX team - if you exist :).Create the API Gateway
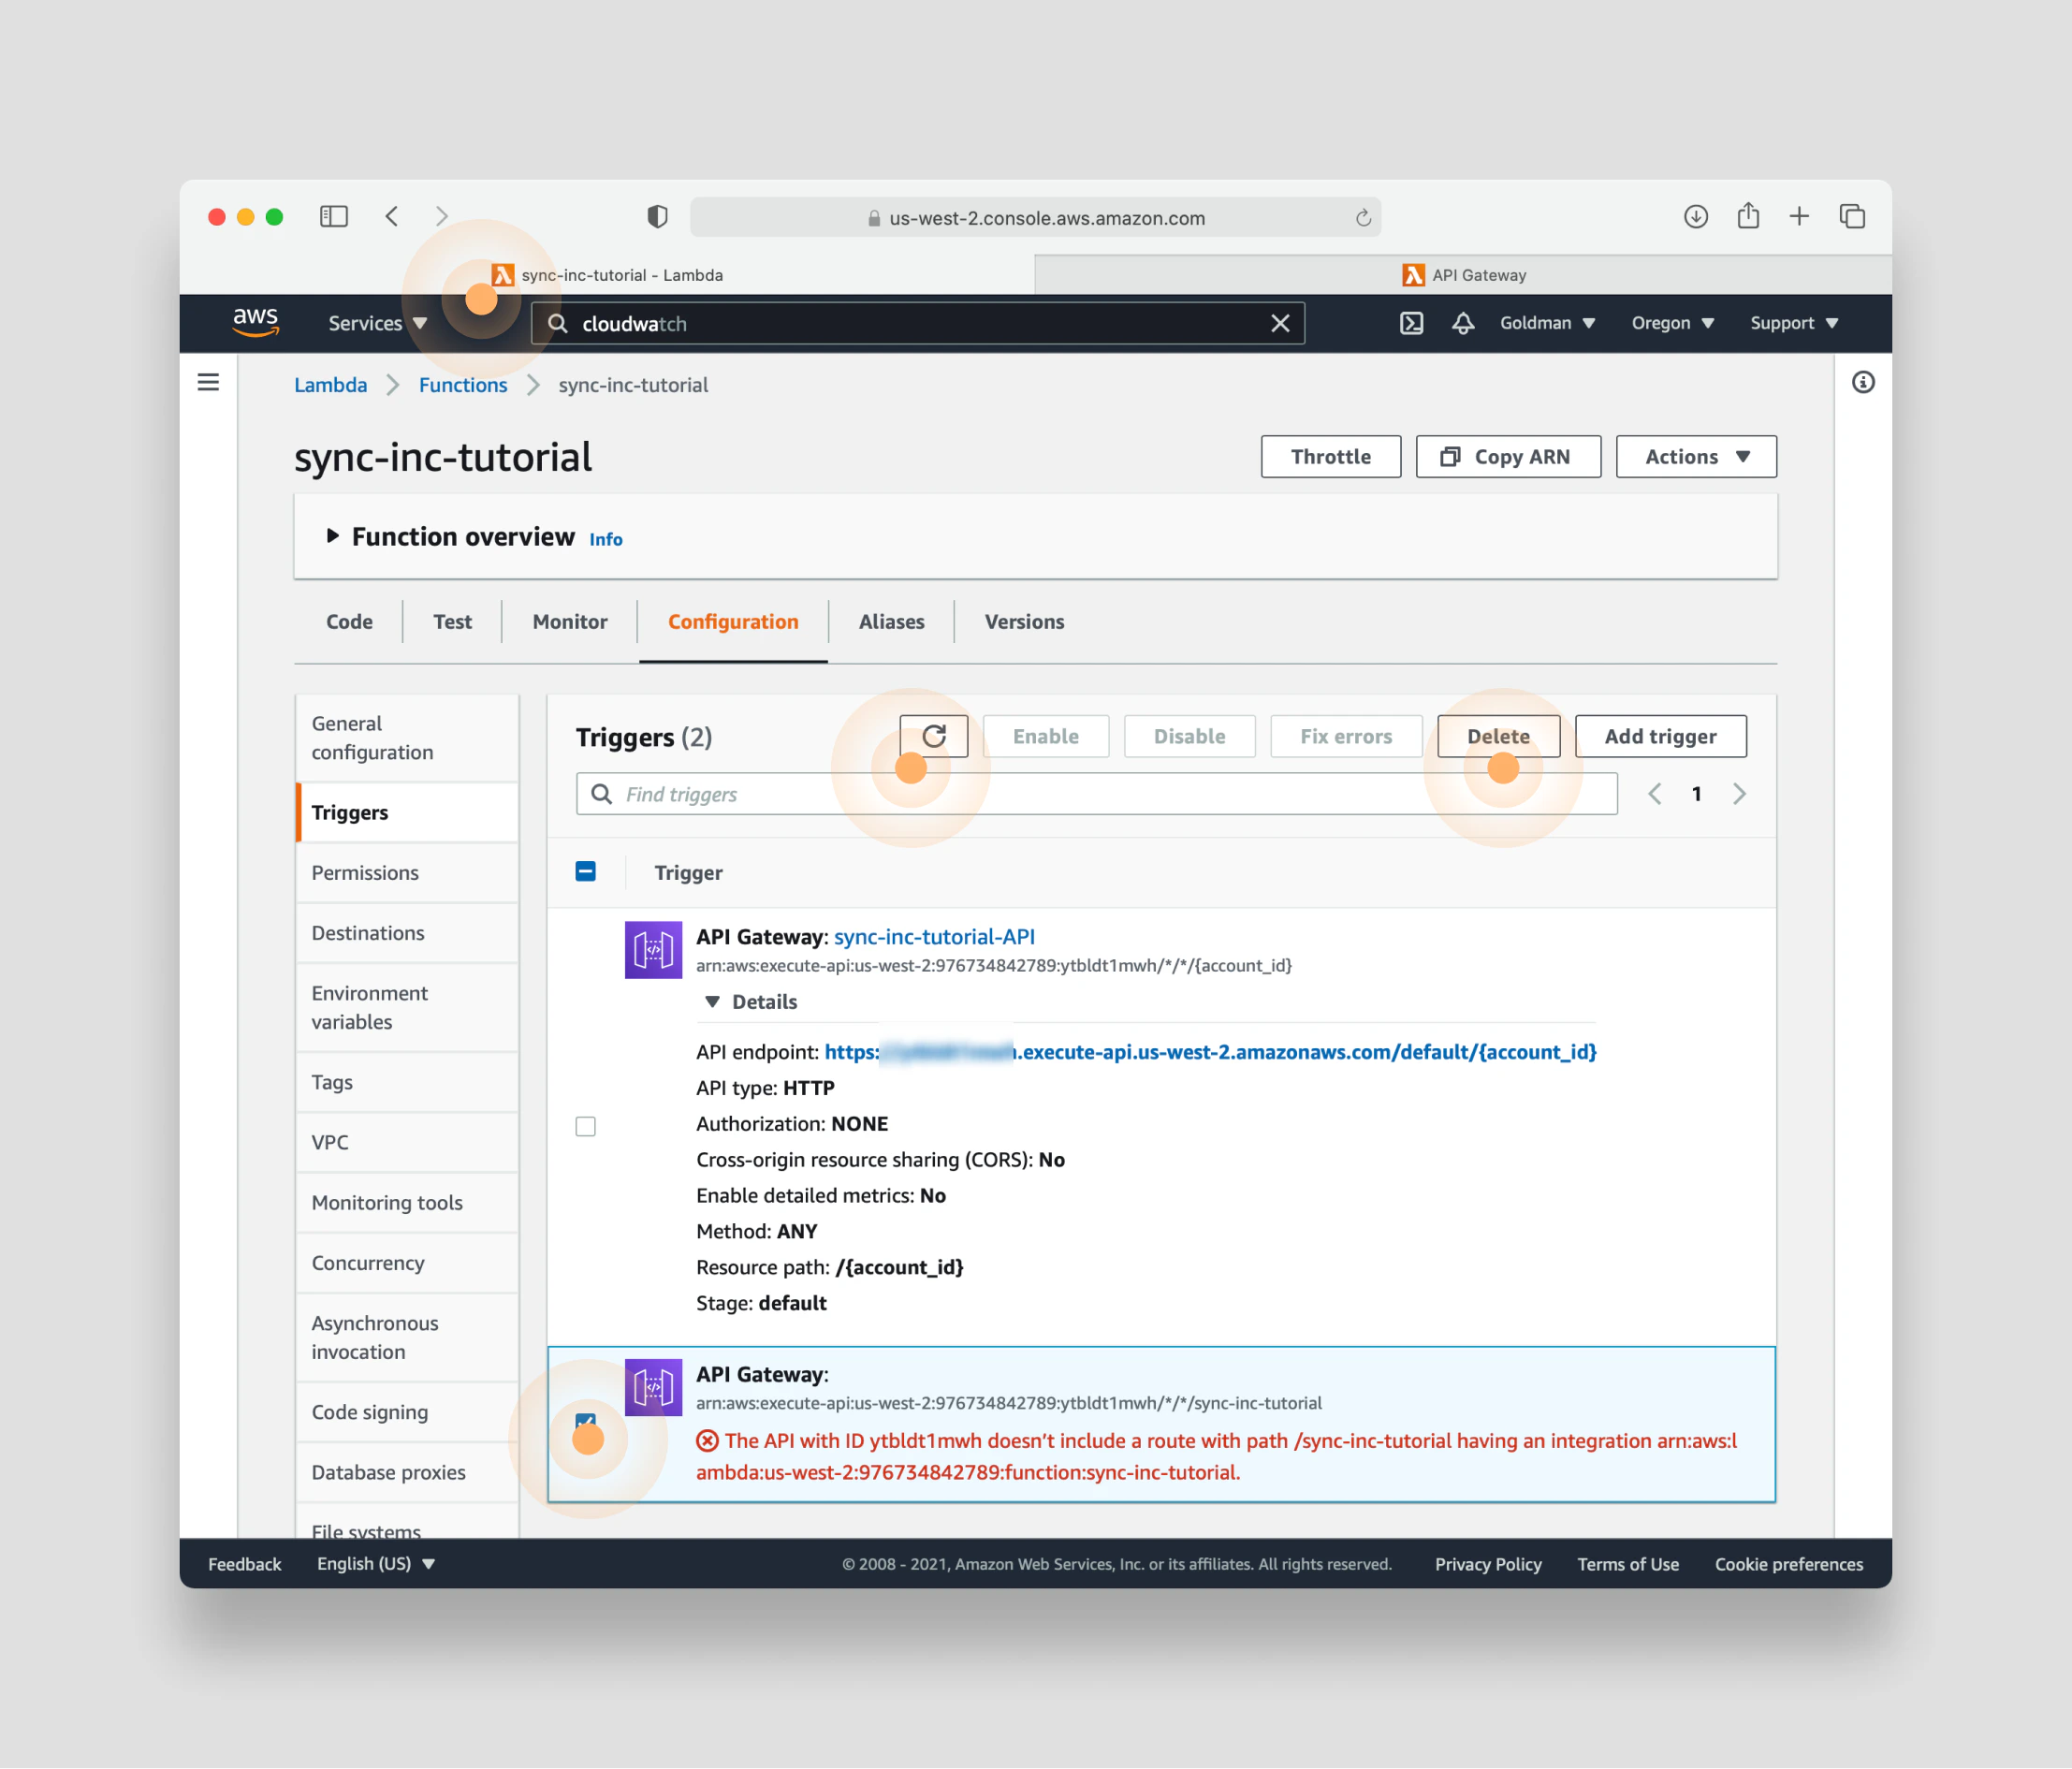
First, add a trigger to your Lambda by expanding the Function overview section and clicking + Add trigger:

Configure the API Gateway
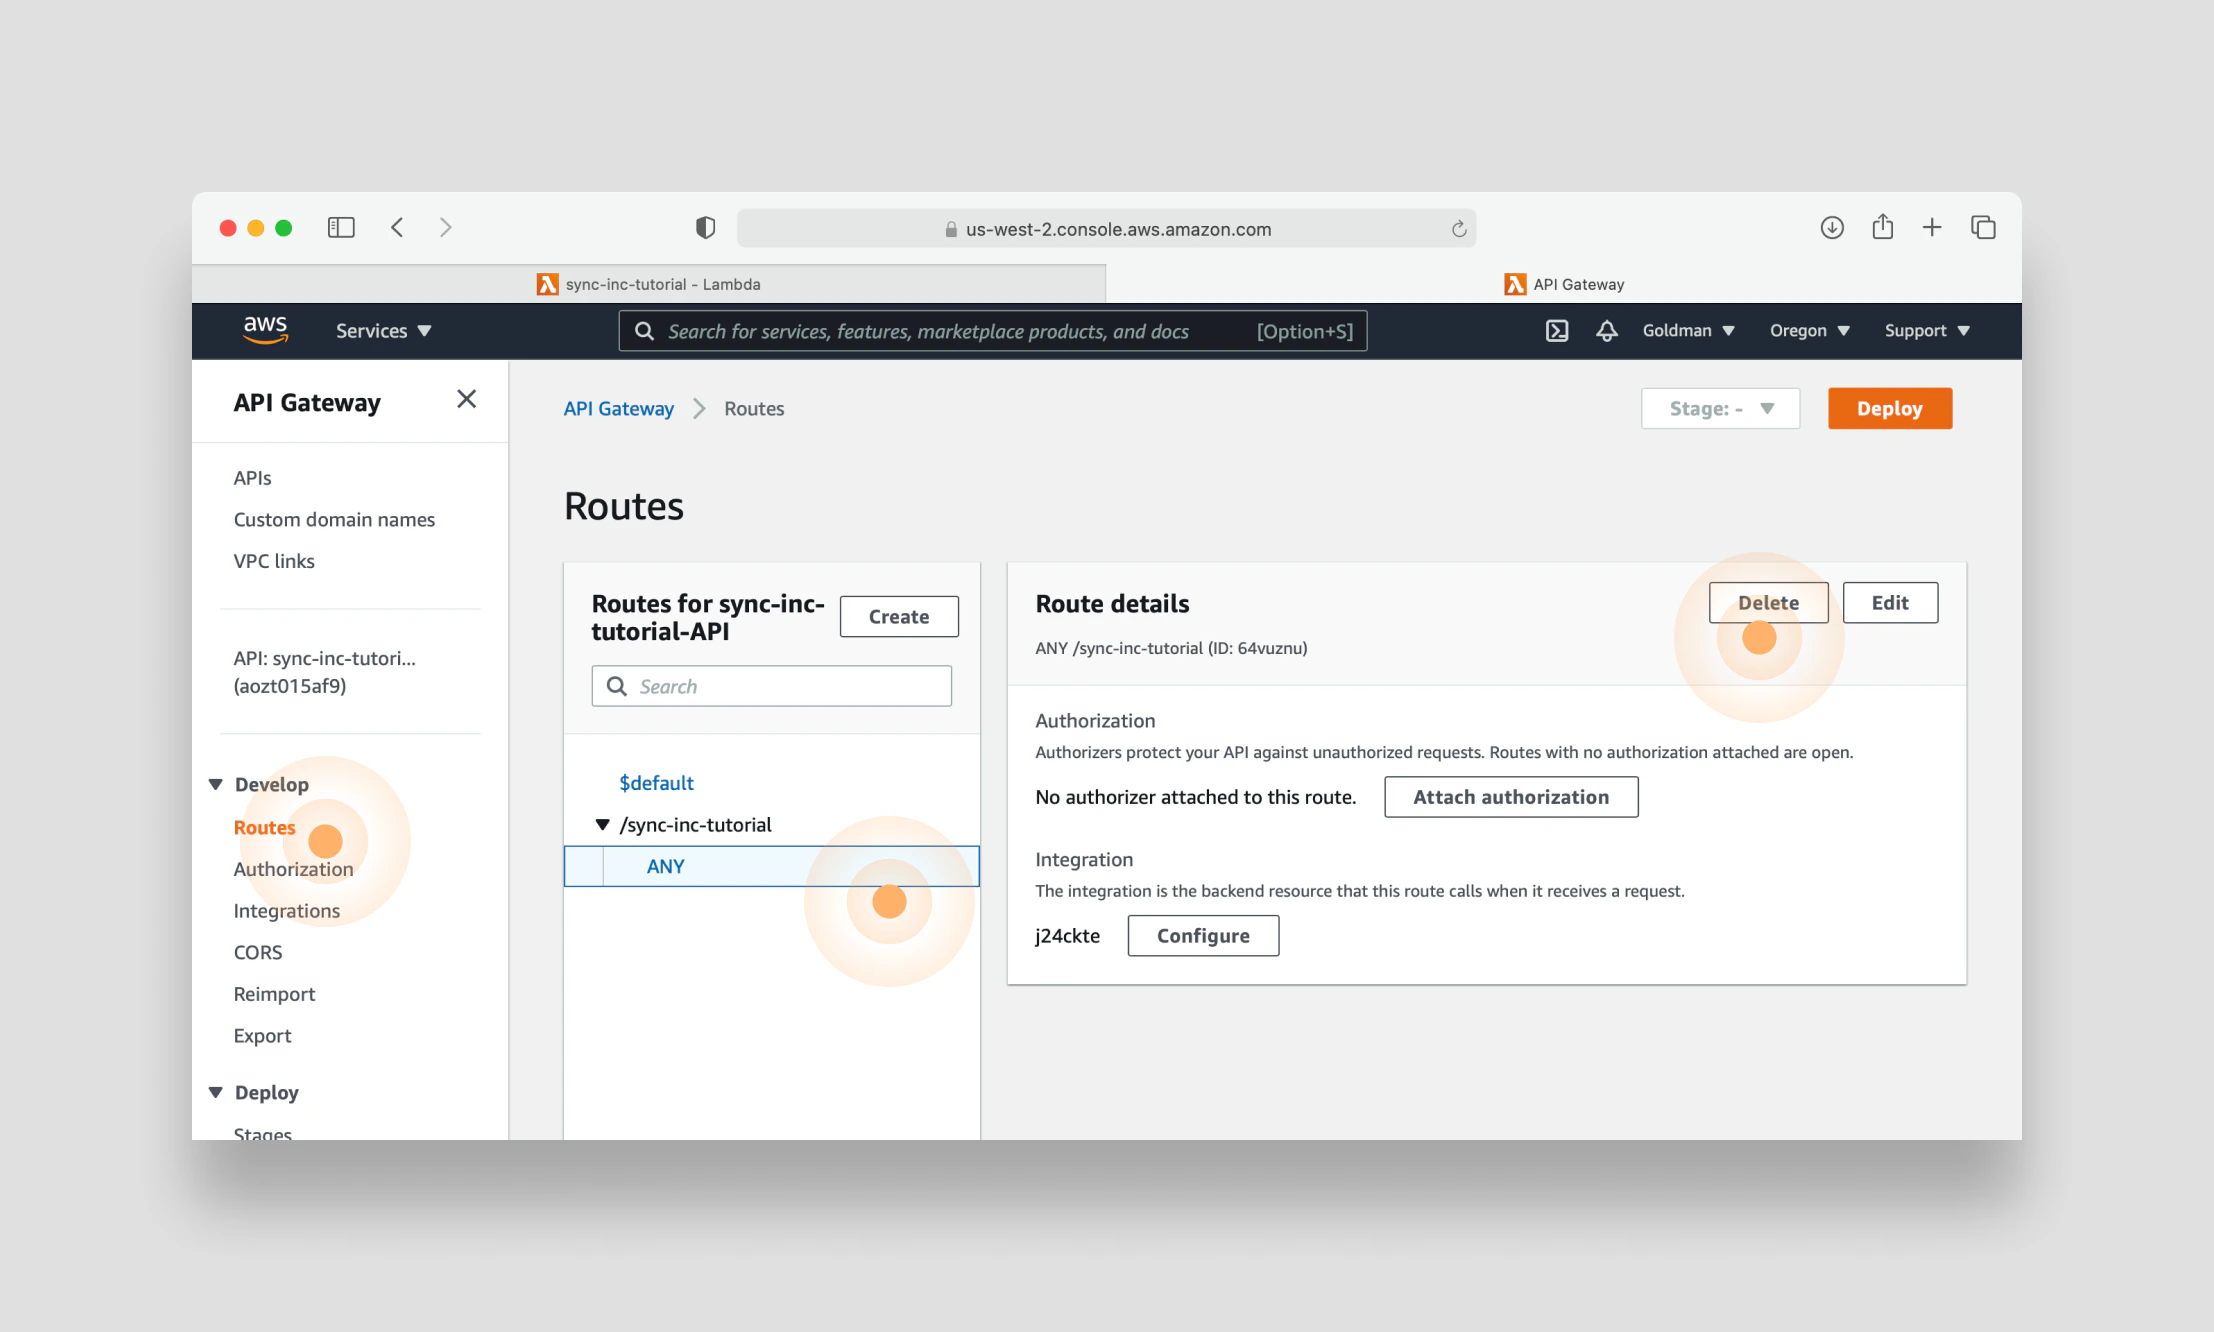
You now need to make a small alteration to the API so that it acceptsaccount_id as a parameter.
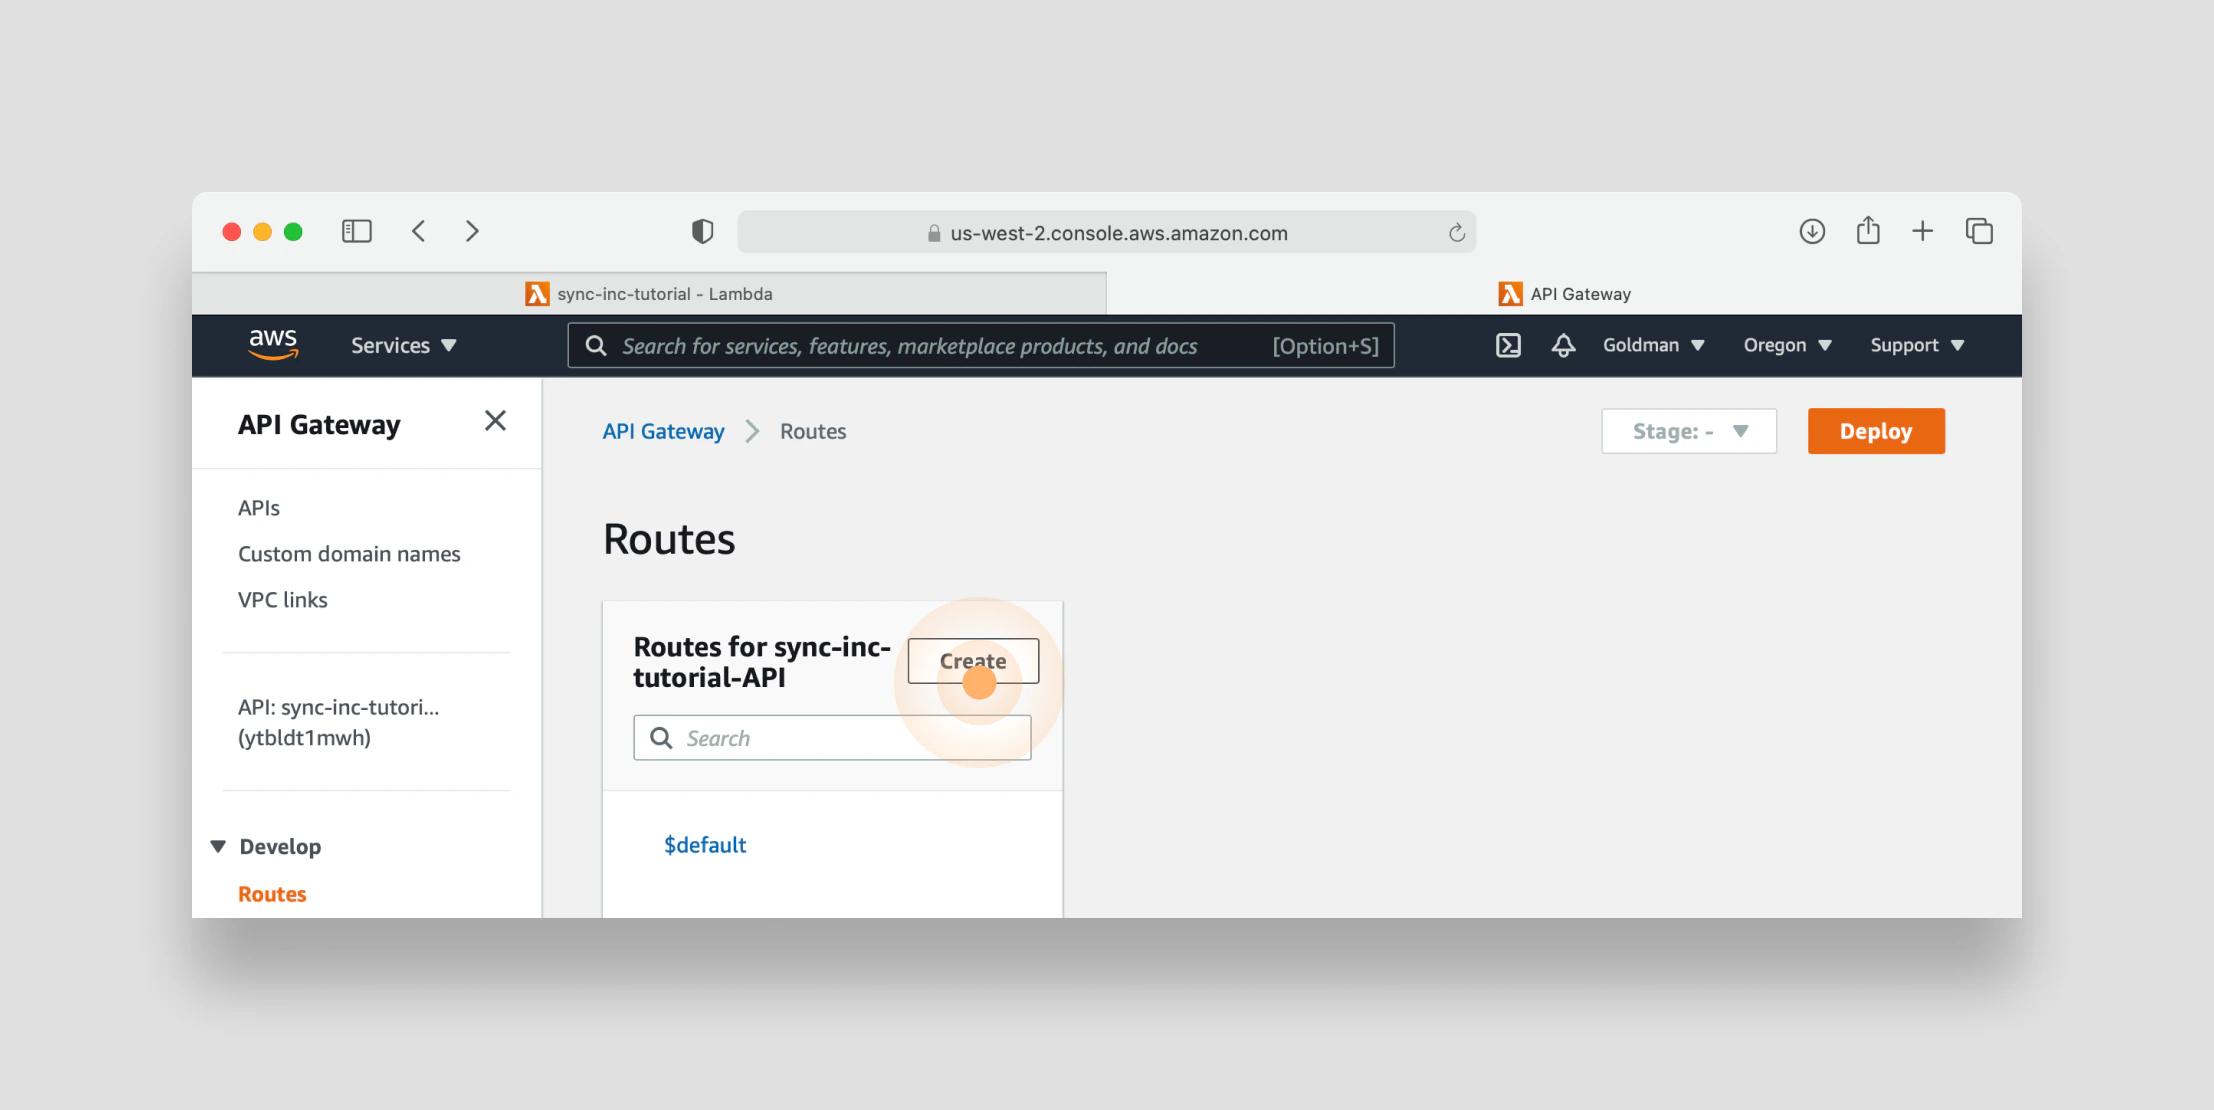
Click on the name of your newly created API to open the API Gateway settings in a new tab:
account_id parameter, you can delete it by clicking the Delete button:
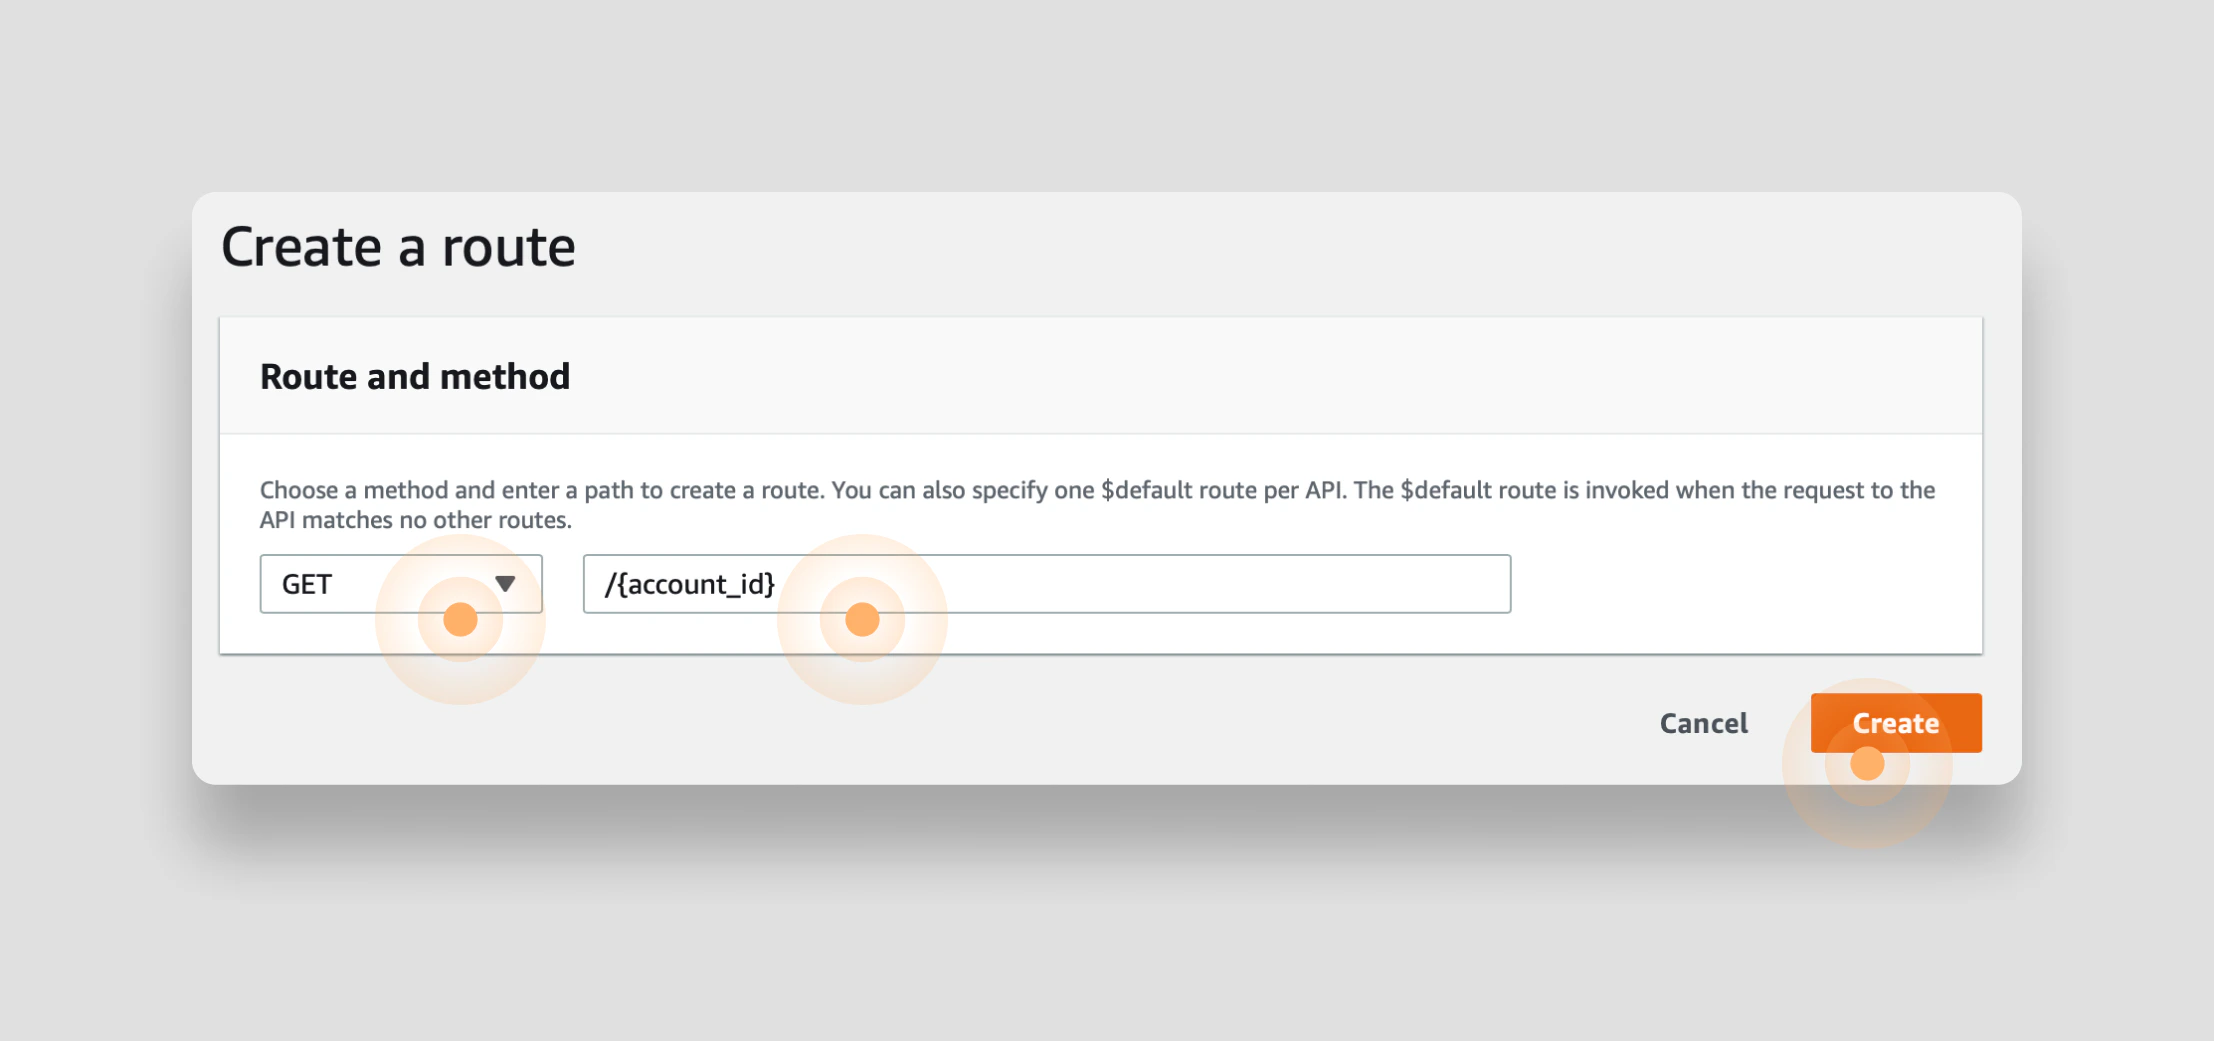
account_id as a parameter. Because your API is going to return all the details of the account, a GET method makes sense.
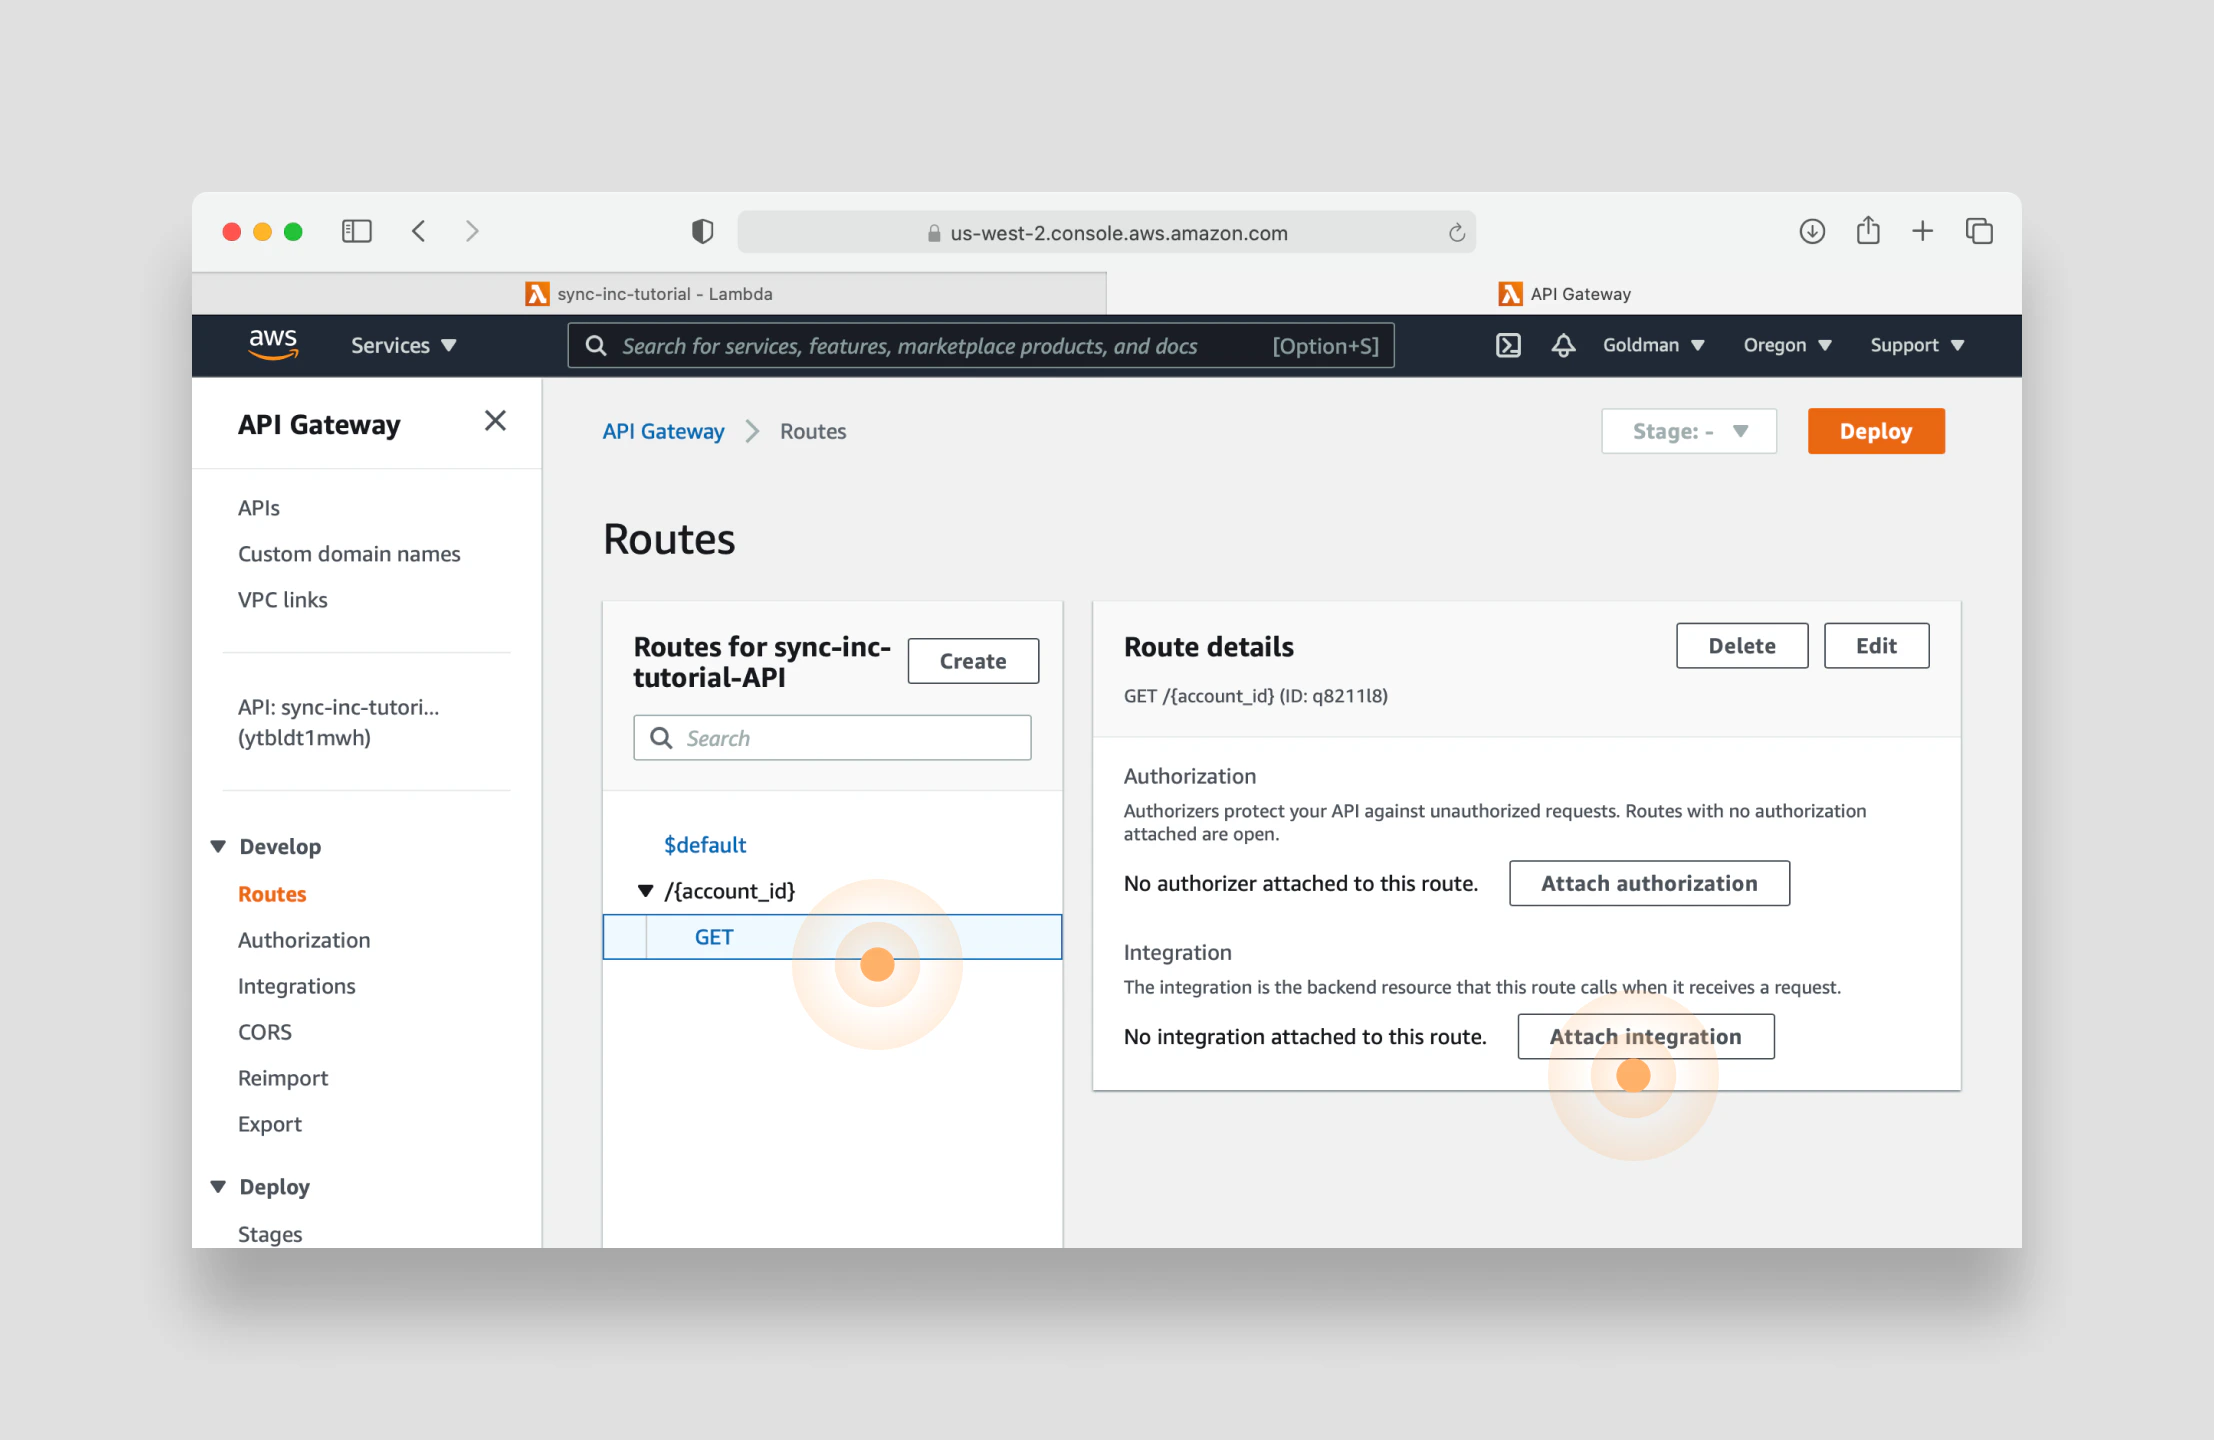
So define a new endpoint by selecting GET as the method and typing /{account_id} as the path. Once configured, click Create:
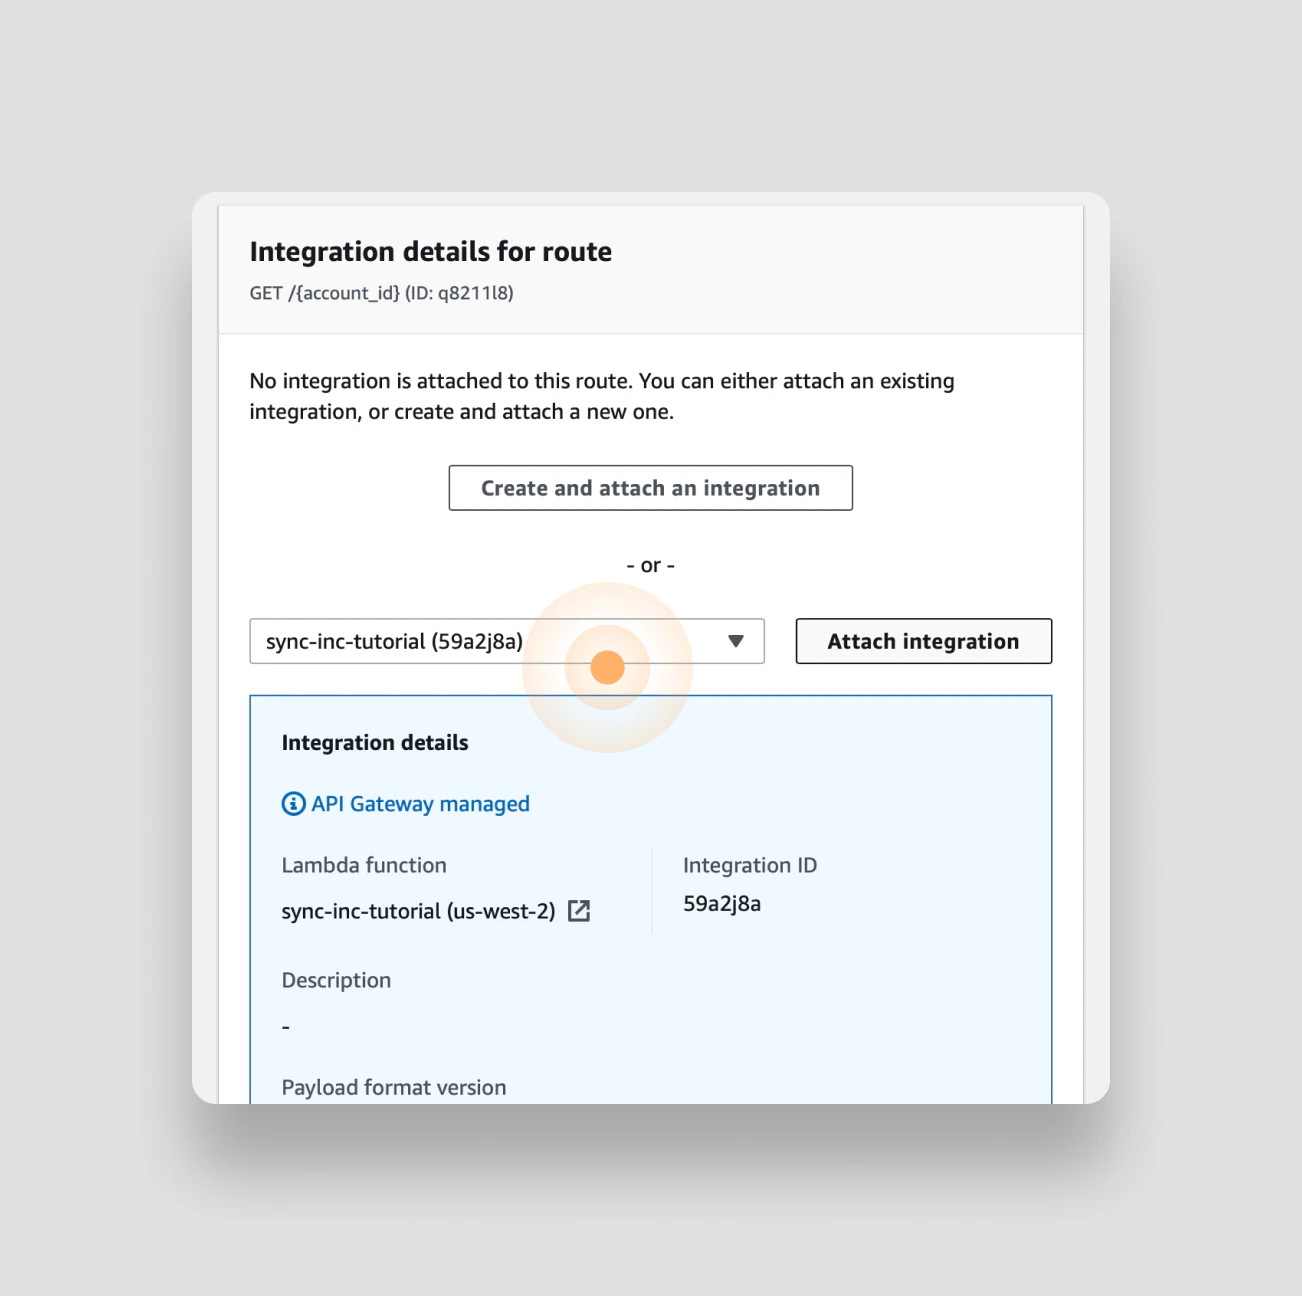
GET method under the new route you just created and click Attach integration:
sync-inc-tutorial from the drop down:
curl it in your terminal using the same account_id you’ve been using in your Lambda test event: