> ## Documentation Index
> Fetch the complete documentation index at: https://sequin.io/docs/llms.txt
> Use this file to discover all available pages before exploring further.
# Glide
> You can use [Glide](https://www.glideapps.com/) to quickly build sleek, well-designed tools. It has its own drag-and-drop component canvas, an action builder to create workflows, and integrations with popular data sources.
You can use Sequin to build Glide apps on top of APIs like Salesforce and HubSpot. Sequin will sync your API data to a Postgres database so you can write your integration in SQL. Changes you make to your database records will be applied to the API and your database at the same time.
While Glide has several out-of-the-box integrations, it's much faster to build with their Postgres adapter. You don't have to worry about rate limits and all your source data is instantly at your finger tips.
## Setup a Sequin sync[](#setup-a-sequin-sync "Direct link to Setup a Sequin sync")
Before you can use Sequin with Glide, you'll need to create a sync. Sequin will guide you through authenticating, selecting the data you want to sync, and connecting to your database. Read our [getting started guide](https://docs.sequin.io/getting-started#create-a-sync) for step-by-step instructions.
## Create a Postgres integration on Glide[](#create-a-postgres-integration-on-glide "Direct link to Create a Postgres integration on Glide")
An [integration](https://www.glideapps.com/docs/integrations) on Glide is a connection to a 3rd-party tool like a database or an API.
Sequin uses a [Postgres Proxy](https://docs.sequin.io/writes#configuration) to interface with your Sequin-synced tables. The Proxy lets Sequin capture inserts, updates, and deletes you make in your database and commit them to the API.
To add Sequin's Postgres Proxy as a Glide integration, you can treat it as a regular Postgres database and enter the connection details in the resource configuration.
You'll need a [Glide enterprise plan](https://www.glideapps.com/pricing) to connect your app to a Postgres database.
**Step 1:** Open an existing Glide app or create a new one. If you need step-by-step instructions, check out the their [quickstart guide](https://www.glideapps.com/docs/getting-started/quick-start).
**Step 2:** Now, add an integration to your app by clicking on *Settings* from the top-right. Select *Integrations*, scroll down to PostgreSQL, and click *Add*.
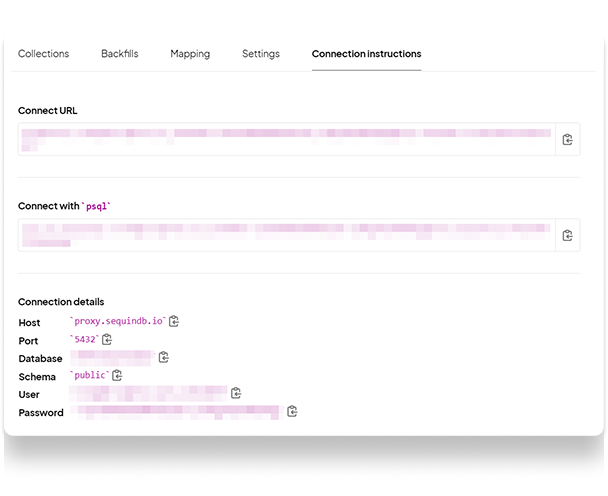
**Step 3:** In the configuration tab that opens, give the integration a name, set the *Connection type* to SSL/TLS, and paste the `host`, `database name`, `database username`, and `database password` from the *Connection instructions* tab of your Sequin dashboard:
 ### Using the Postgres integration in Glide[](#using-the-postgres-integration-in-glide "Direct link to Using the Postgres integration in Glide")
Now, Sequin is syncing your API data to Postgres. You've also connected Glide to Postgres via Sequin's Proxy. To add this data in your Glide app, go back to your Glide dashboard and select the app you just created:
**Step 1:** Navigate to the *Data* tab from the top and click the Add (+) button. Select *SQL* and then choose *PostgreSQL*.
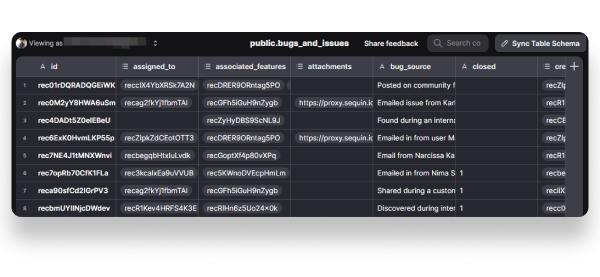
**Step 2:** Select a table in the modal that appears. Click *Continue* and in a few seconds, you should have data flowing from Airtable through the Sequin Proxy to your Glide app. In the example below, data from an Airtable base used for tracking bugs is now immediately available in Glide.
### Using the Postgres integration in Glide[](#using-the-postgres-integration-in-glide "Direct link to Using the Postgres integration in Glide")
Now, Sequin is syncing your API data to Postgres. You've also connected Glide to Postgres via Sequin's Proxy. To add this data in your Glide app, go back to your Glide dashboard and select the app you just created:
**Step 1:** Navigate to the *Data* tab from the top and click the Add (+) button. Select *SQL* and then choose *PostgreSQL*.
**Step 2:** Select a table in the modal that appears. Click *Continue* and in a few seconds, you should have data flowing from Airtable through the Sequin Proxy to your Glide app. In the example below, data from an Airtable base used for tracking bugs is now immediately available in Glide.
 **Step 3:** Navigate back to the *Layout* tab, click the Add (+) button next to *Navigation*, and select *Custom screen*.
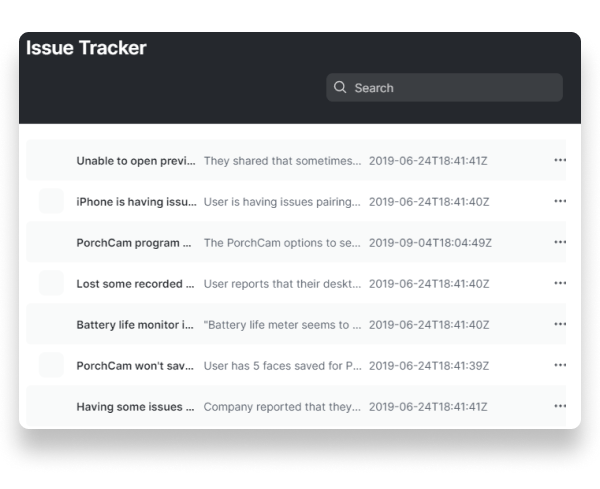
**Step 4:** From the right-hand configuration menu, choose *Table*. This should populate your table with the data from your Postgres database.
If you already had other tables in your Glide app, you can choose the Postgres table from the *Source* dropdown from the table's configuration.
**Step 5:** Click *Publish* to publish your Glide app.
**Step 3:** Navigate back to the *Layout* tab, click the Add (+) button next to *Navigation*, and select *Custom screen*.
**Step 4:** From the right-hand configuration menu, choose *Table*. This should populate your table with the data from your Postgres database.
If you already had other tables in your Glide app, you can choose the Postgres table from the *Source* dropdown from the table's configuration.
**Step 5:** Click *Publish* to publish your Glide app.
 ## Writing back to the API[](#writing-back-to-the-api "Direct link to Writing back to the API")
With Sequin, you can also [mutate records](https://docs.sequin.io/writes) via your database. Inserts, updates, and deletes you make to Sequin-synced tables are first applied to the API. If they pass validation, they're committed to your database.
### Inserts[](#inserts "Direct link to Inserts")
You can insert data into your table by clicking on the *Add* button at the top. This opens a modal on the right-side where you can enter data corresponding to different rows. After entering them, click *Submit* to save the data to your upstream source via the Sequin Proxy.
Make sure you hide the `id` or `api_id` fields from the interface. Instead of the user entering these values, the Sequin proxy will retrieve these `id`s for the record after completing the insert.
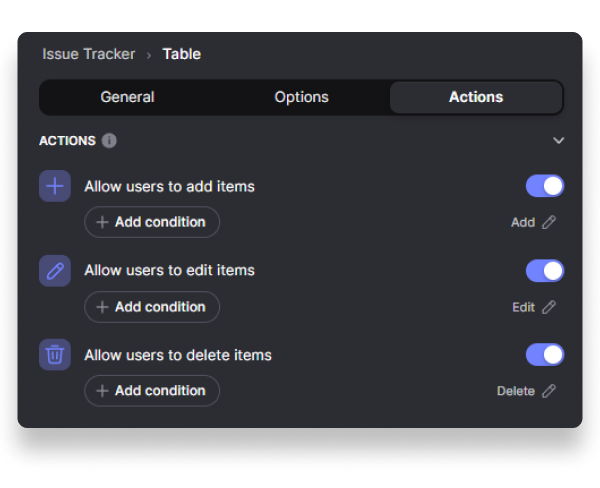
If you don't have the option to add a row, make sure it is enabled on your collection. Click on the table, in the drawer on right navigate to the *Actions* tab, and enable the option to add items.
## Writing back to the API[](#writing-back-to-the-api "Direct link to Writing back to the API")
With Sequin, you can also [mutate records](https://docs.sequin.io/writes) via your database. Inserts, updates, and deletes you make to Sequin-synced tables are first applied to the API. If they pass validation, they're committed to your database.
### Inserts[](#inserts "Direct link to Inserts")
You can insert data into your table by clicking on the *Add* button at the top. This opens a modal on the right-side where you can enter data corresponding to different rows. After entering them, click *Submit* to save the data to your upstream source via the Sequin Proxy.
Make sure you hide the `id` or `api_id` fields from the interface. Instead of the user entering these values, the Sequin proxy will retrieve these `id`s for the record after completing the insert.
If you don't have the option to add a row, make sure it is enabled on your collection. Click on the table, in the drawer on right navigate to the *Actions* tab, and enable the option to add items.
 ### Updates[](#updates "Direct link to Updates")
To edit table data, click on a row and select the *Edit* option. You can also click on the 3-dot icon next to a row and select *Edit*. Once you make the required changes, click *Submit*.
### Updates[](#updates "Direct link to Updates")
To edit table data, click on a row and select the *Edit* option. You can also click on the 3-dot icon next to a row and select *Edit*. Once you make the required changes, click *Submit*.
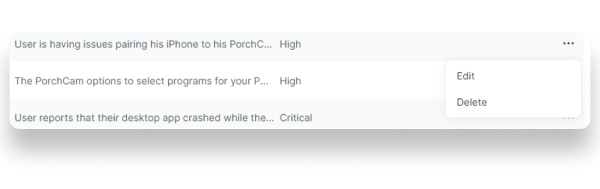 If you don't have the option to edit a row, make sure it is enabled on your collection. Click on the table, go to the *Actions* tab, and enable the option to edit items.
### Deletes[](#deletes "Direct link to Deletes")
To delete table data, click on the 3-dot icon on a row and select *Delete*. If you don't have the option to delete a row, make sure it is enabled on your collection. As with inserts and edits, click on the table, go to the *Actions* tab, and enable the option to delete items.
### Errors[](#errors "Direct link to Errors")
Your upstream source is the source of truth for your data. The Sequin Proxy validates all operations against the upstream source. When a validation fails, the Sequin Proxy returns an error and Glide displays this as an error notification.
If you don't have the option to edit a row, make sure it is enabled on your collection. Click on the table, go to the *Actions* tab, and enable the option to edit items.
### Deletes[](#deletes "Direct link to Deletes")
To delete table data, click on the 3-dot icon on a row and select *Delete*. If you don't have the option to delete a row, make sure it is enabled on your collection. As with inserts and edits, click on the table, go to the *Actions* tab, and enable the option to delete items.
### Errors[](#errors "Direct link to Errors")
Your upstream source is the source of truth for your data. The Sequin Proxy validates all operations against the upstream source. When a validation fails, the Sequin Proxy returns an error and Glide displays this as an error notification.
 ## Next steps[](#next-steps "Direct link to Next steps")
You can now use Glide to build on top of sources like Salesforce, Stripe, and HubSpot. If you have any questions, please [reach out to us](mailto:support@sequin.io).
## Next steps[](#next-steps "Direct link to Next steps")
You can now use Glide to build on top of sources like Salesforce, Stripe, and HubSpot. If you have any questions, please [reach out to us](mailto:support@sequin.io).