> ## Documentation Index
> Fetch the complete documentation index at: https://sequin.io/docs/llms.txt
> Use this file to discover all available pages before exploring further.
# Forest Admin
> Using [Forest Admin](https://www.forestadmin.com/), you can quickly build admin panels on top of your data. Right out-of-the-box, you get an admin panel with built-in tools to read, create, update, and delete your data.
You can use Sequin to build admin panels on Forest Admin on top of APIs like Stripe and Salesforce. Sequin will sync your API data to a Postgres database so you can write your integration in SQL. Changes you make to your database records will be applied to the API and your database at the same time.
Forest Admin supports MariaDB, MicrosoftSQL, MongoDB, MySQL, Supabase, and PostgreSQL. Using Forest Admin's Postgres adapter, you can sync your source data through Sequin without worrying about any rate limits.
## Setup a Sequin sync[](#setup-a-sequin-sync "Direct link to Setup a Sequin sync")
Before you can use Sequin with Forest Admin, you'll need to create a sync. Sequin will guide you through authenticating, selecting the data you want to sync, and connecting to your database. Read our [getting started guide](https://docs.sequin.io/getting-started#create-a-sync) for step-by-step instructions.
## Choosing a Postgres data source on Forest Admin[](#choosing-a-postgres-data-source-on-forest-admin "Direct link to Choosing a Postgres data source on Forest Admin")
Sequin uses the [Postgres Proxy](https://docs.sequin.io/writes#configuration) to interface with your Sequin-synced tables. The Proxy lets Sequin capture inserts, updates, and deletes you make in your database and commit them to the API.
To add Sequin's Postgres Proxy as a database on Forest Admin, you can treat it as a regular Postgres database and enter the connection details in the configuration page.
**Step 1:** Start by creating a new project on Forest Admin. Go to your dashboard and click on *New Project*. Give a name for the project and click on *Create your project*.
**Step 2:** Choose *Instant setup* to spin up an admin panel connected to your data source. If you want more customization options and control over your data, choose the *Advanced setup*.
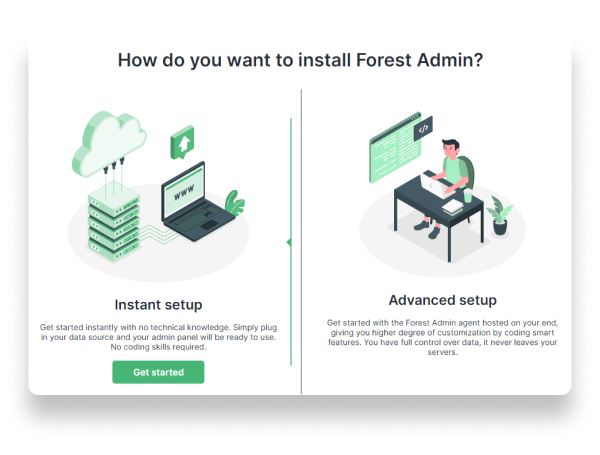 **Step 3:** Select *PostgreSQL*.
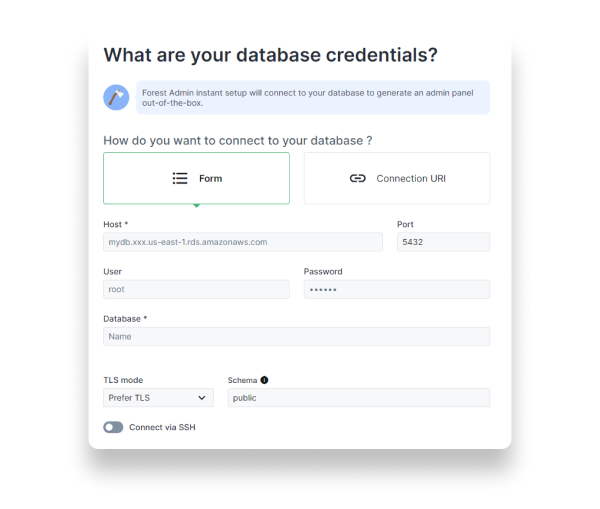
**Step 4:** In the configuration page, select *Form*, and paste the `host`, `database name`, `database username`, and `database password` from the *Connection instructions* tab of your Sequin dashboard:
**Step 3:** Select *PostgreSQL*.
**Step 4:** In the configuration page, select *Form*, and paste the `host`, `database name`, `database username`, and `database password` from the *Connection instructions* tab of your Sequin dashboard:
 **Step 5:** Click *Next*. Forest Admin immediately connects to your Postgres database and starts generating an admin panel.
### Viewing the Postgres data on Forest Admin[](#viewing-the-postgres-data-on-forest-admin "Direct link to Viewing the Postgres data on Forest Admin")
Now, Sequin is syncing your API data to Postgres. You've also connected Forest Admin to Postgres via Sequin's Proxy. Start working with your data, starting with views:
**Step 1:** Navigate to the *Data* tab from the left-hand menu. This displays all the synced tables from Sequin.
**Step 2:** Click on *Edit layout* from the top-right. This changes the admin panel view to the edit mode.
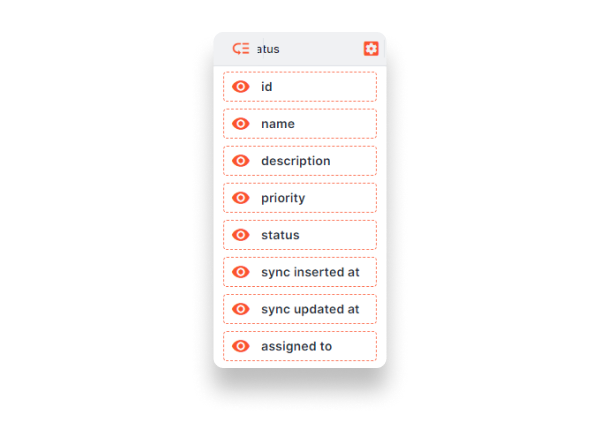
**Step 3:** Click on the eye icon next to the tables you don't want in your admin panel. For instance, if you were syncing the Bug Tracker example from Airtable via Sequin, you'd want to view only the *Bugs And Issues*, *Features*, and *Team Members* tables.
**Step 4:** You can also rearrange the data in the table to view the most necessary fields. Click on the rearrange icon at the top-left of the table and click and drag to rearrange the columns.
**Step 5:** Click *Next*. Forest Admin immediately connects to your Postgres database and starts generating an admin panel.
### Viewing the Postgres data on Forest Admin[](#viewing-the-postgres-data-on-forest-admin "Direct link to Viewing the Postgres data on Forest Admin")
Now, Sequin is syncing your API data to Postgres. You've also connected Forest Admin to Postgres via Sequin's Proxy. Start working with your data, starting with views:
**Step 1:** Navigate to the *Data* tab from the left-hand menu. This displays all the synced tables from Sequin.
**Step 2:** Click on *Edit layout* from the top-right. This changes the admin panel view to the edit mode.
**Step 3:** Click on the eye icon next to the tables you don't want in your admin panel. For instance, if you were syncing the Bug Tracker example from Airtable via Sequin, you'd want to view only the *Bugs And Issues*, *Features*, and *Team Members* tables.
**Step 4:** You can also rearrange the data in the table to view the most necessary fields. Click on the rearrange icon at the top-left of the table and click and drag to rearrange the columns.
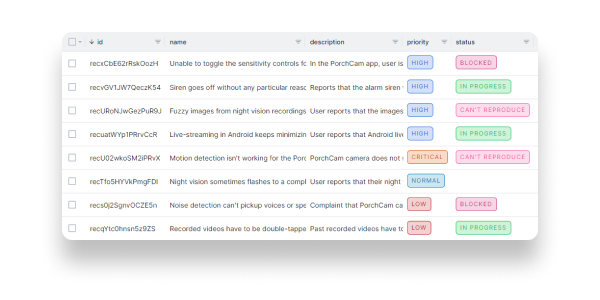
 **Step 5:** To display labels for columns with predefined values, click on the gear icon next to the column name, click on the gear icon next to *Display Settings*, and enable *Conditional Formatting*. You can set up your own rules or let Forest Admin do it automatically for you. Don't forget to click *Save* to commit your changes.
 ## Writing back to the API[](#writing-back-to-the-api "Direct link to Writing back to the API")
With Sequin, you can also [mutate records](https://docs.sequin.io/writes) via your database. Inserts, updates, and deletes you make to Sequin-synced tables are first applied to the API. If they pass validation, they're committed to your database.
### Inserts[](#inserts "Direct link to Inserts")
You can insert data into your table by clicking on the *Add* button from the top-right. This opens a new screen where you can enter data corresponding to different rows. After entering them, click *Create* to save the data to your upstream source via the Sequin Proxy.
info
Before you can add data to the table, you must set the *id* field to be read-only. In the edit mode, click on the gear icon next to the *id* field, enable the *Read-only* toggle, and click *Save*. Instead of the user entering these values, the [Sequin Proxy](https://docs.sequin.io/writes#configuration) will retrieve these `id`s for the record after completing the insert.
### Updates[](#updates "Direct link to Updates")
To edit table data, select a row. This opens a new page with a detailed view of that row. Select the *Edit* option from the top-right. Once you make the required changes, click *Save*.
### Deletes[](#deletes "Direct link to Deletes")
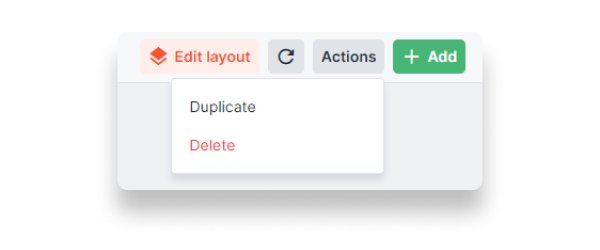
To delete table data, select one or more rows, click on the *Actions* button from the top-right, and click *Delete*.
## Writing back to the API[](#writing-back-to-the-api "Direct link to Writing back to the API")
With Sequin, you can also [mutate records](https://docs.sequin.io/writes) via your database. Inserts, updates, and deletes you make to Sequin-synced tables are first applied to the API. If they pass validation, they're committed to your database.
### Inserts[](#inserts "Direct link to Inserts")
You can insert data into your table by clicking on the *Add* button from the top-right. This opens a new screen where you can enter data corresponding to different rows. After entering them, click *Create* to save the data to your upstream source via the Sequin Proxy.
info
Before you can add data to the table, you must set the *id* field to be read-only. In the edit mode, click on the gear icon next to the *id* field, enable the *Read-only* toggle, and click *Save*. Instead of the user entering these values, the [Sequin Proxy](https://docs.sequin.io/writes#configuration) will retrieve these `id`s for the record after completing the insert.
### Updates[](#updates "Direct link to Updates")
To edit table data, select a row. This opens a new page with a detailed view of that row. Select the *Edit* option from the top-right. Once you make the required changes, click *Save*.
### Deletes[](#deletes "Direct link to Deletes")
To delete table data, select one or more rows, click on the *Actions* button from the top-right, and click *Delete*.
 ### Errors[](#errors "Direct link to Errors")
Your upstream source is the source of truth for your data. The Sequin Proxy validates all operations against the upstream source. When a validation fails, the Sequin Proxy returns an error and Forest Admin displays this as an error notification.
### Errors[](#errors "Direct link to Errors")
Your upstream source is the source of truth for your data. The Sequin Proxy validates all operations against the upstream source. When a validation fails, the Sequin Proxy returns an error and Forest Admin displays this as an error notification.
 ## Next steps[](#next-steps "Direct link to Next steps")
You can now use Forest Admin to build admin panels on top of sources like Salesforce, Stripe, and HubSpot. If you have any questions, please [reach out to us](mailto:support@sequin.io).
## Next steps[](#next-steps "Direct link to Next steps")
You can now use Forest Admin to build admin panels on top of sources like Salesforce, Stripe, and HubSpot. If you have any questions, please [reach out to us](mailto:support@sequin.io).